
Register your Account on the site
First you have to choose: Are you registering as a New Coach or as a Member?
Coach Registration
Steps:
1. If you are registering as a New Coach, click on Coach Registration
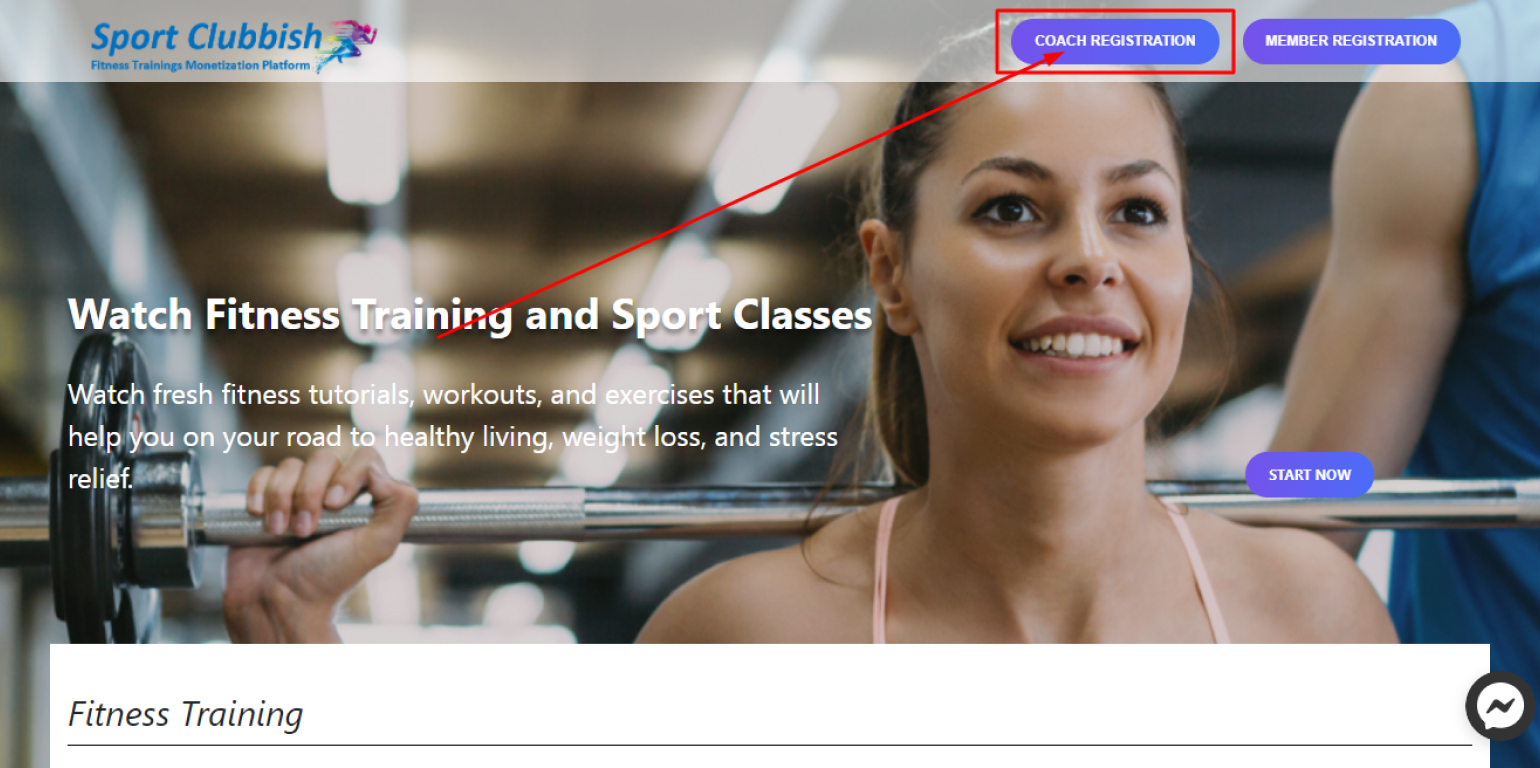
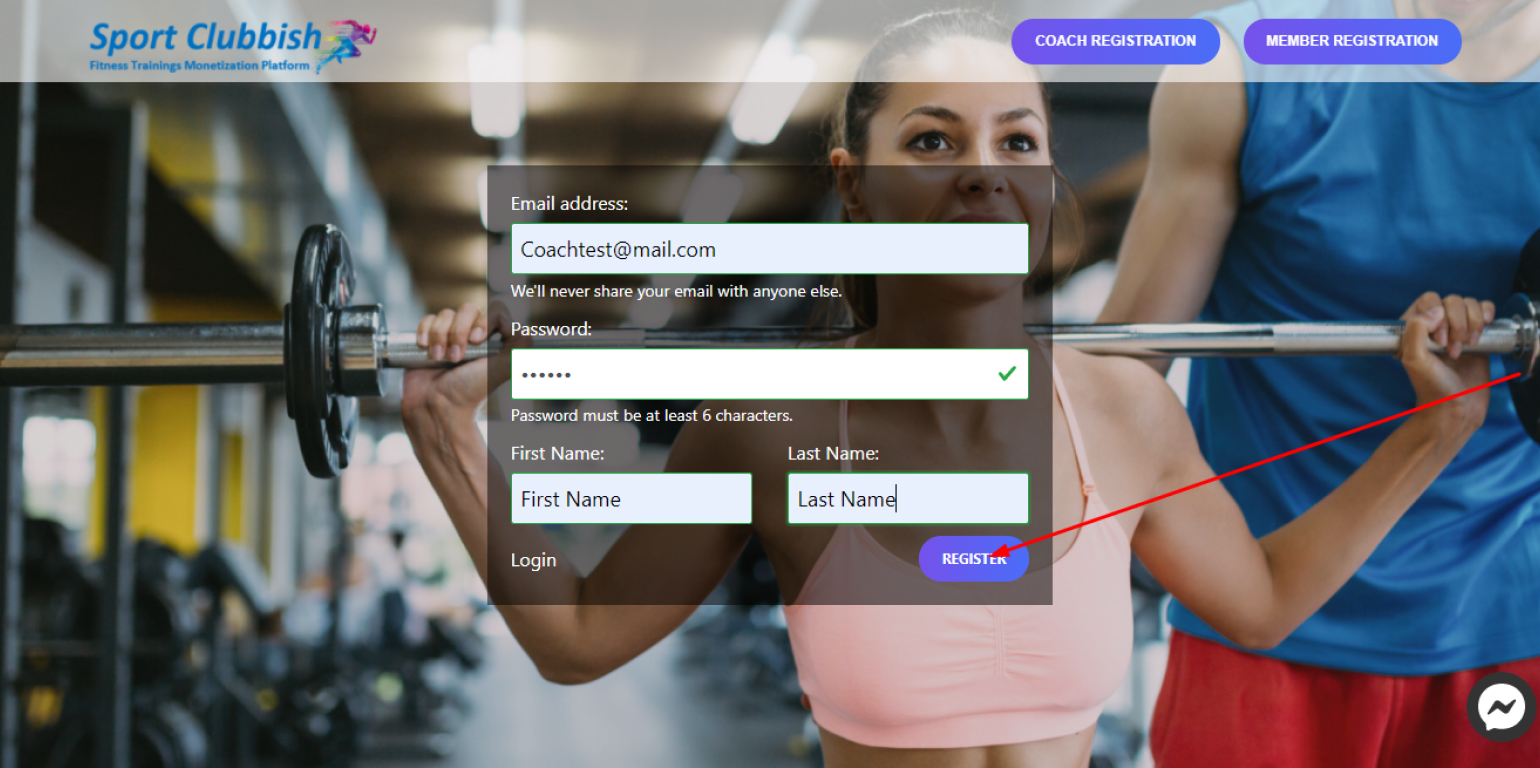
2. On the Coach Registration page https://sportclubbish.com/registration/coach Enter:
Email Address, Password, First Name, Last Name and click on Register
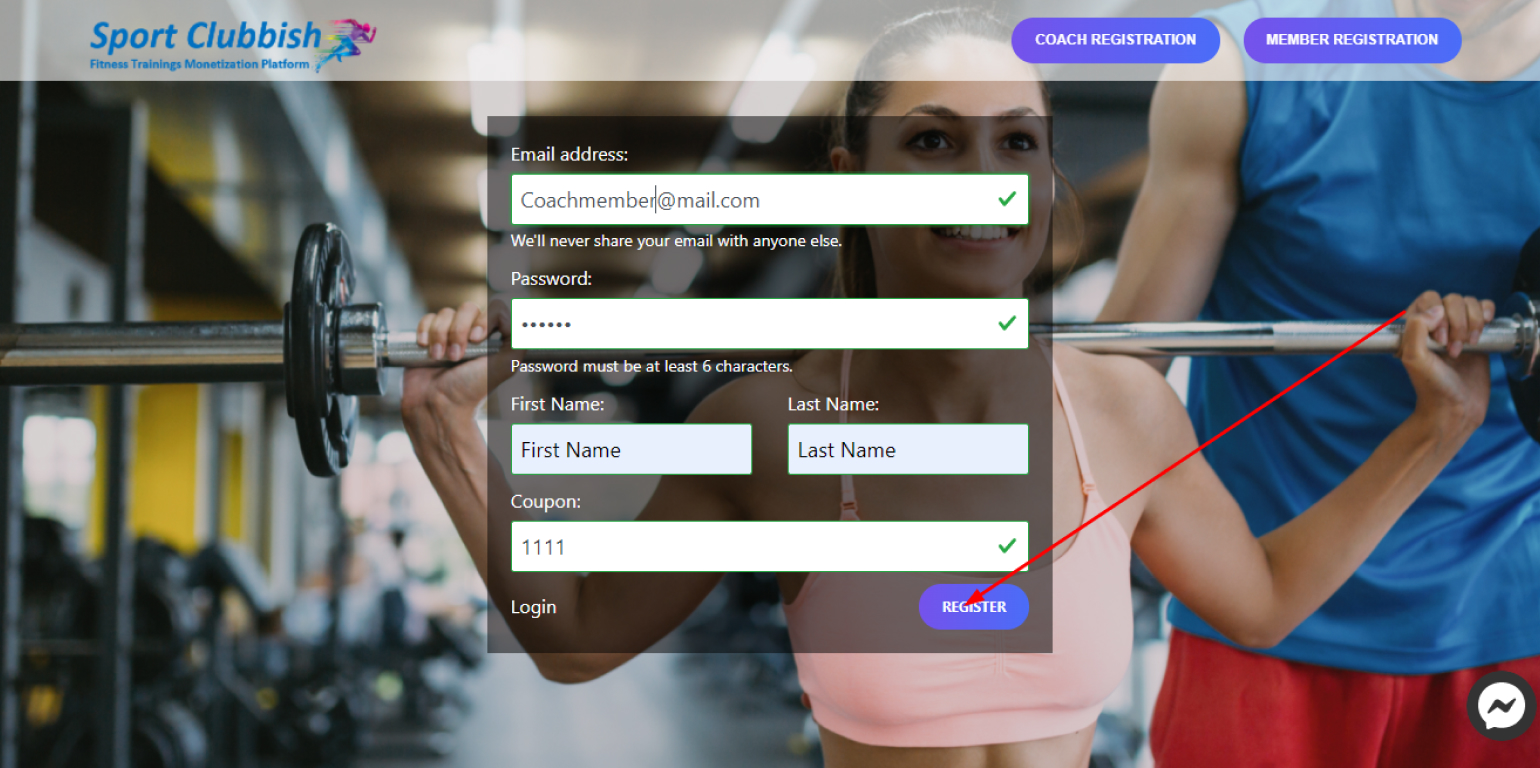
Member Registration
Steps:
1. If you are registering as a Member, click on Member Registration
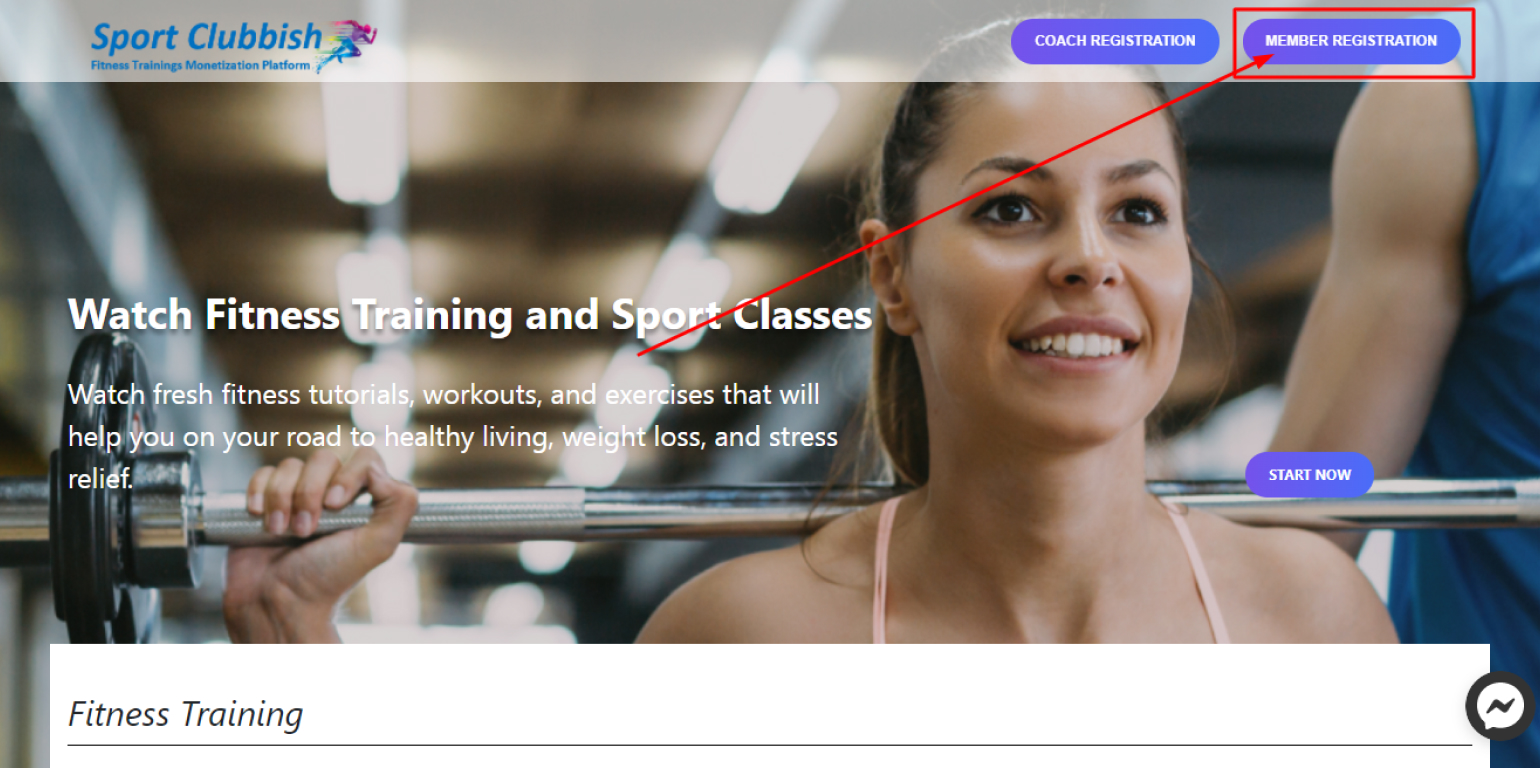
2. On the Member Registration page https://sportclubbish.com/registration/member Enter:
Email Address, Password, First Name, Last Name, Coupon and click on Register
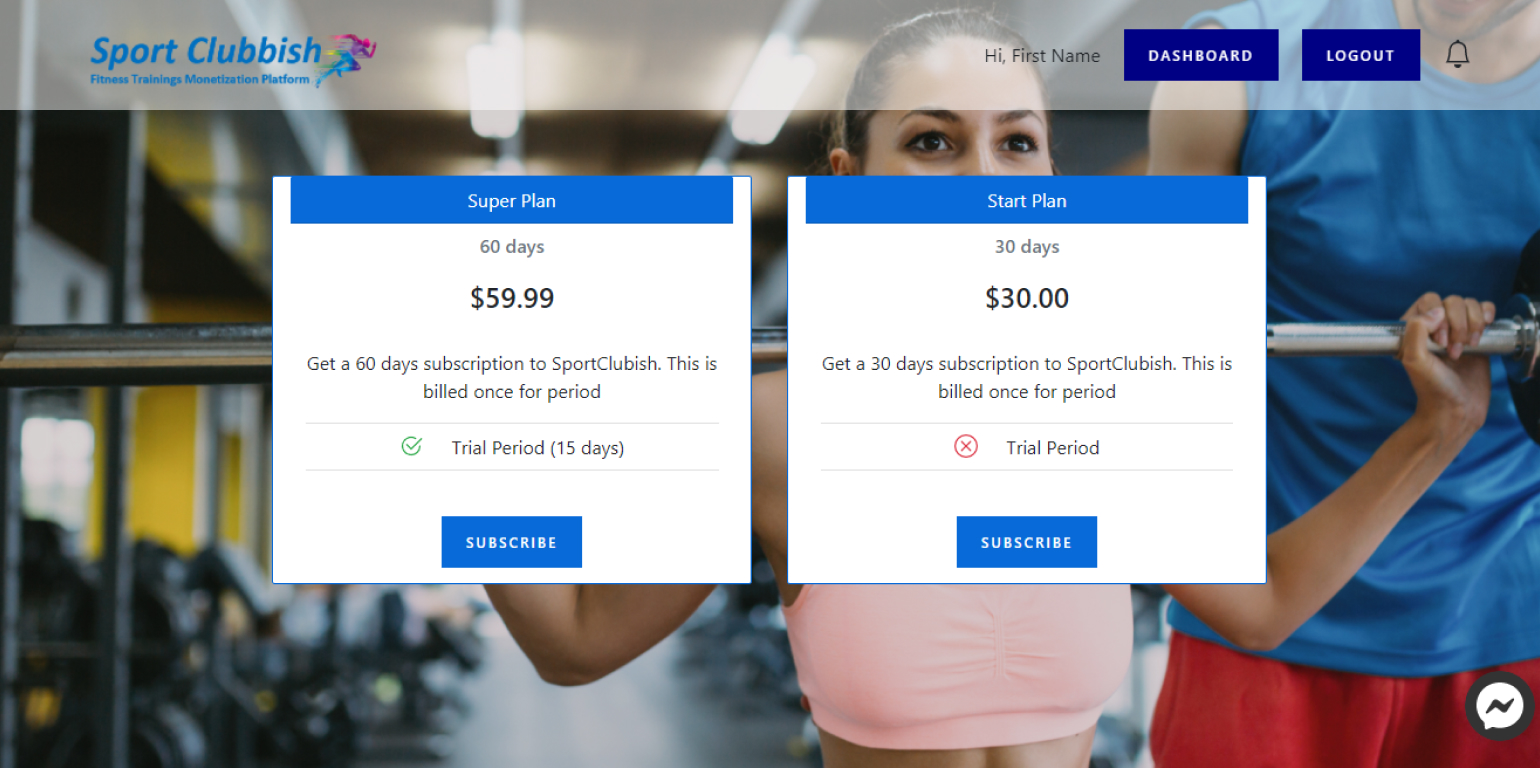
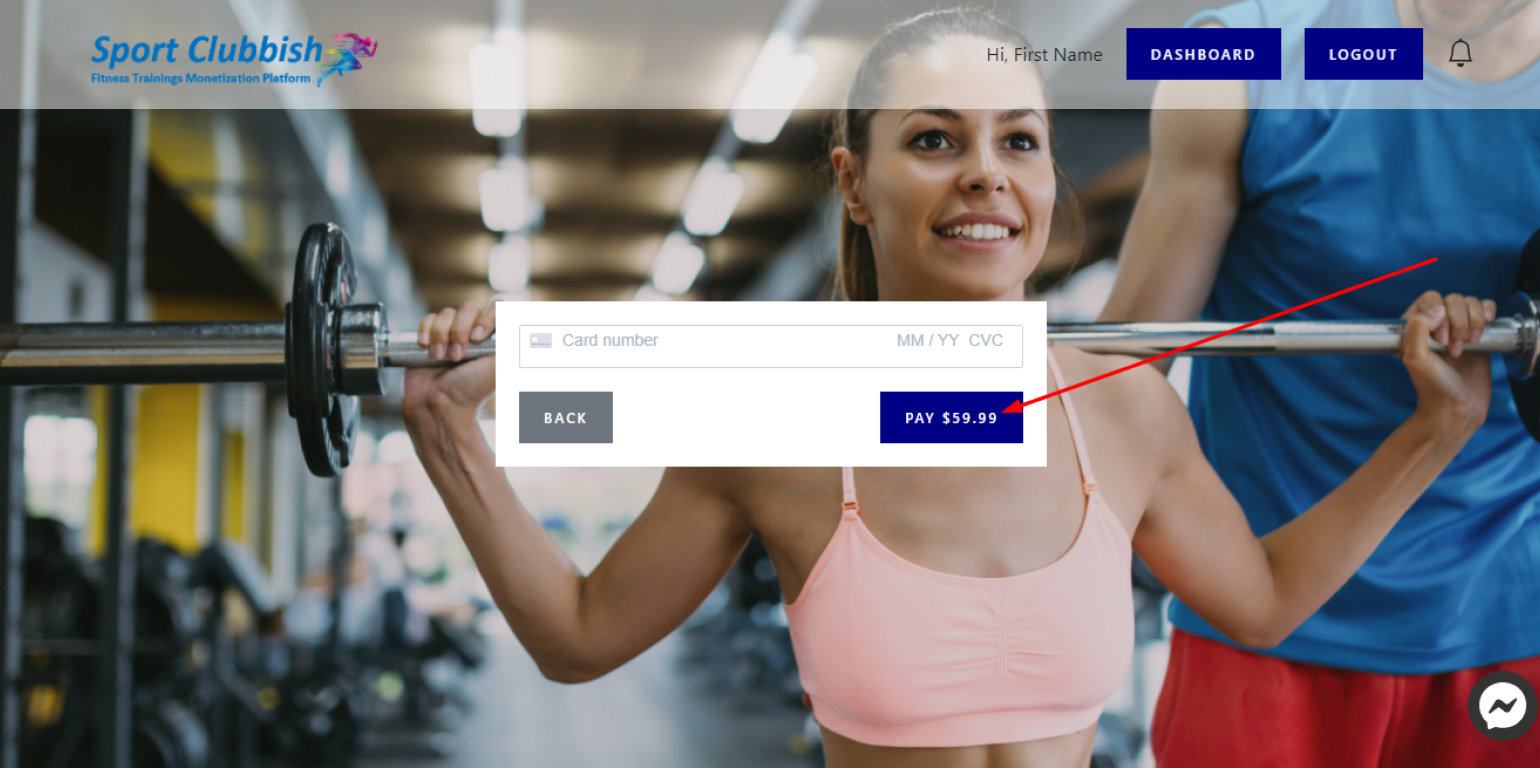
3. Choose the Appropriate Plan. Enter the necessary data and pay for the Plan you have chosen
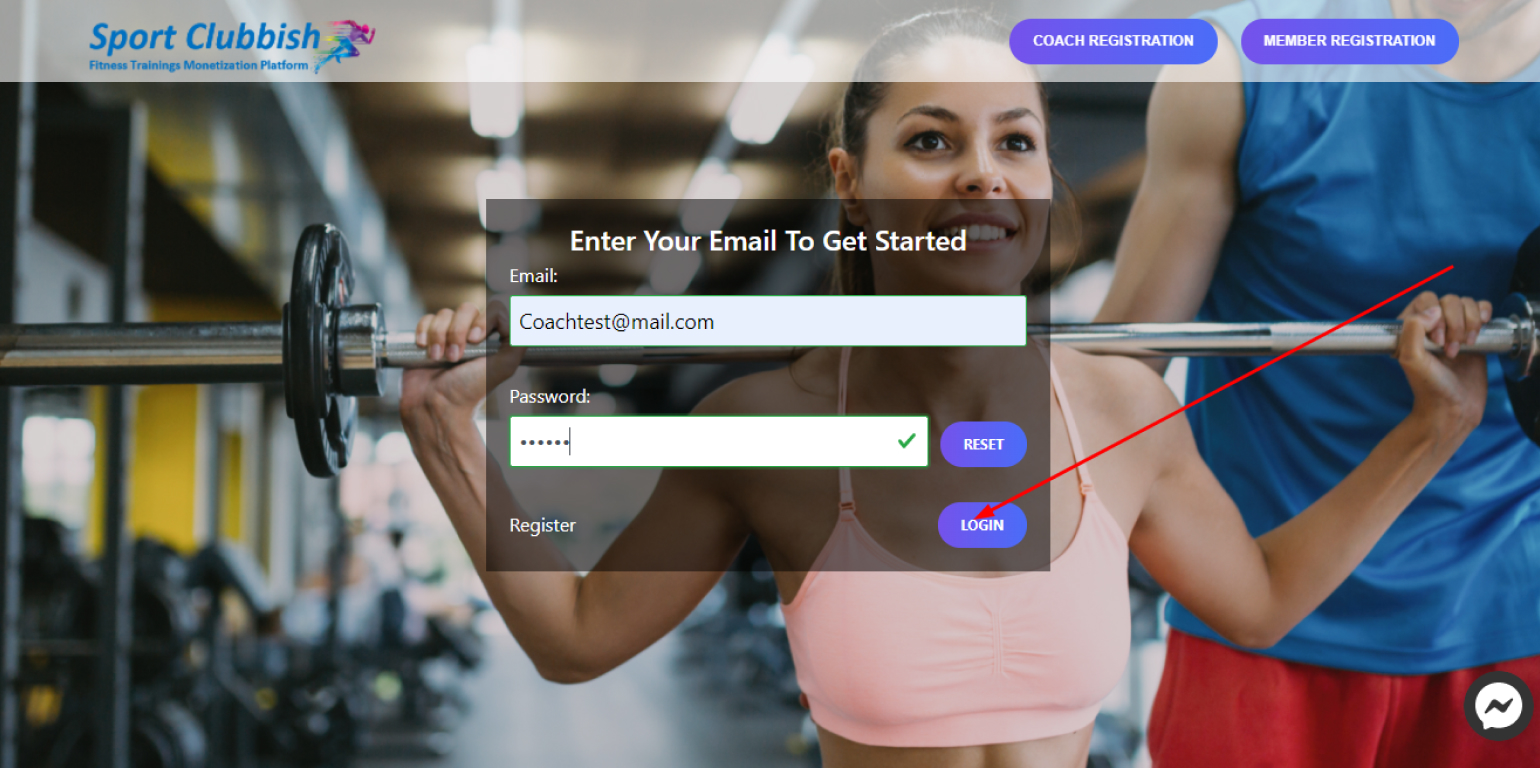
Login to your Sport Clubbish Account
Steps:
1. Go to the bold Sport Clubbish login page https://sportclubbish.com/sign/in
2. Enter your Email and click on Get Started
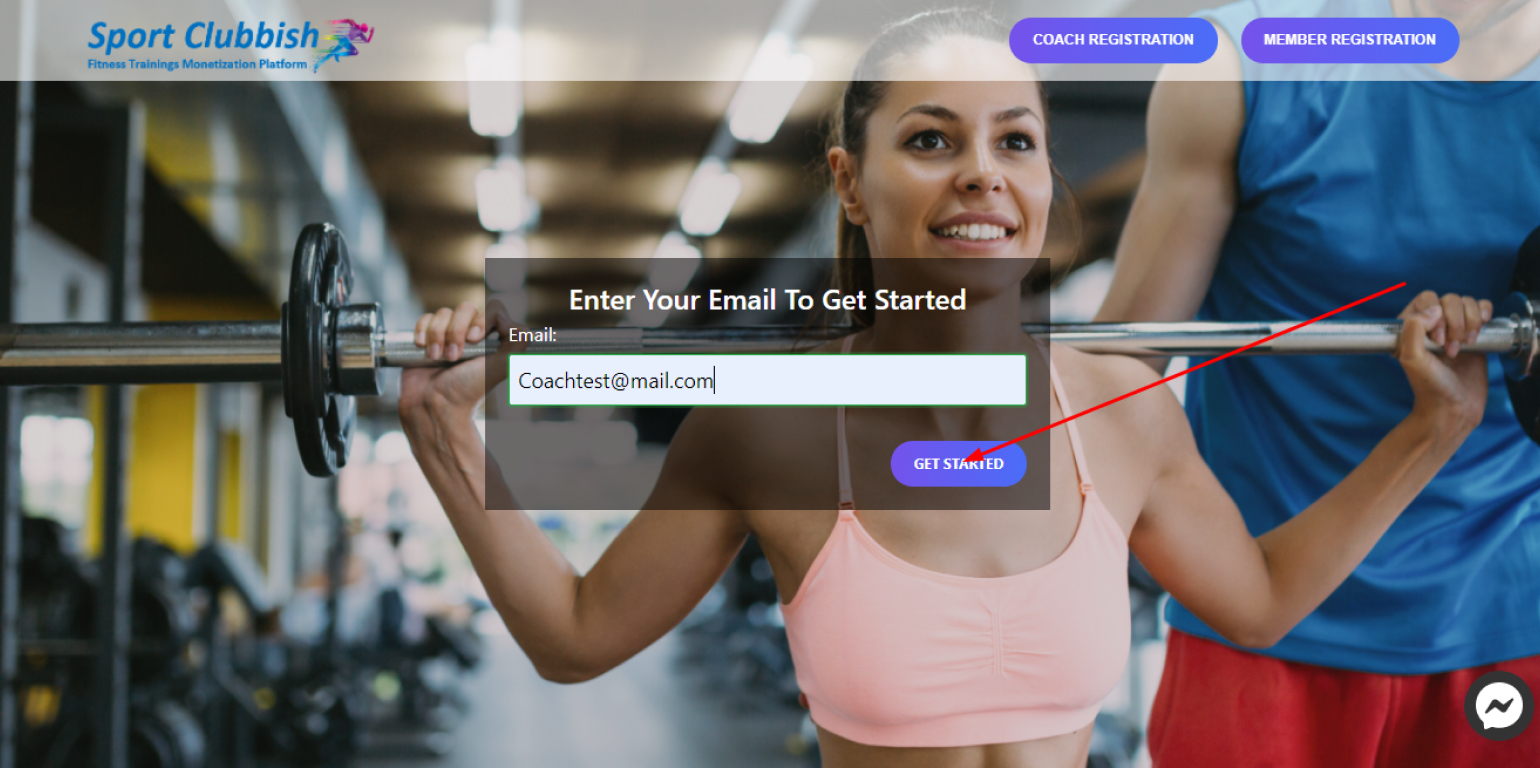
3. Enter your Password and click on Login
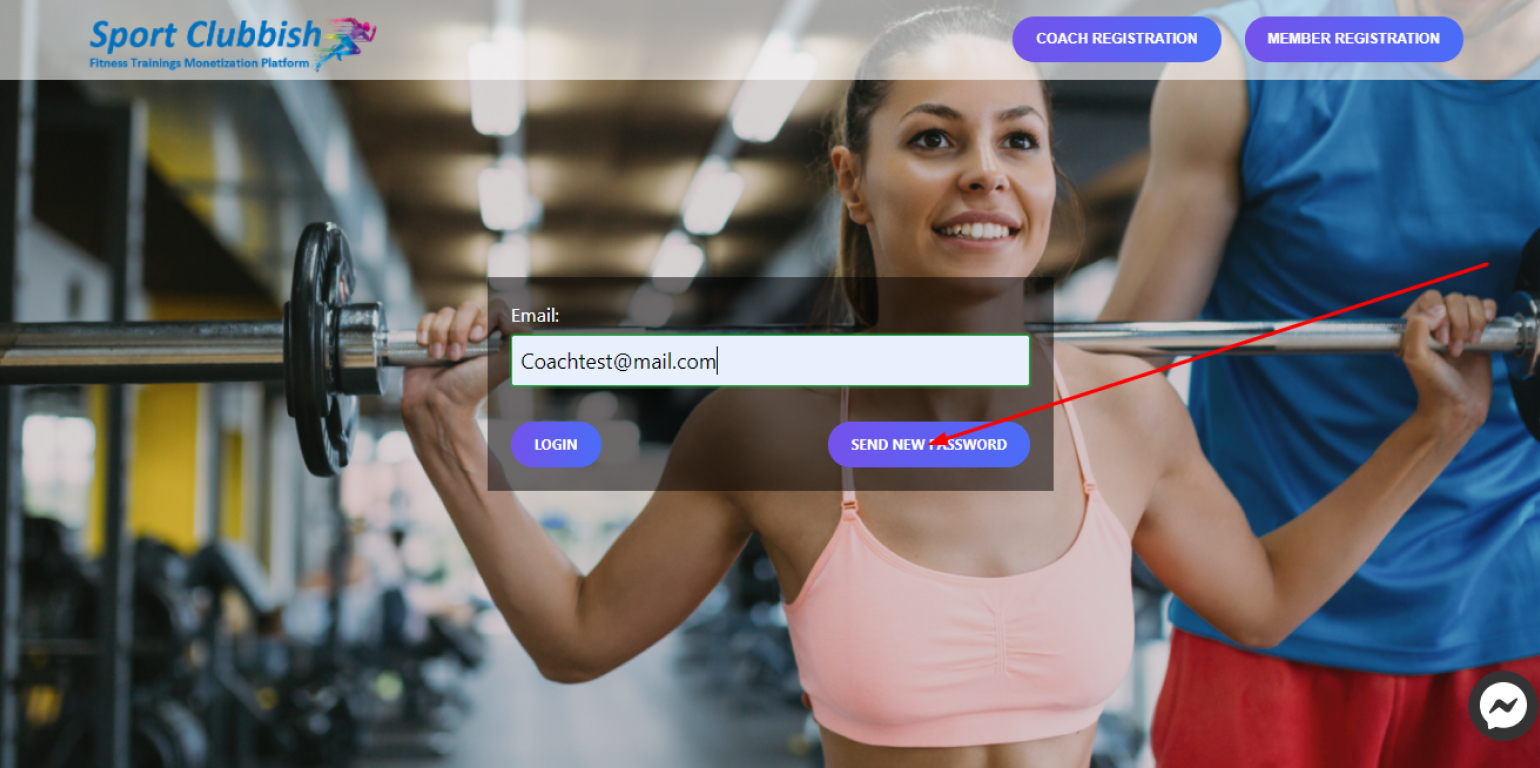
Reset your Account Password
Steps:
1. Go to the Resetting Account Password page https://sportclubbish.com/forgot-password
2. Enter your Email and click on Send New Password
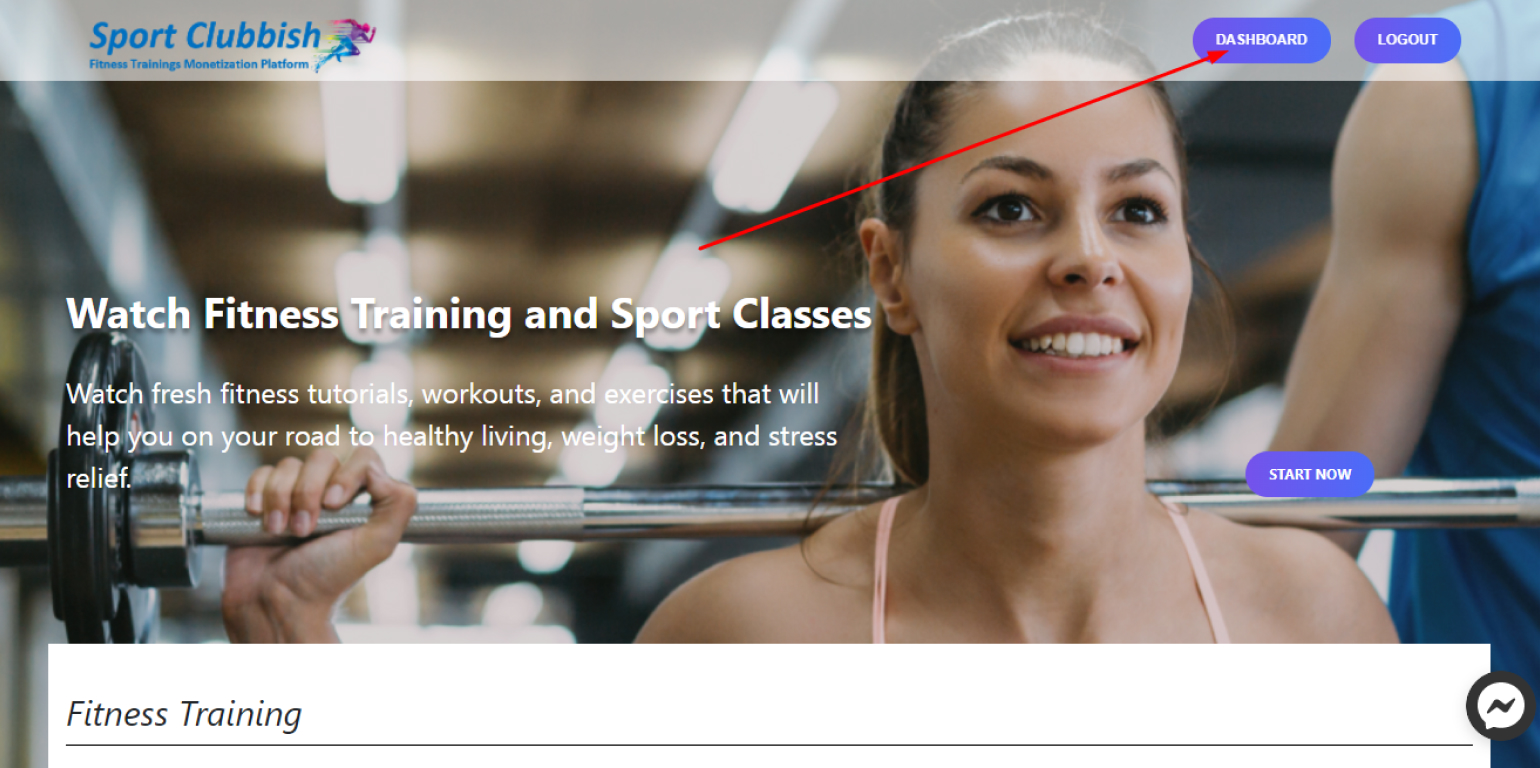
Login to your Dashboard
Steps:
After you have entered your Email and Password on the login page https://sportclubbish.com, you are automatically taken to your Dashboard.
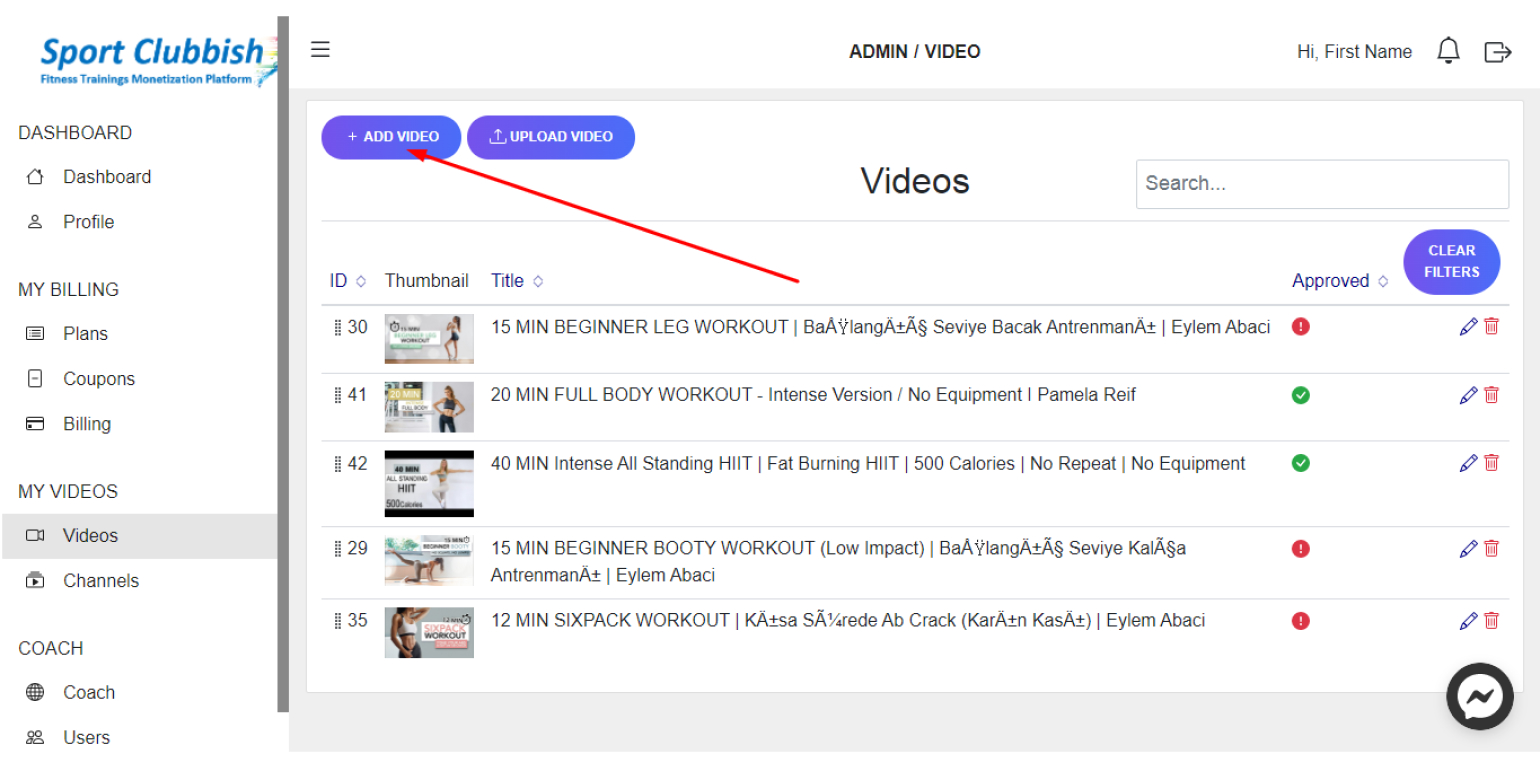
Add a Video to your site page
Steps:
1. In your Dashboard in the left panel, click on Videos
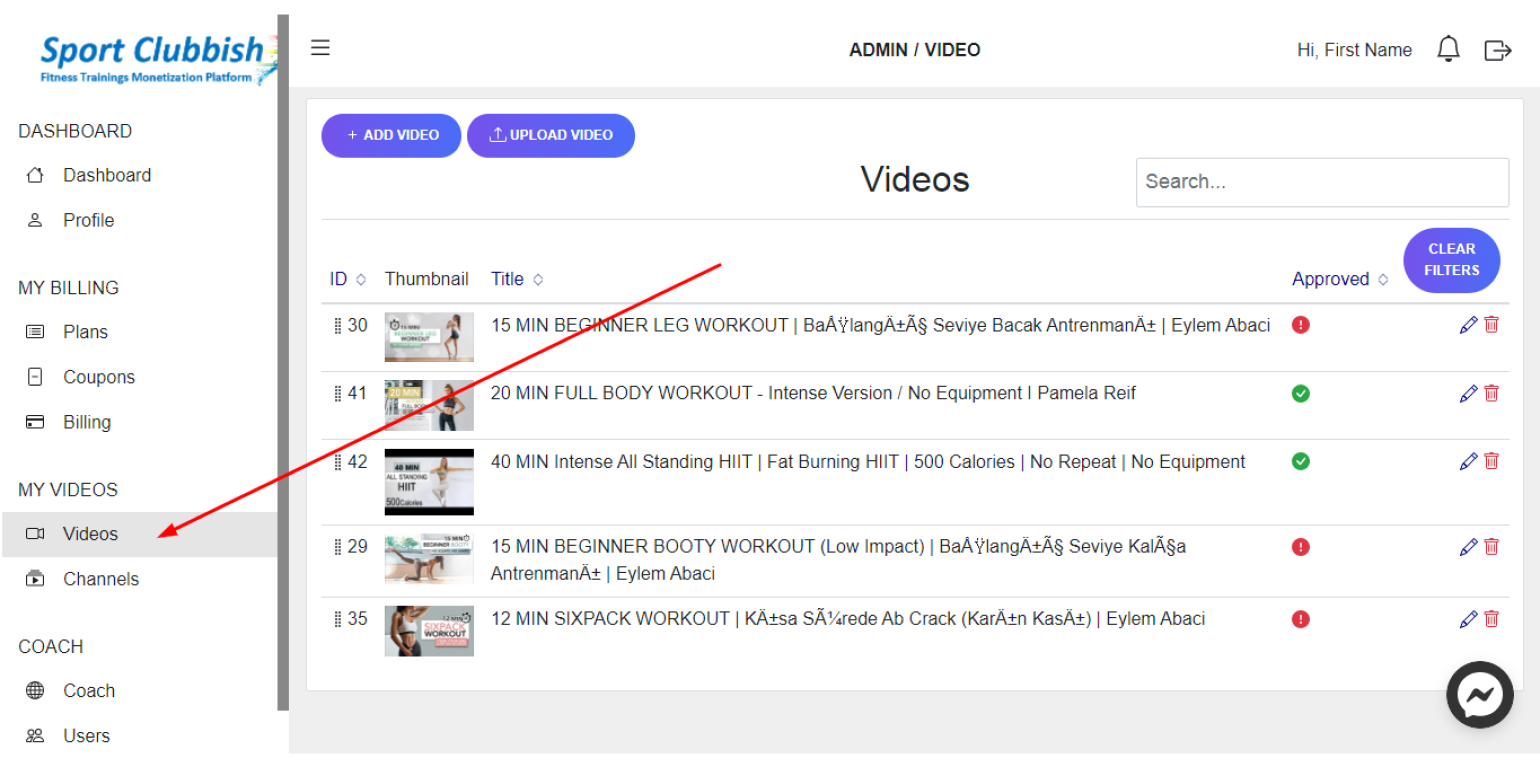
2. To add a video from Youtube or Vimeo , click on the +Add Video button
3. Here in the first field, enter the YouTube or Vimeo video link
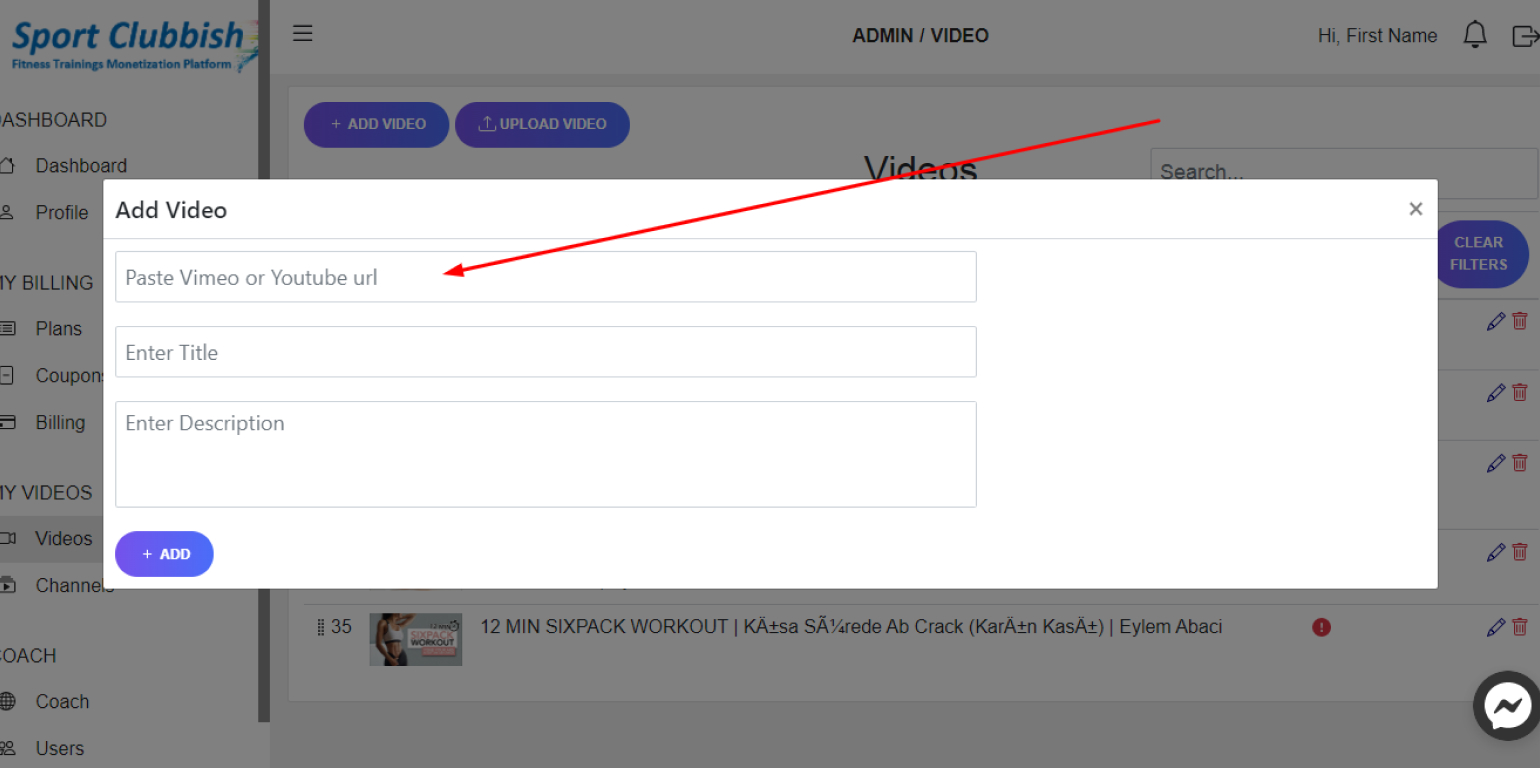
The Title and Description fields will be filled in automatically (if this data was specified in YouTube or Vimeo), or you can edit these fields yourself.
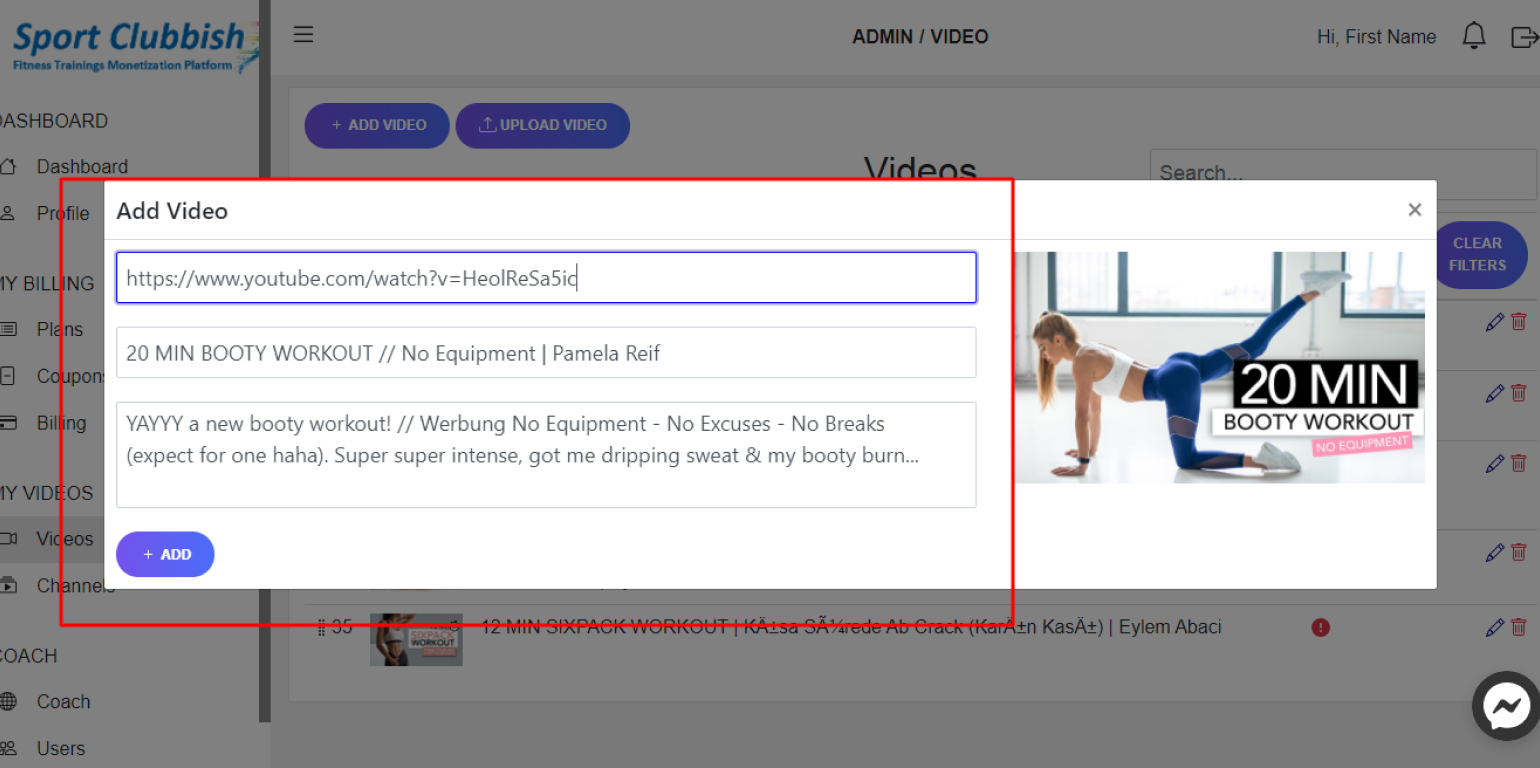
4. After filling in the fields, click on +Add

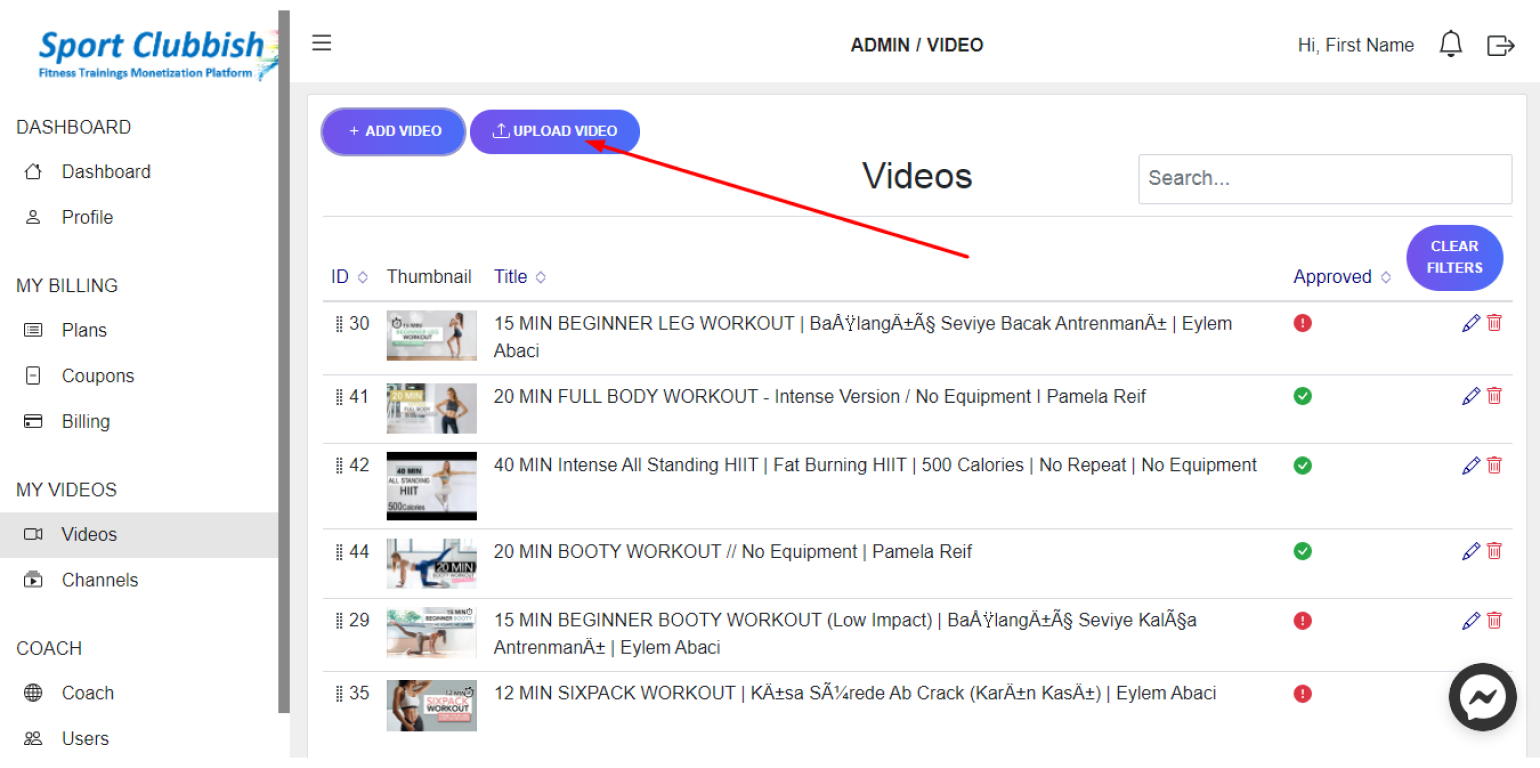
5. To upload a video from your computer, click on the Upload Video panbutton.
Enter the Video Name, Video Description, choose Video File from your computer, and click on Upload

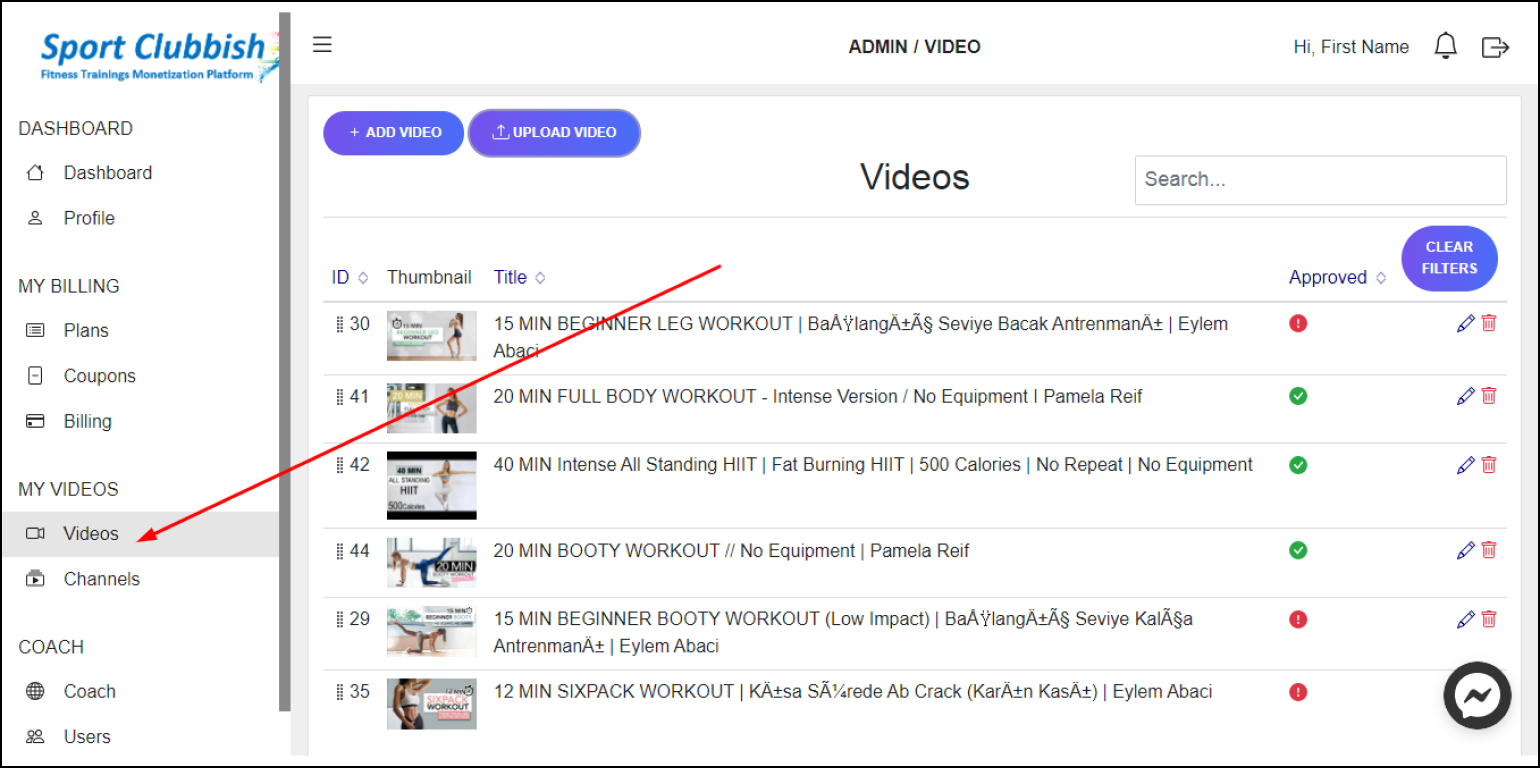
Edit the Uploaded Video
Steps:
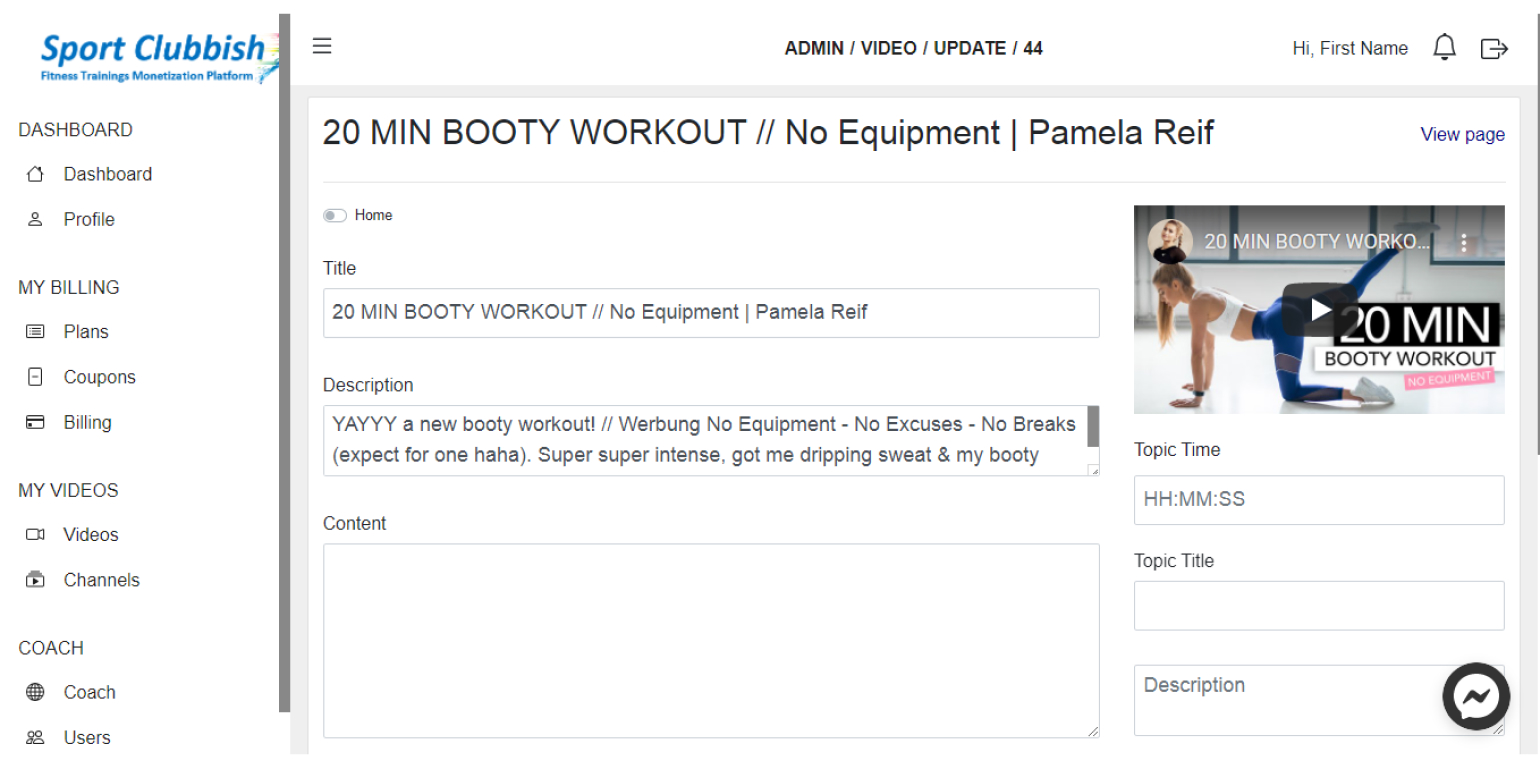
1. In your Dashboard in the left panel, click on Videos

2. In the Video section, click on the Edit Icon next to your video
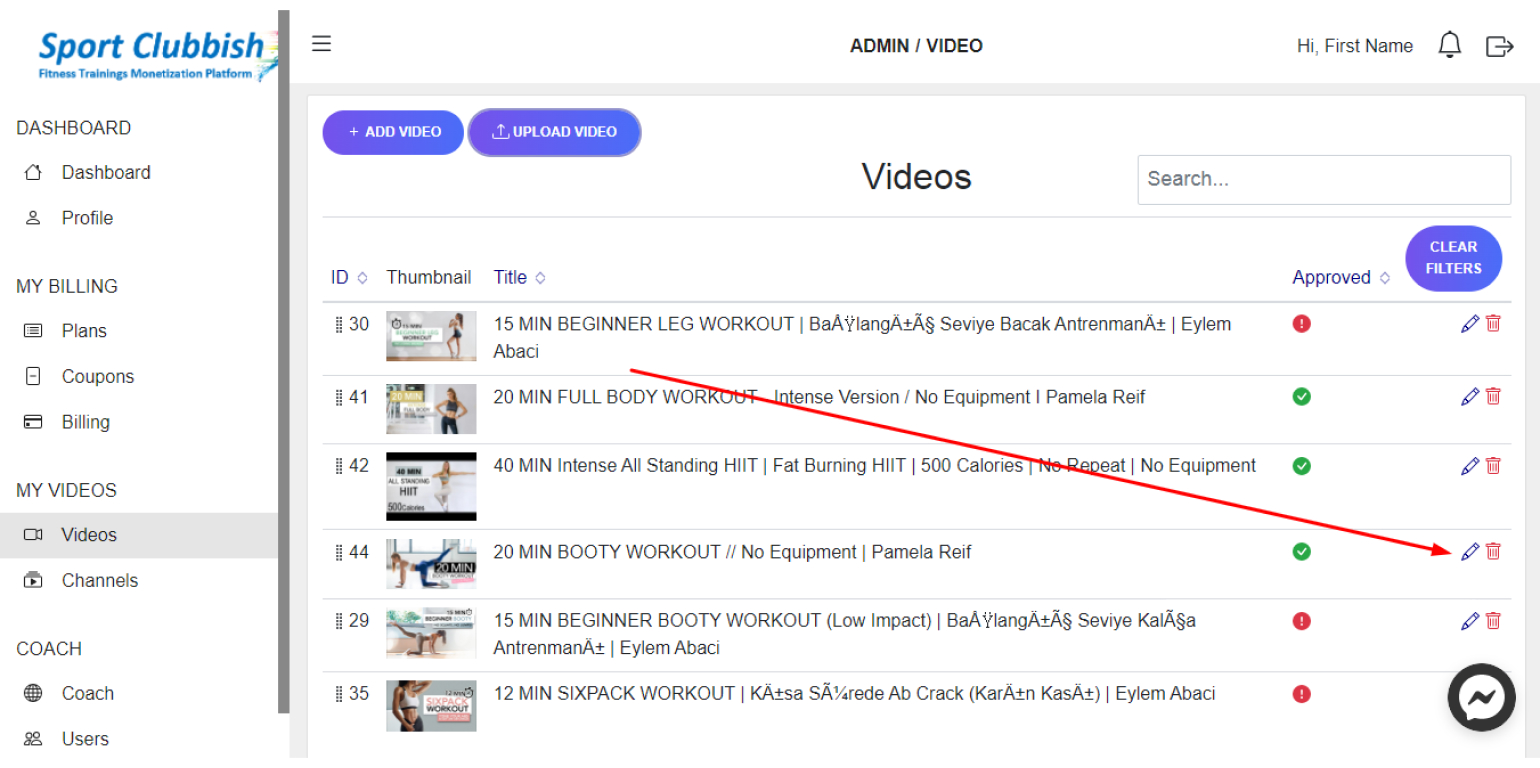
Here you can enter all the necessary data for your video: Title, Description, Timecodes, or add Similar Videos.
3. After filling in the fields, click on Save
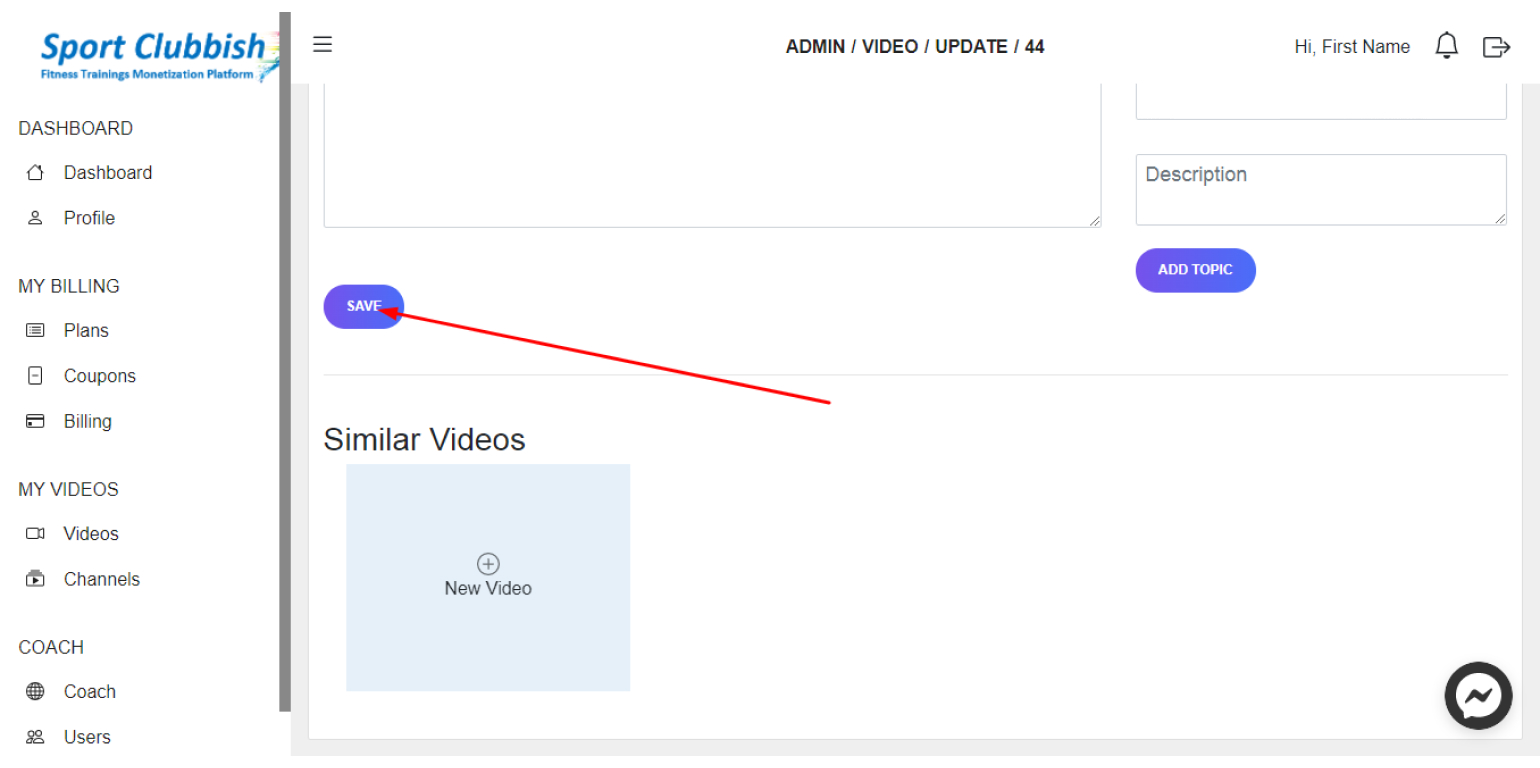
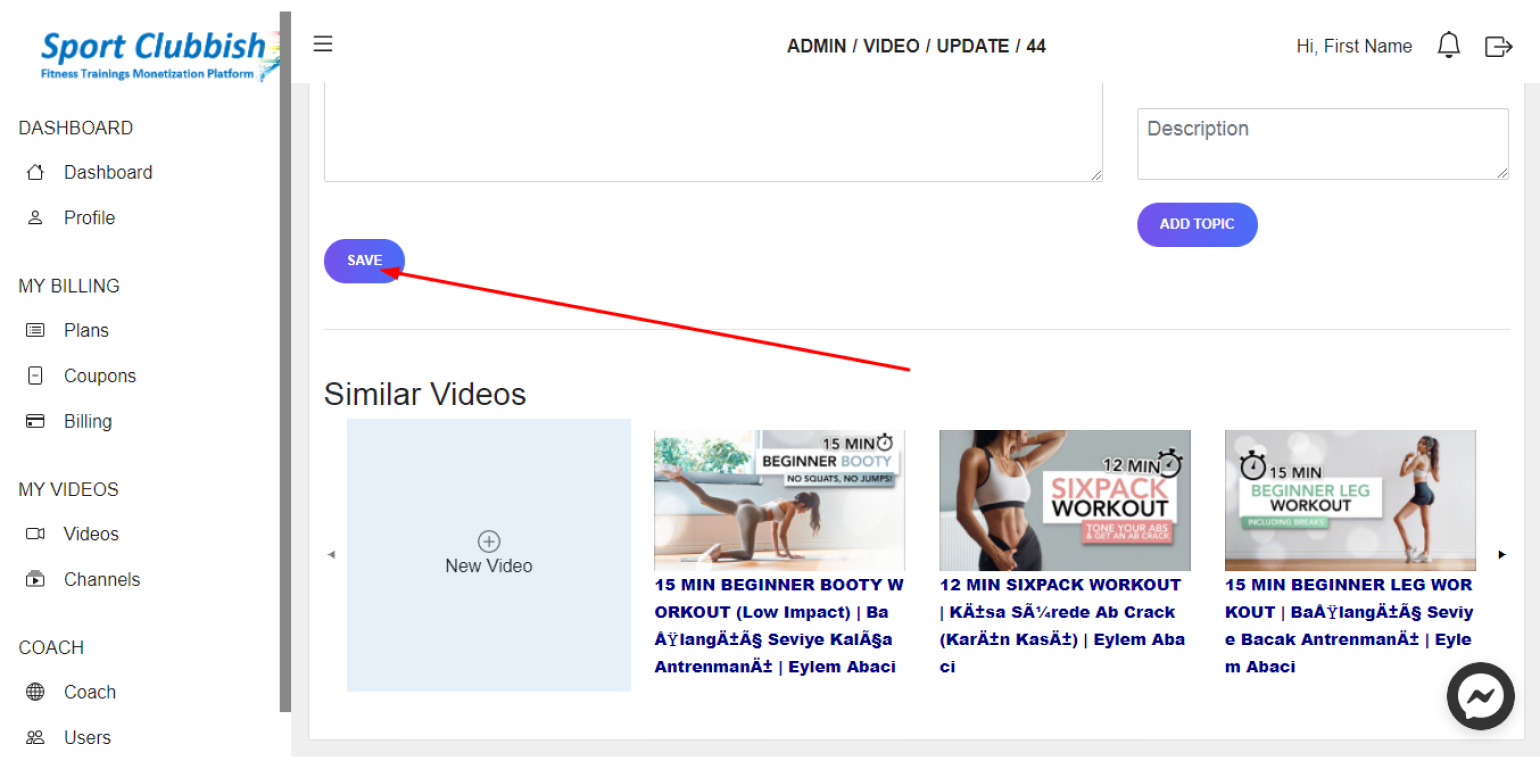
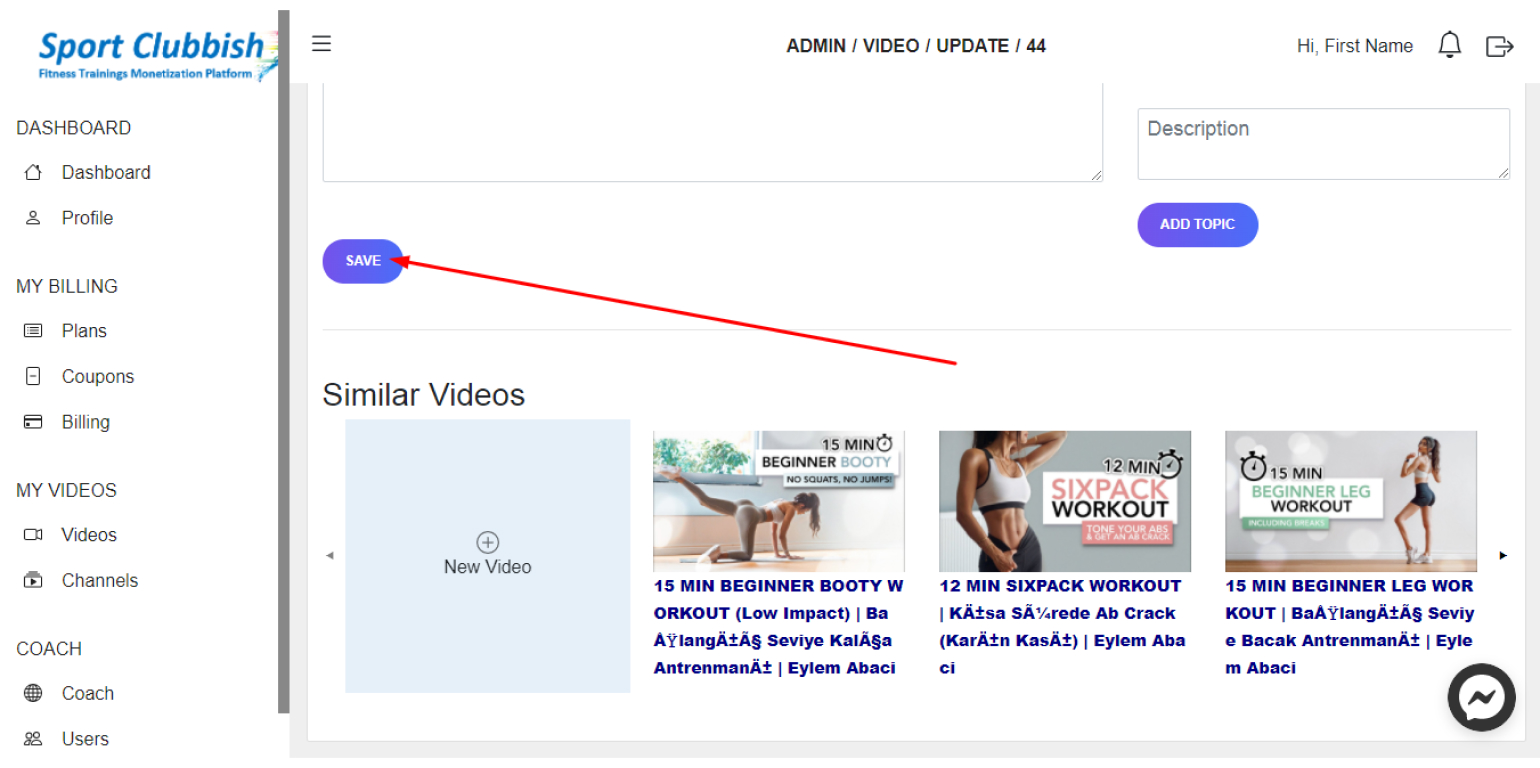
Add Similar Videos to your video
Steps:
1. In your Dashboard in the left panel, click on Videos

2. In the Video section, click on the Edit Icon next to your video

Here at the end of the page, you can add Similar Videos .
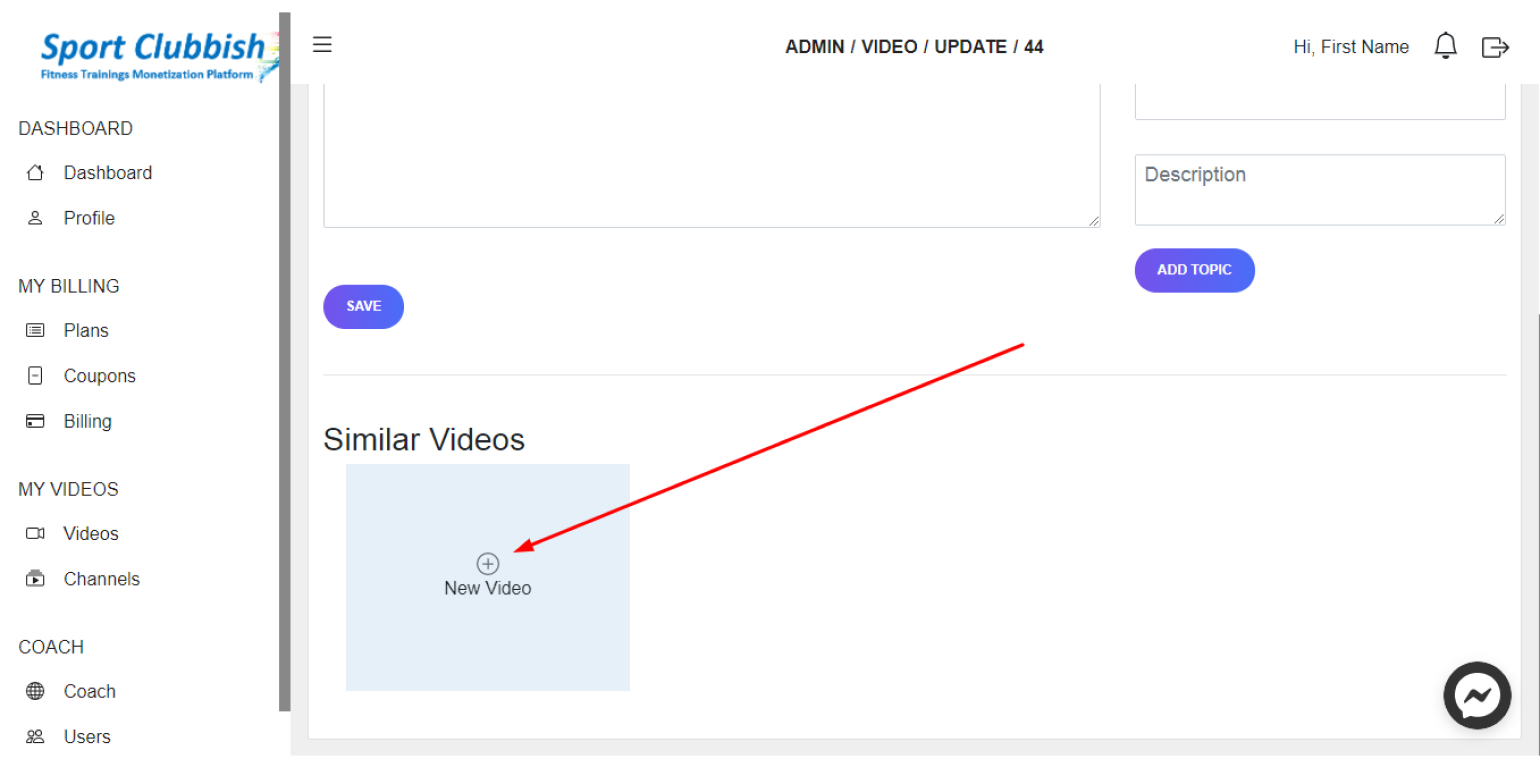
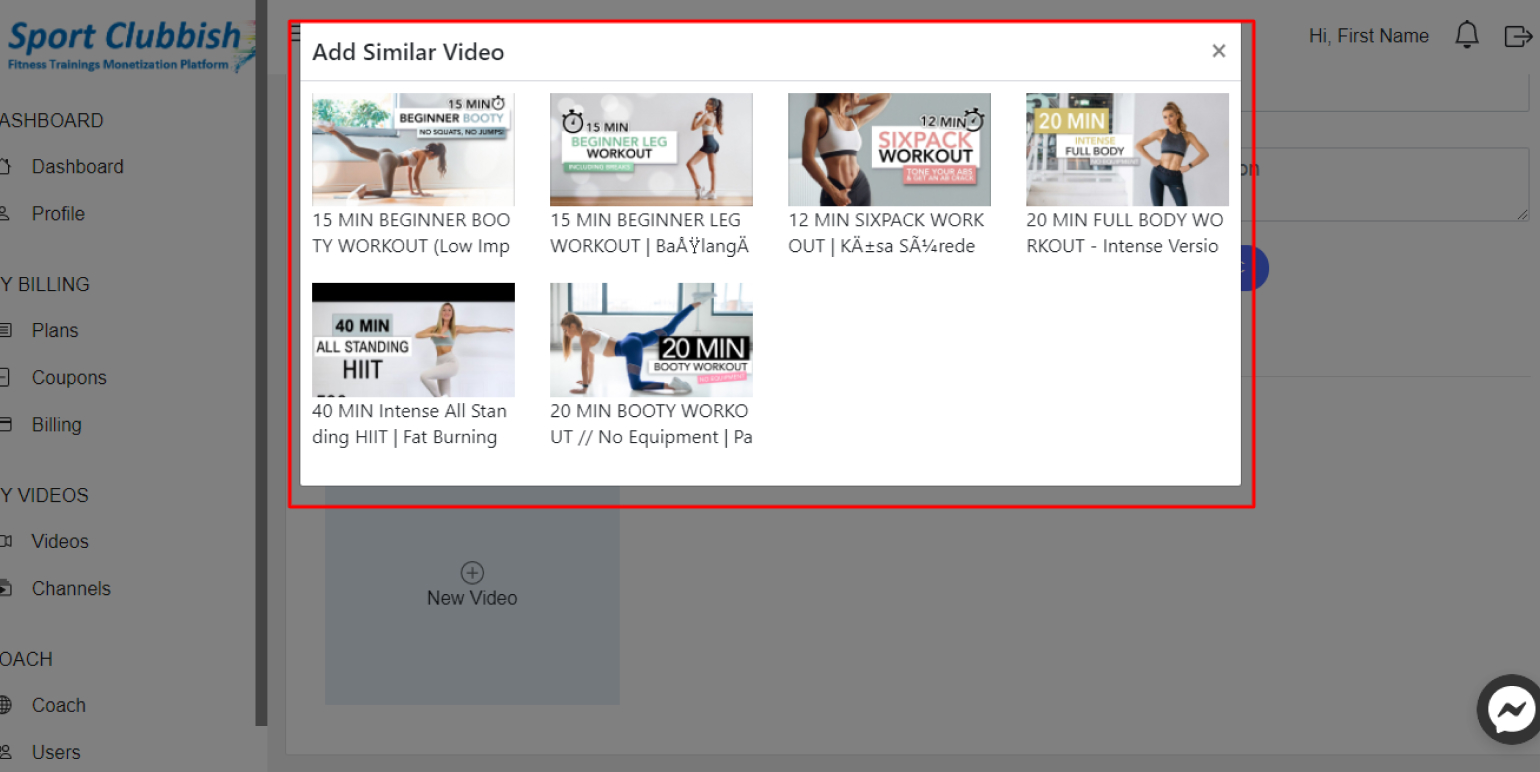
3. After adding Similar Videos, click on Save
Add Timecodes to your video
Steps:
1. In your Dashboard in the left panel, click on Videos
2. In the Video section, click on the Edit Icon next to your video

3. Here in the right panel of the page, you can add Timecodes.
Fill in the Topic Time, Title, Description fields and click on Add Topic
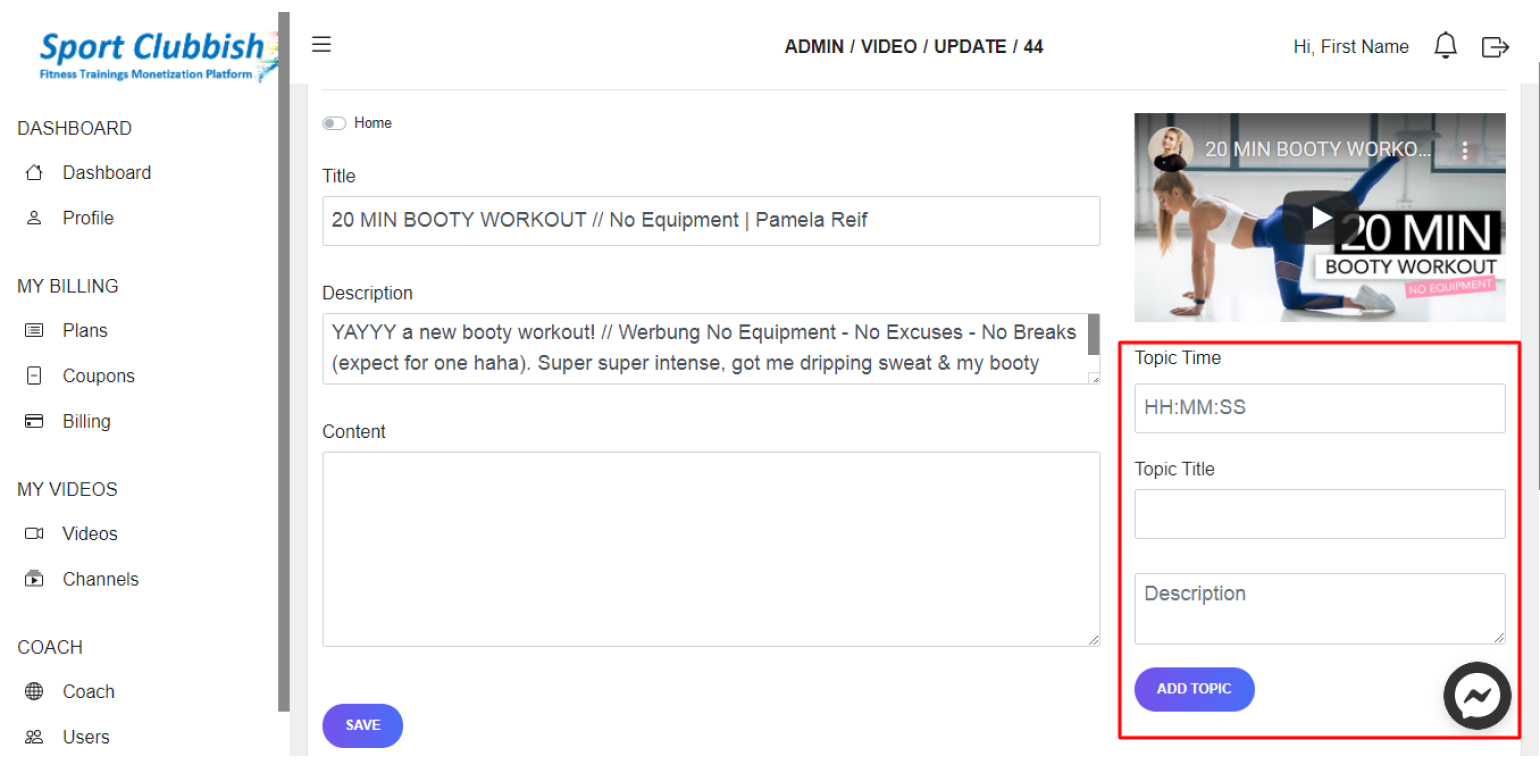
4. After adding Timecodes, click on Save at the end of the page
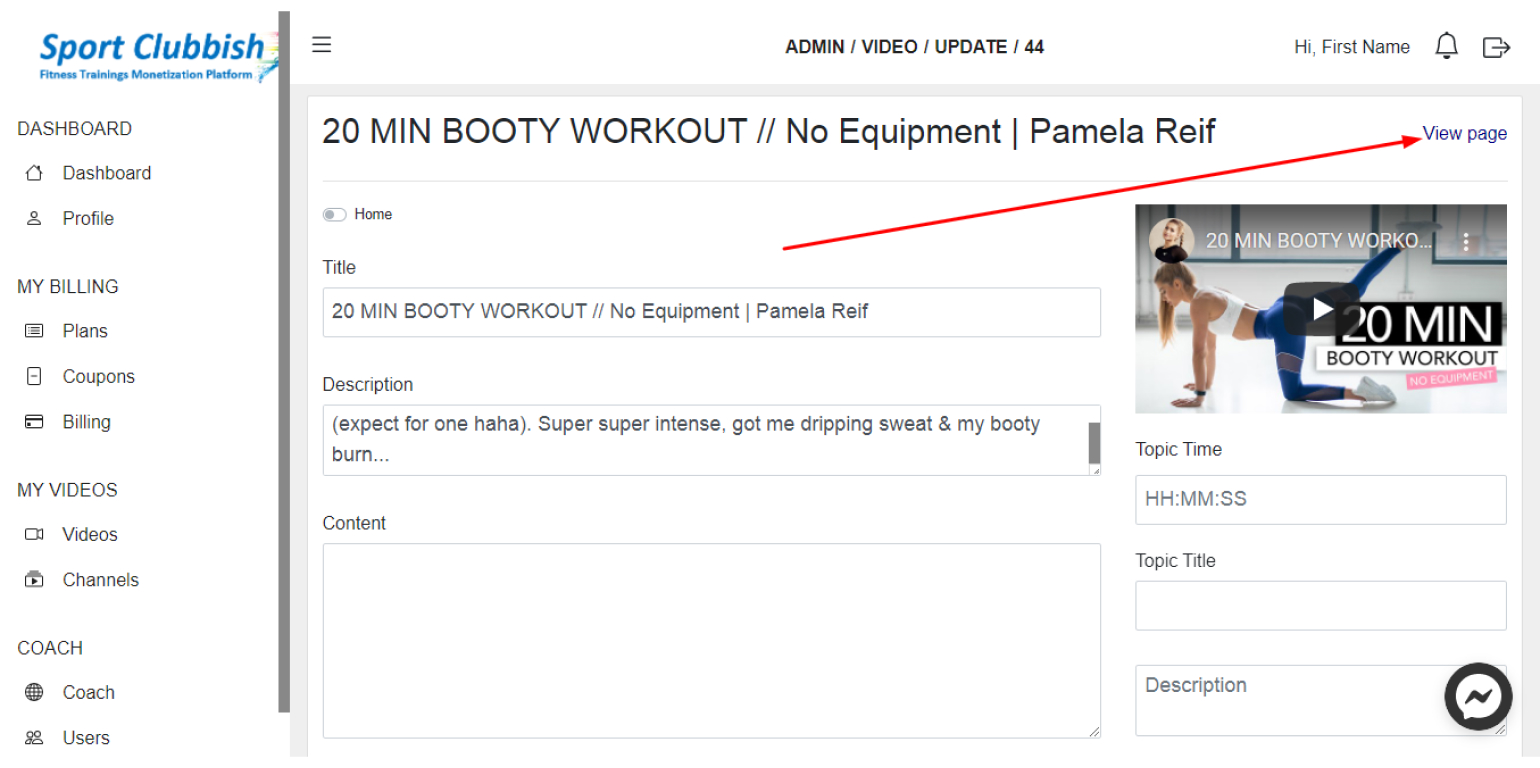
View the page with the uploaded video
Steps:
1. In your Dashboard in the left panel, click on Videos

2. In the Video section, click on the Edit Icon next to your video

3. Here, next to the video title, click on the View page
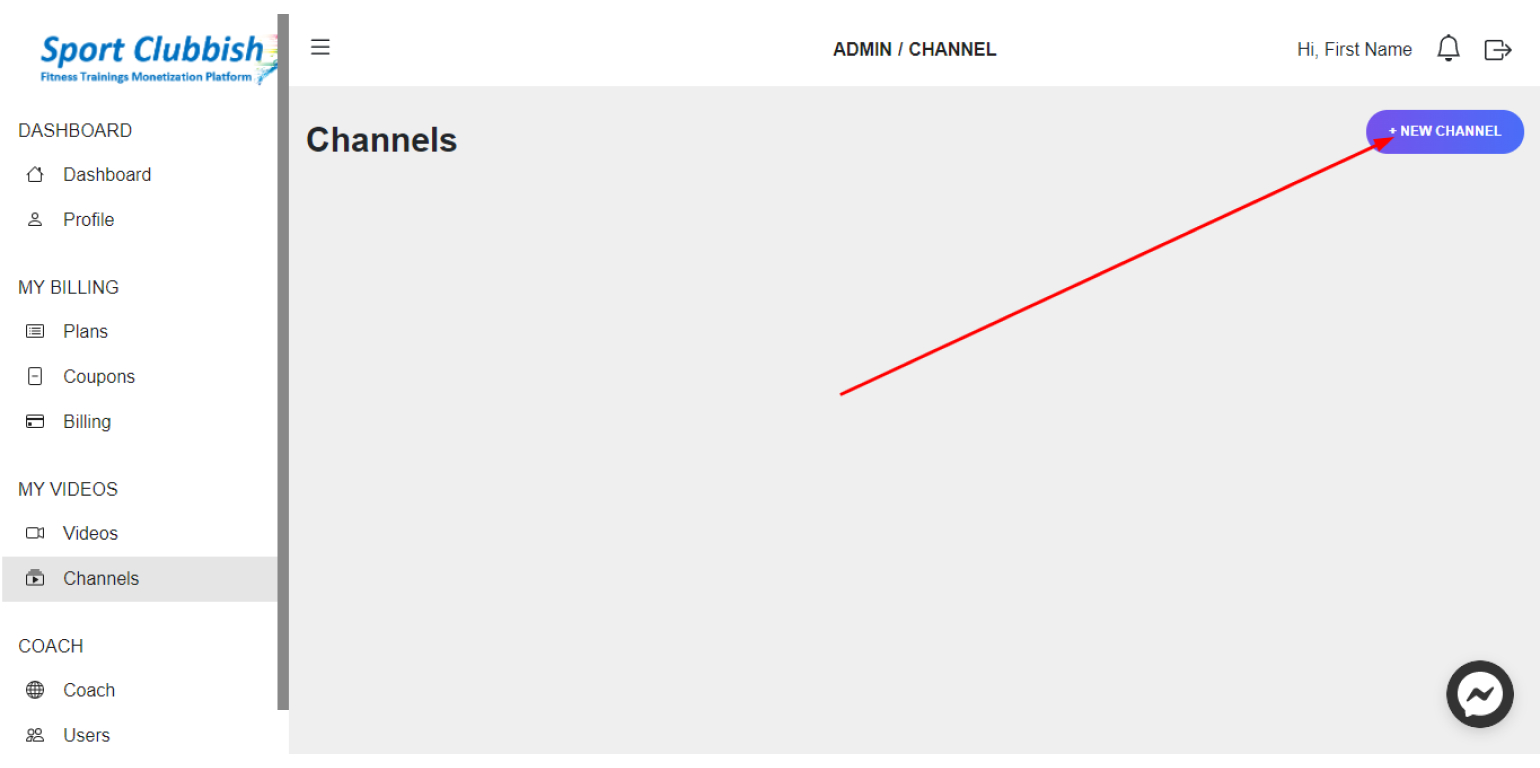
Сreate or add a New Channel
Steps:
1. In your Dashboard in the left panel, click on Channels
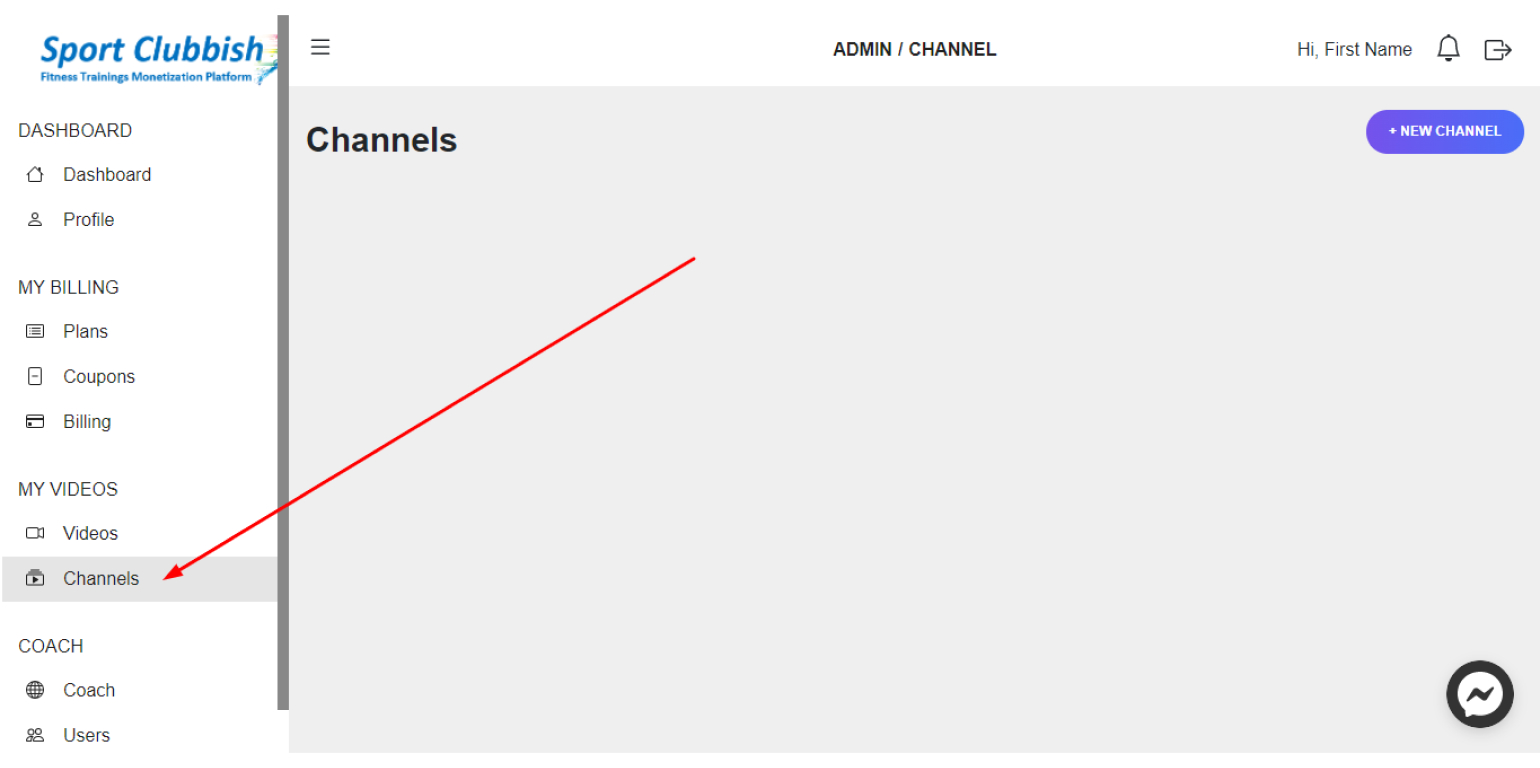
2. In the upper right corner, click on New Channel
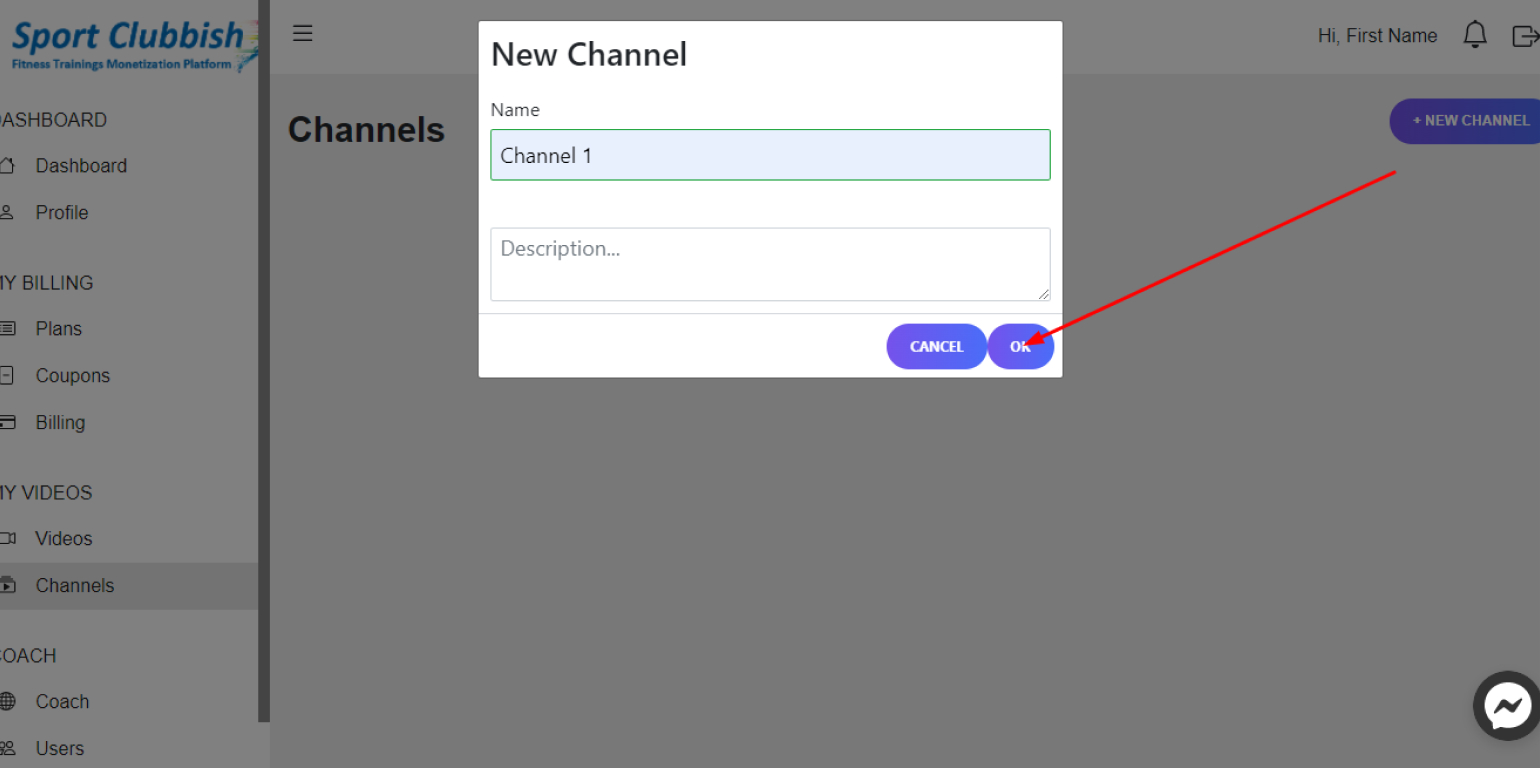
3. In the window that appears, enter the Name and Description of the channel and click on OK
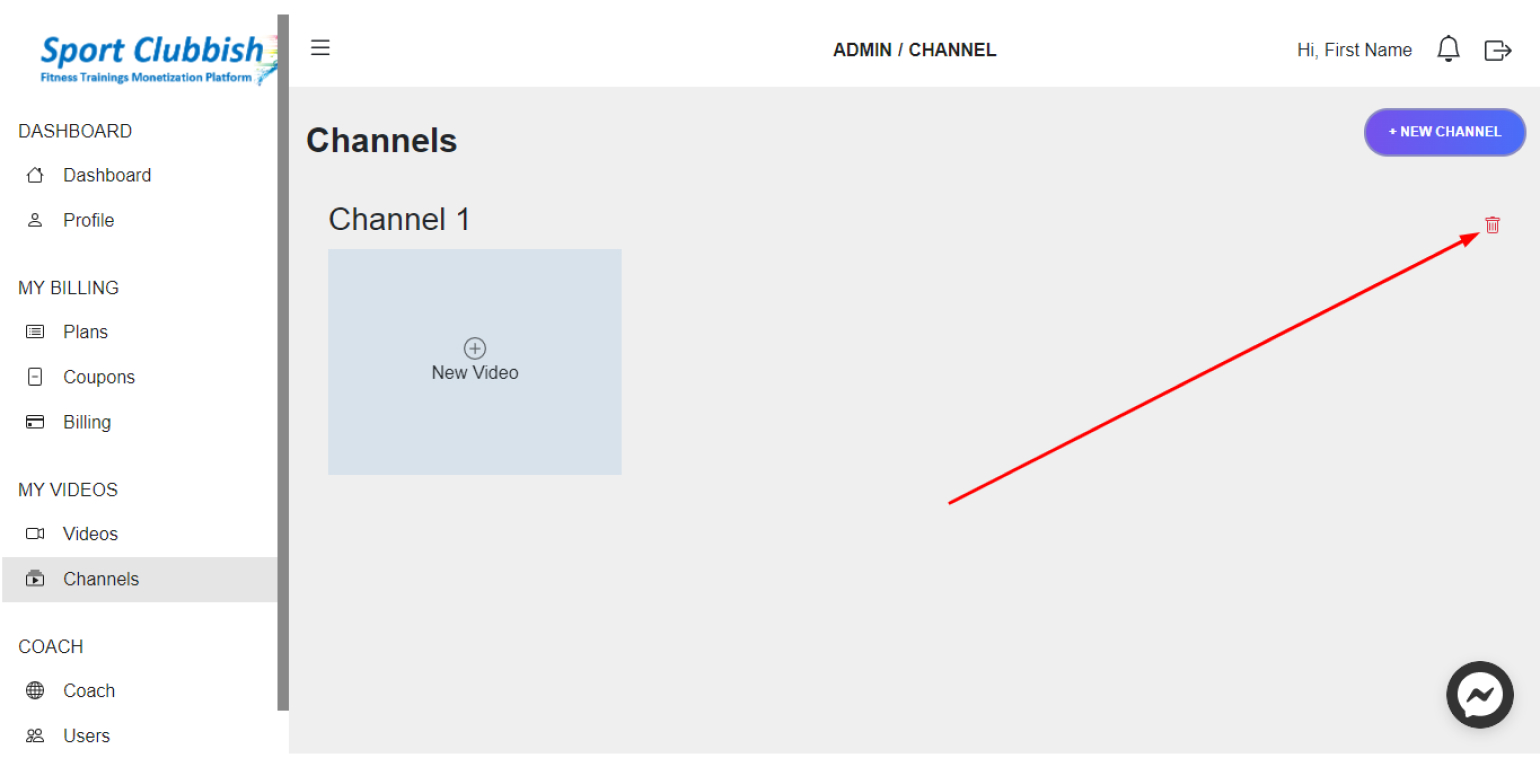
Delete a Created Channel
Steps:
1. In your Dashboard in the left panel, click on Channels

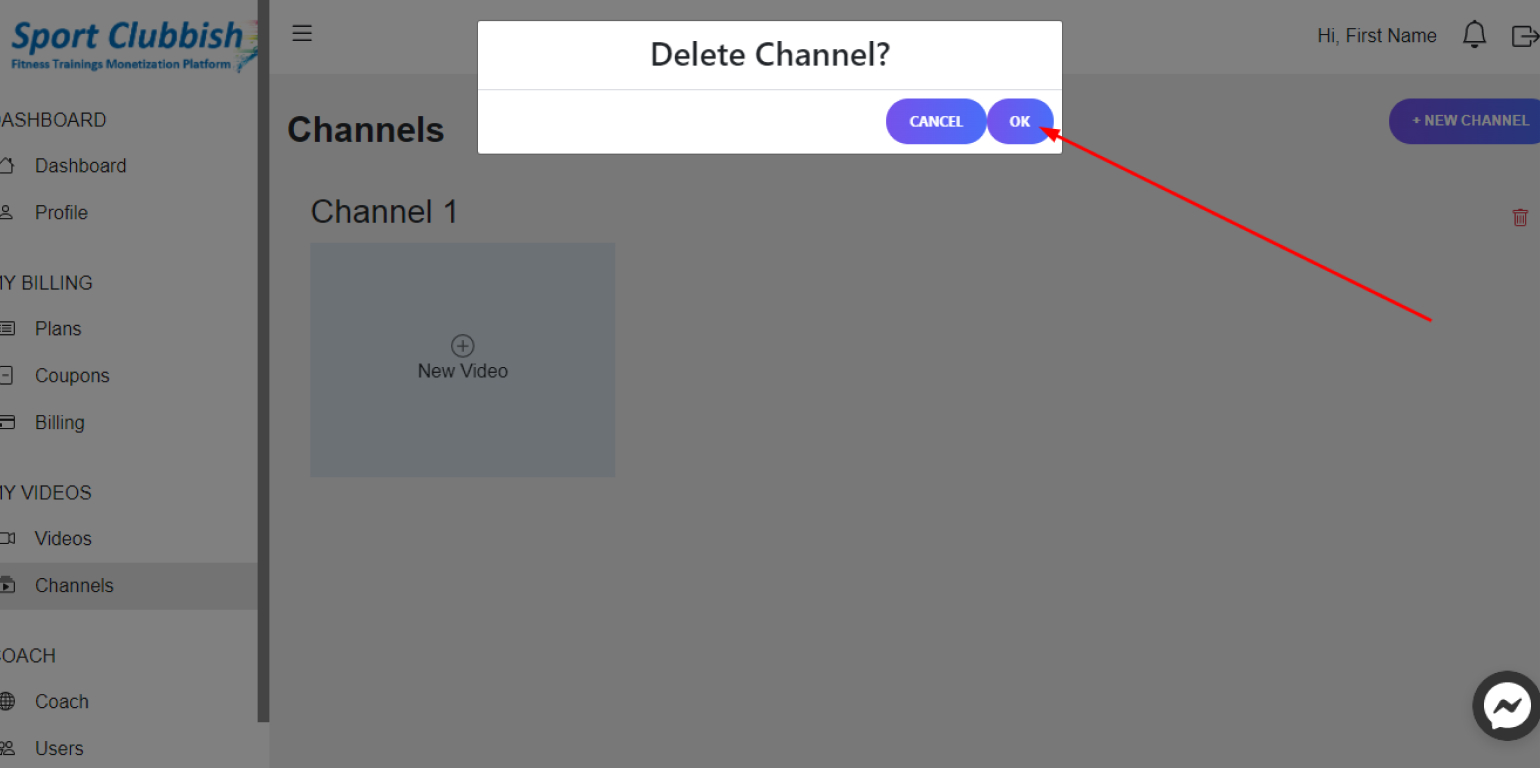
2. Here, next to the channel you want to delete, click on the Delete Icon and then click on OK
Add a video to a Created Channel
Steps:
1. In your Dashboard in the left panel, click on Channels
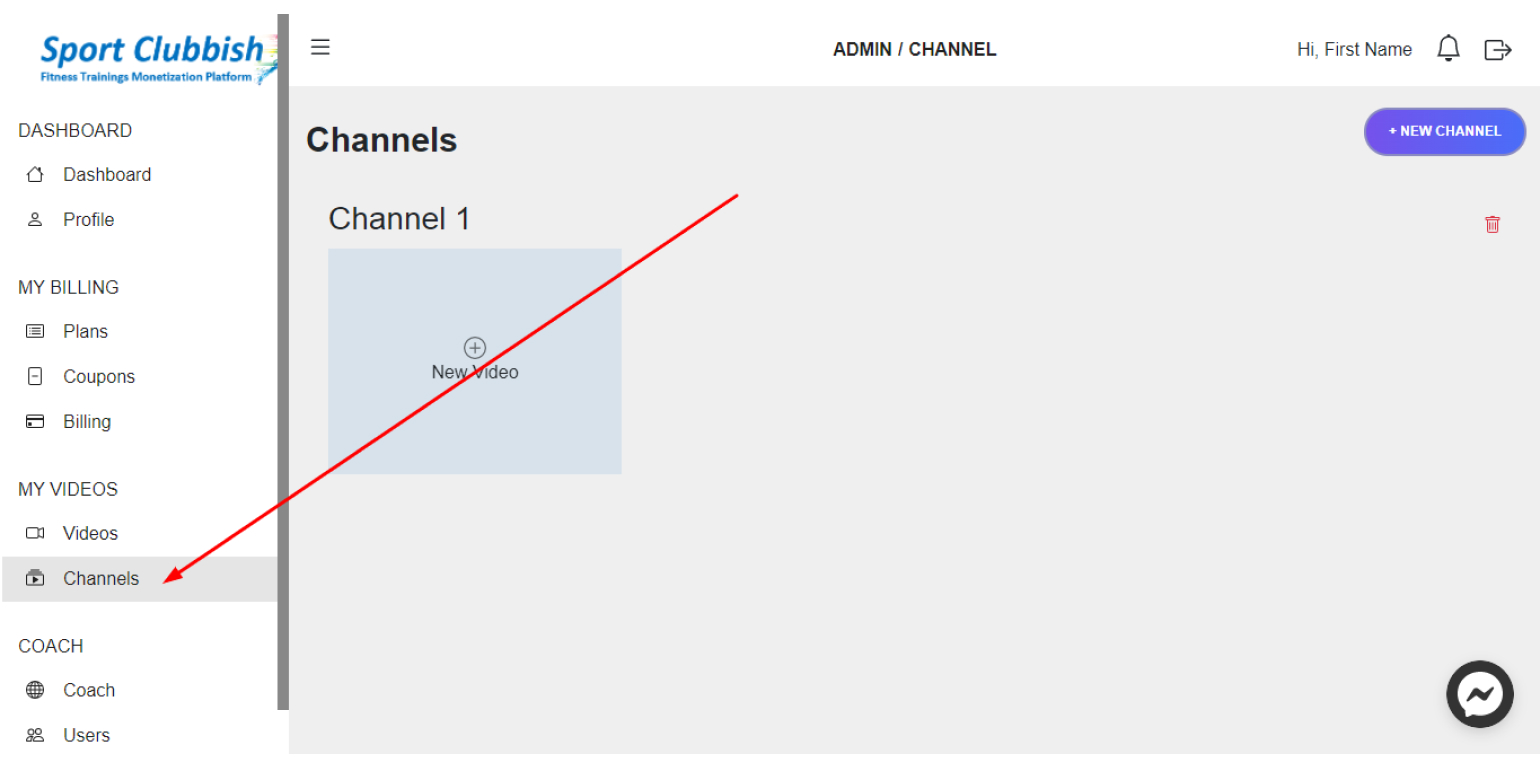
2. Here, next to the desired channel, click on New Video
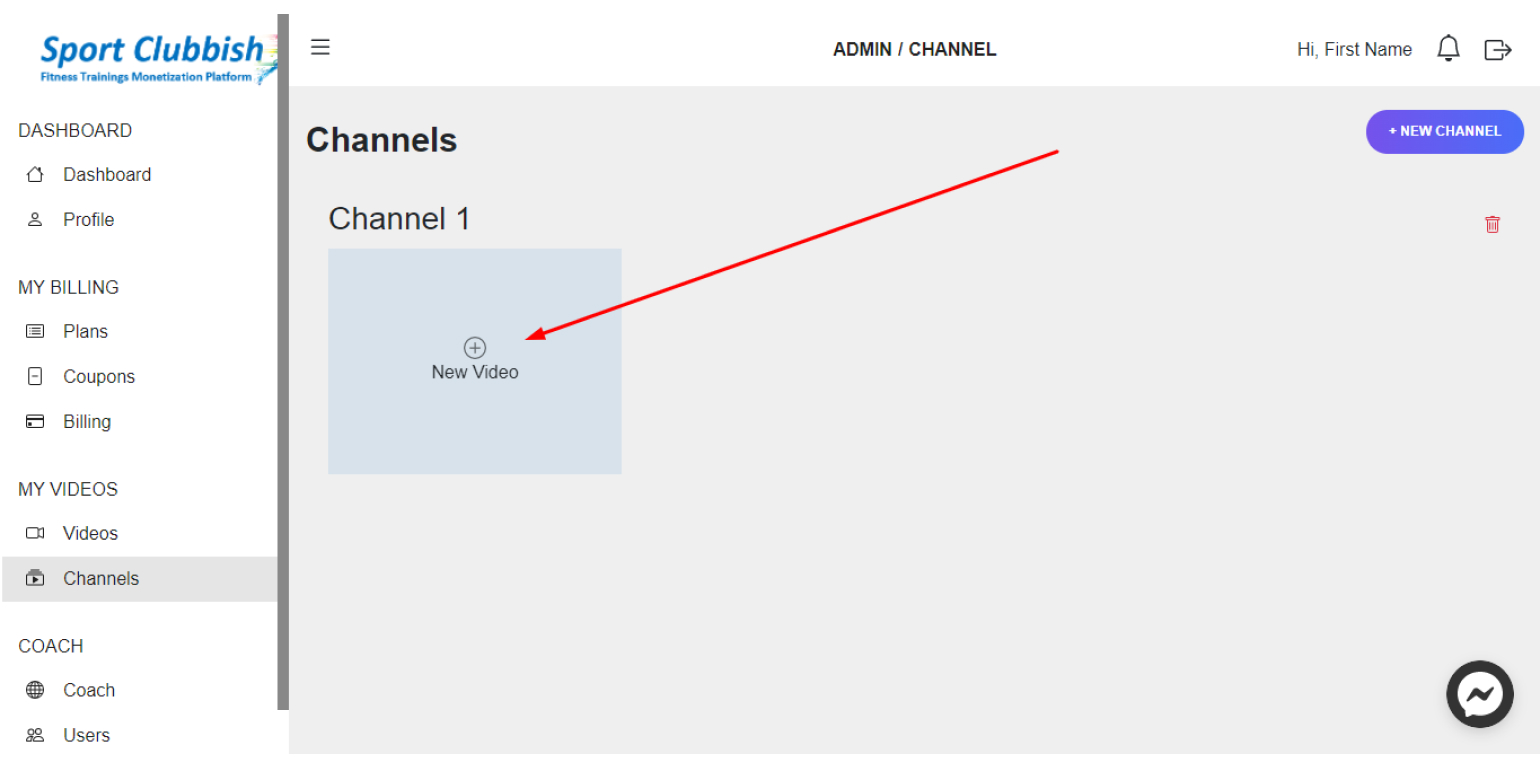
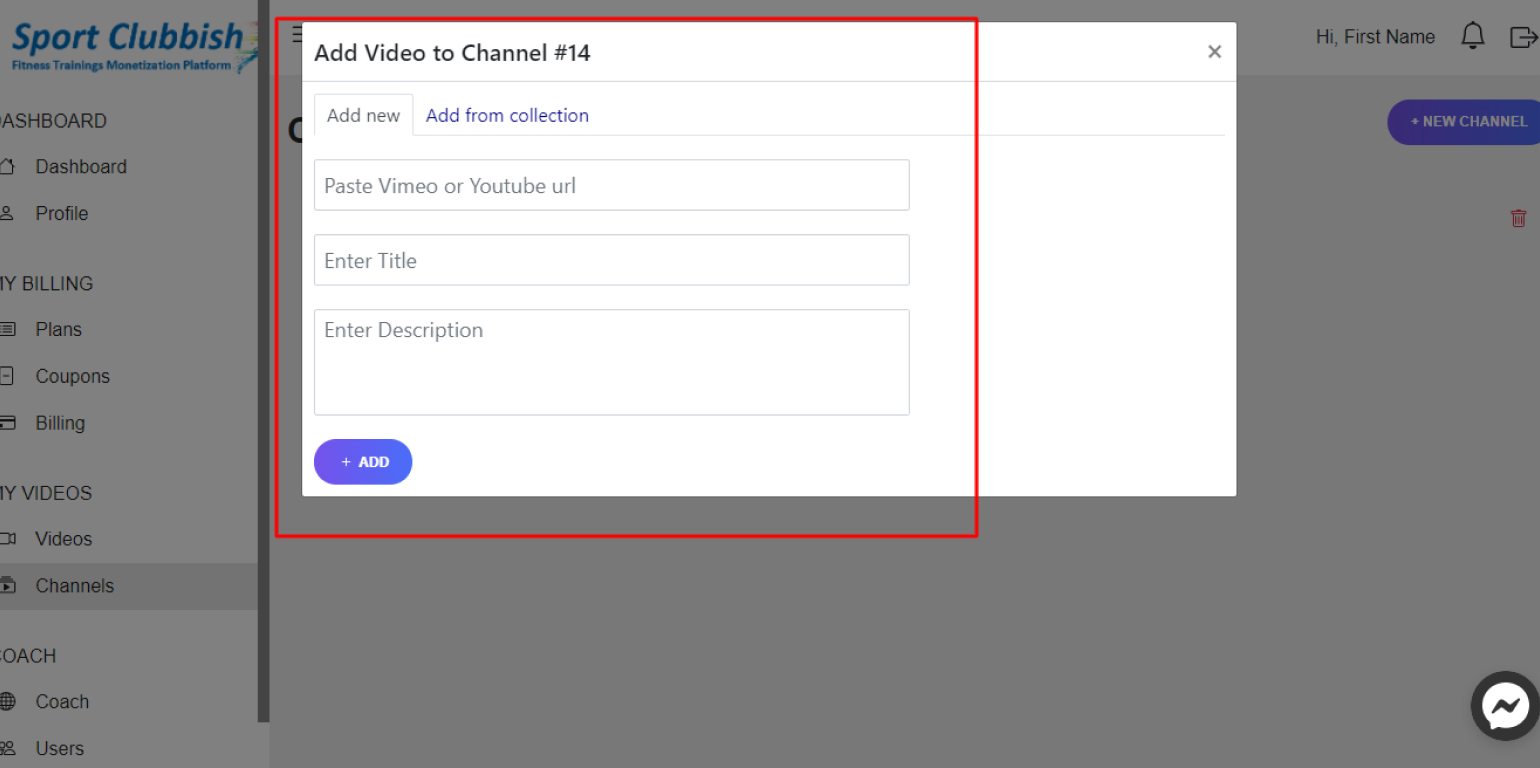
3. In the window that appears, enter the YouTube or Vimeo video link, Title and Description of the video and click on +Add
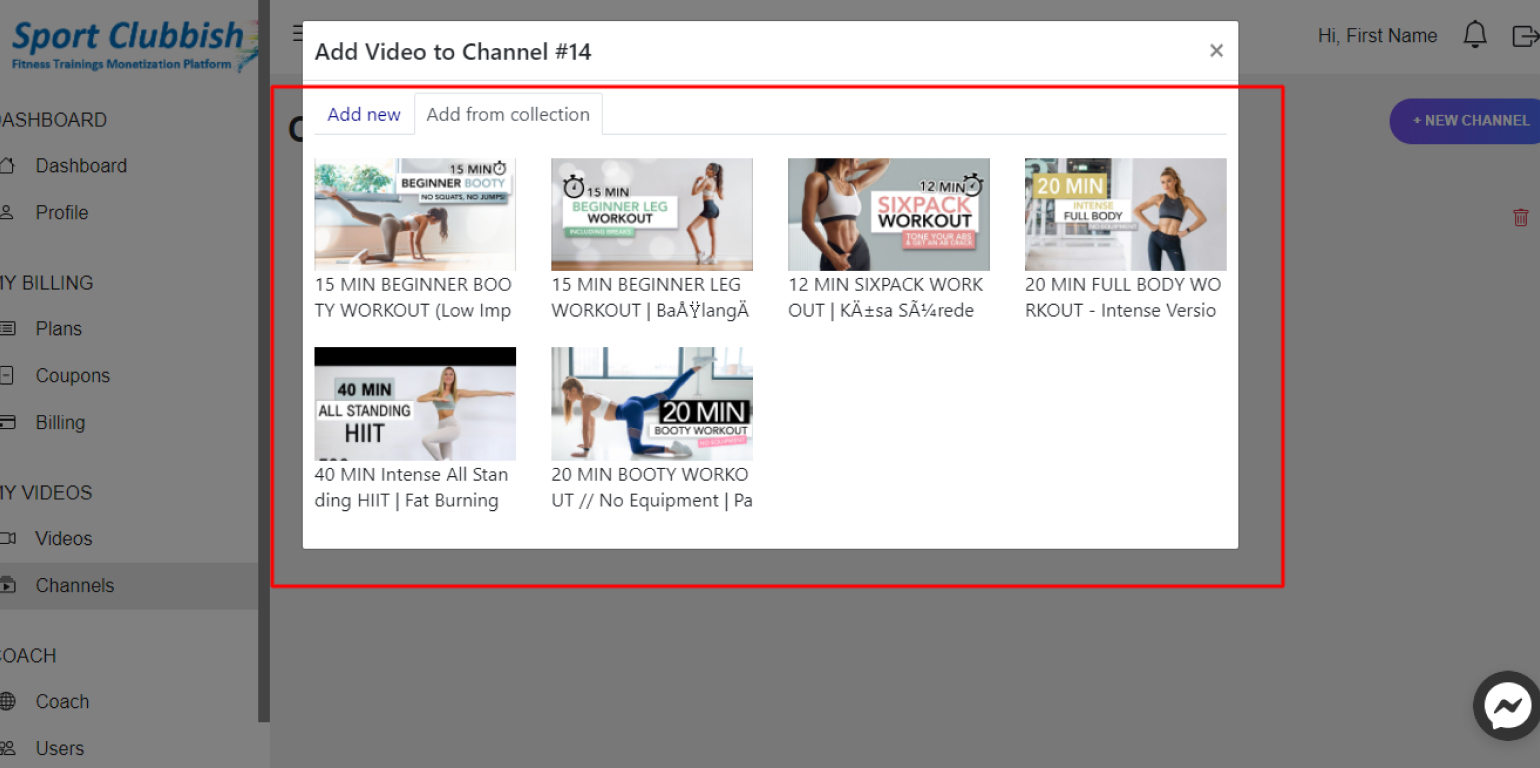
4. You can also add videos from the Collection. To do this, click on Add From Collection and add the desired video
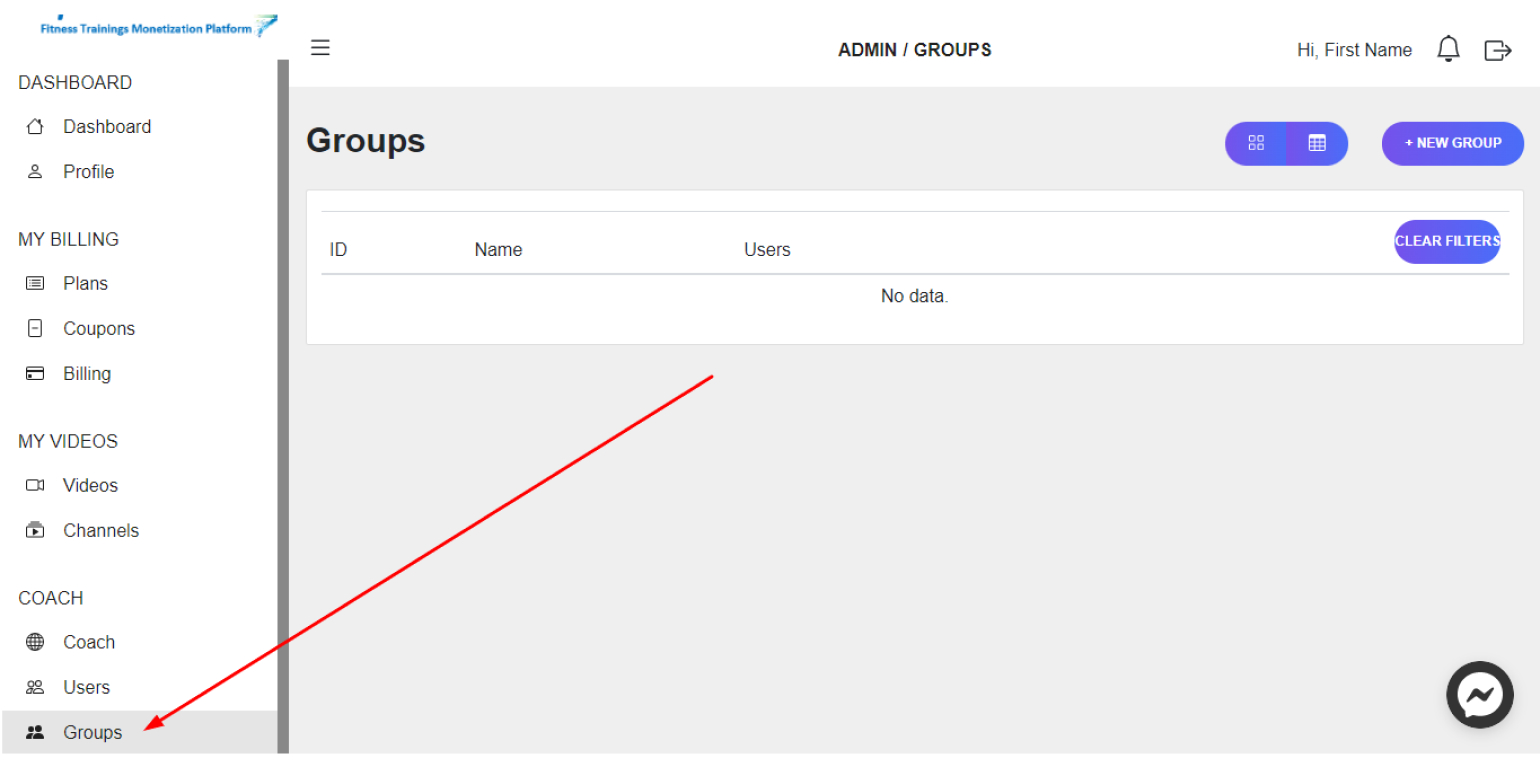
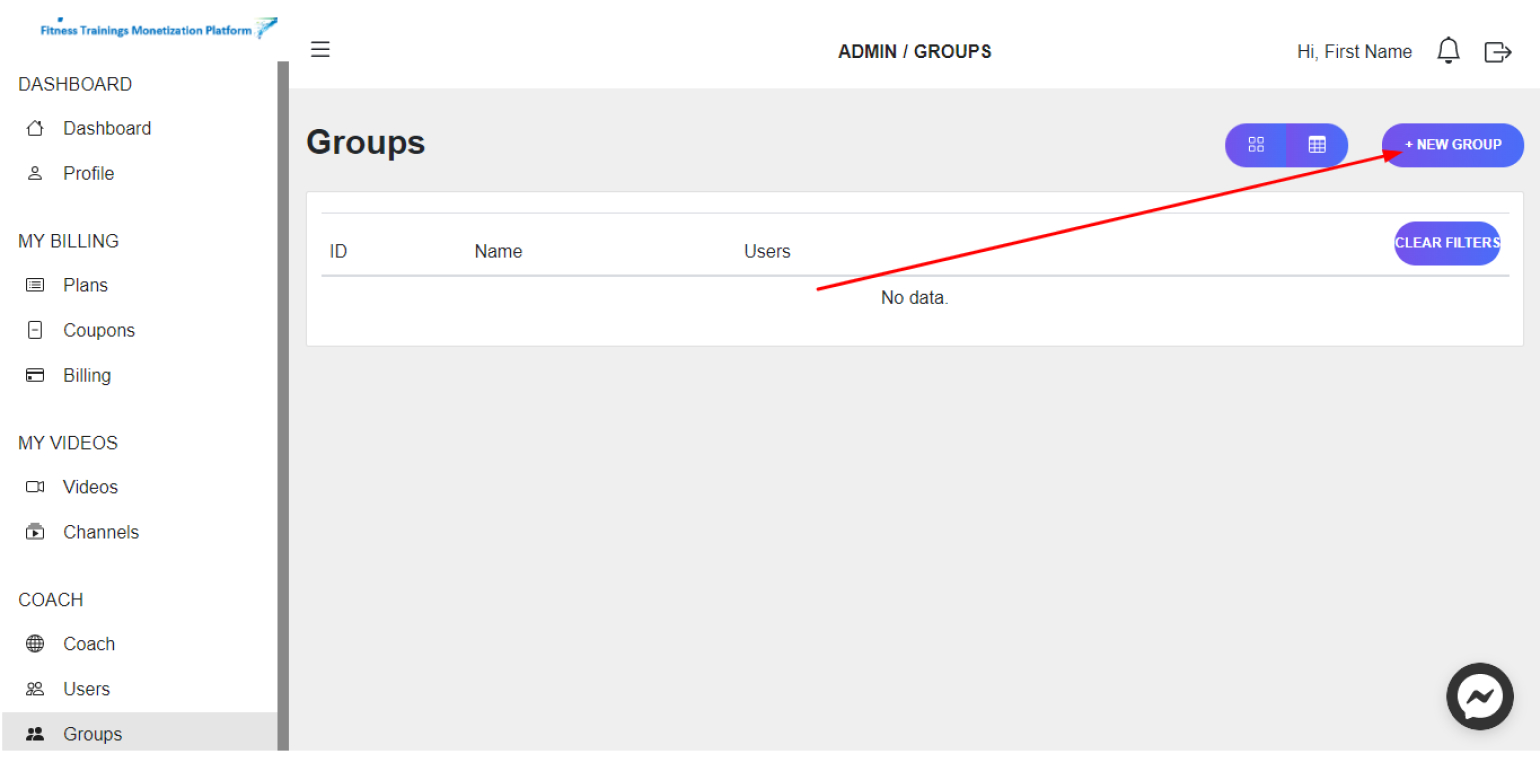
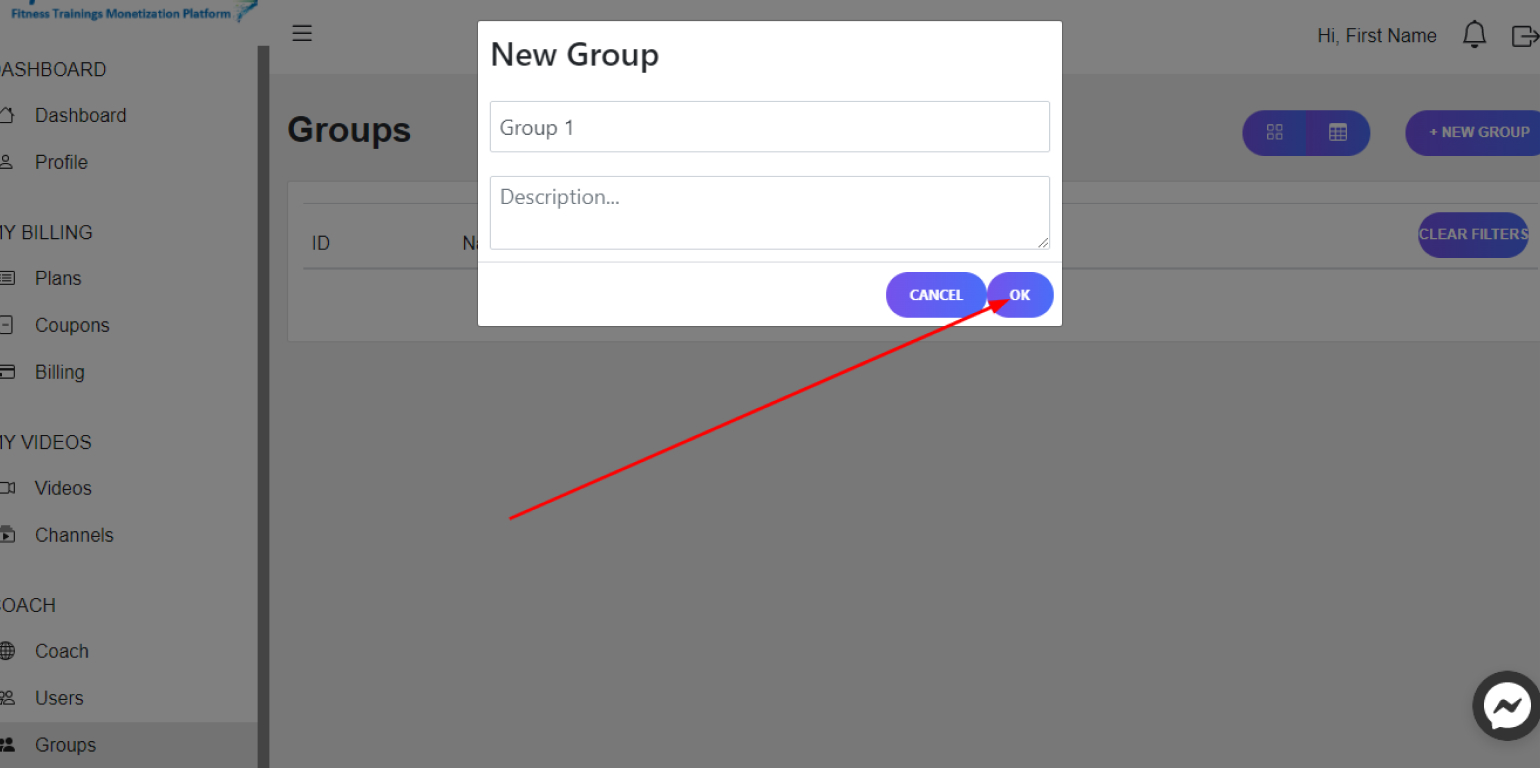
Сreate a New Group
Steps:
1. In your Dashboard in the left panel, click on Groups
2. In the upper right corner, click on New Group
3. In the window that appears, enter the Name and Description of the group and click on OK
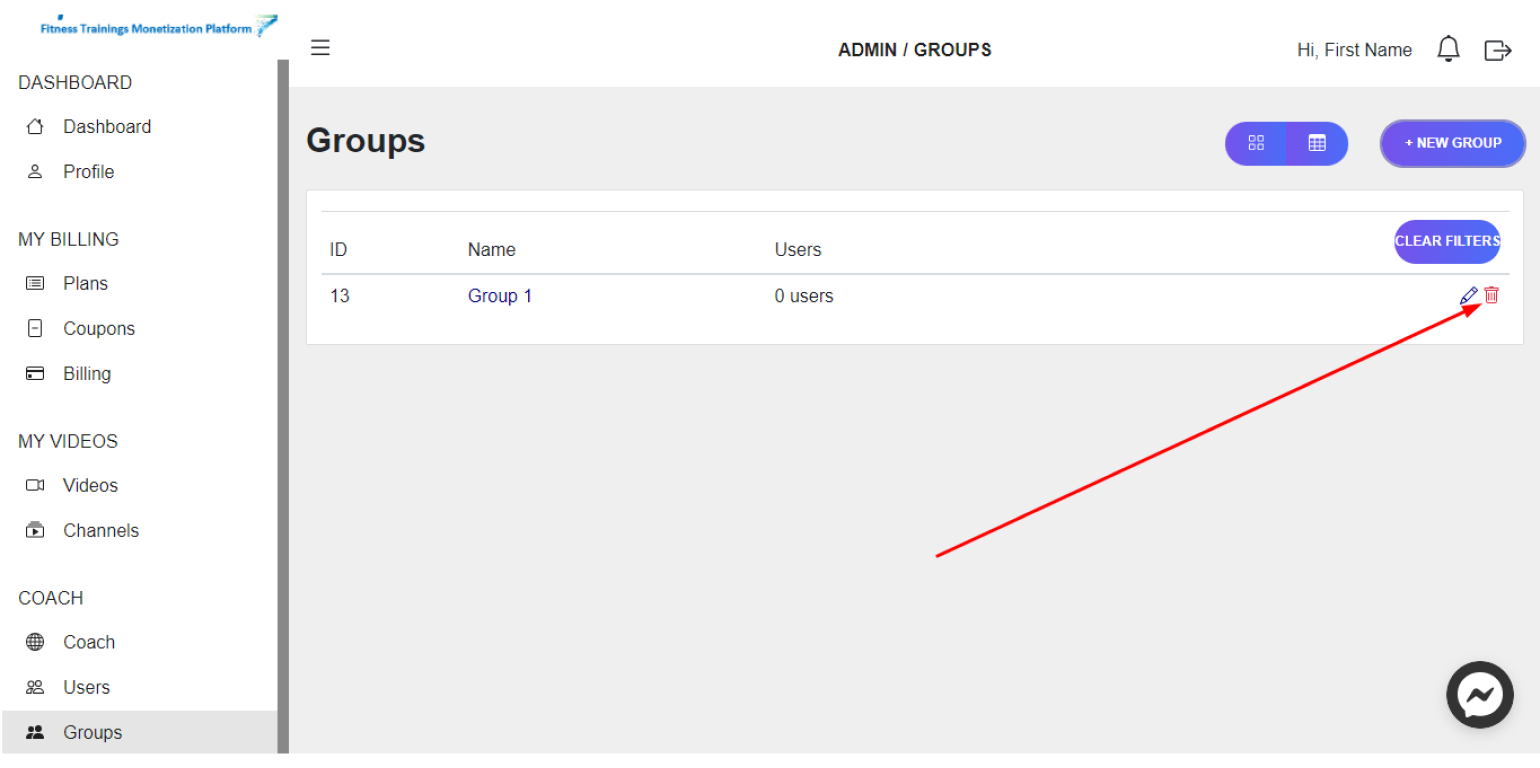
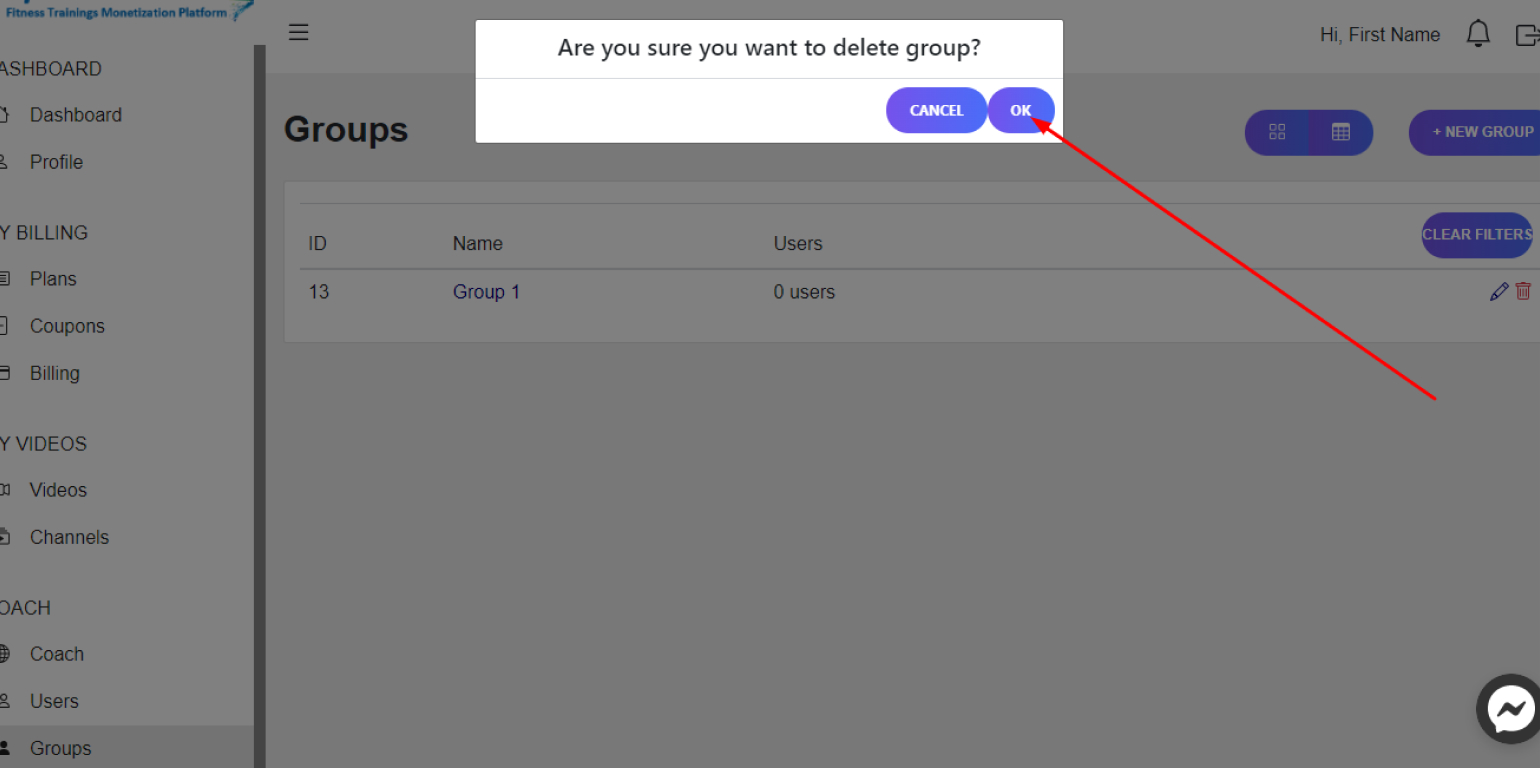
Delete a Created Group
Steps:
1. In your Dashboard in the left panel, click on Groups

2. Here, next to the Group you want to delete, click on the Delete Icon and then click on OK
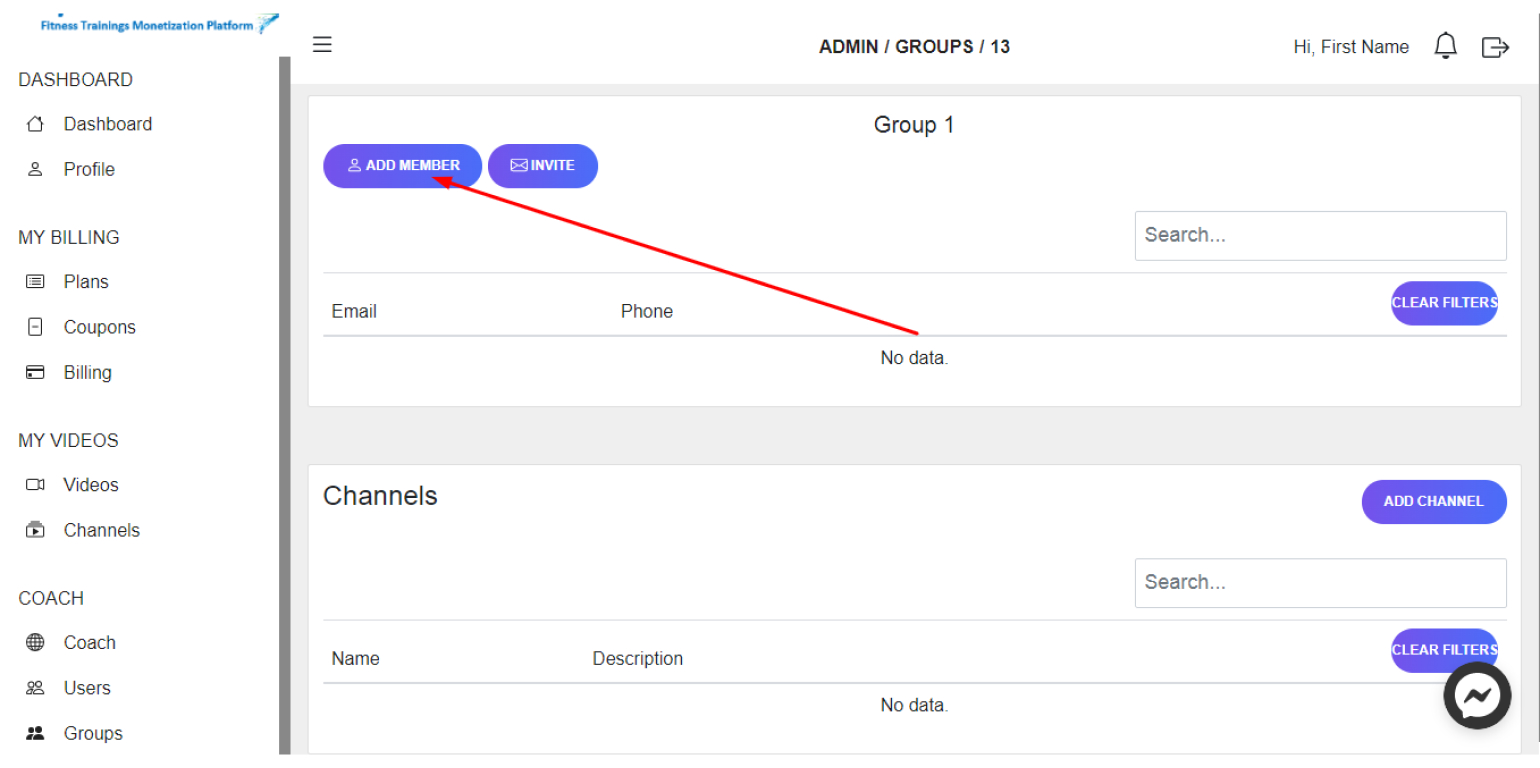
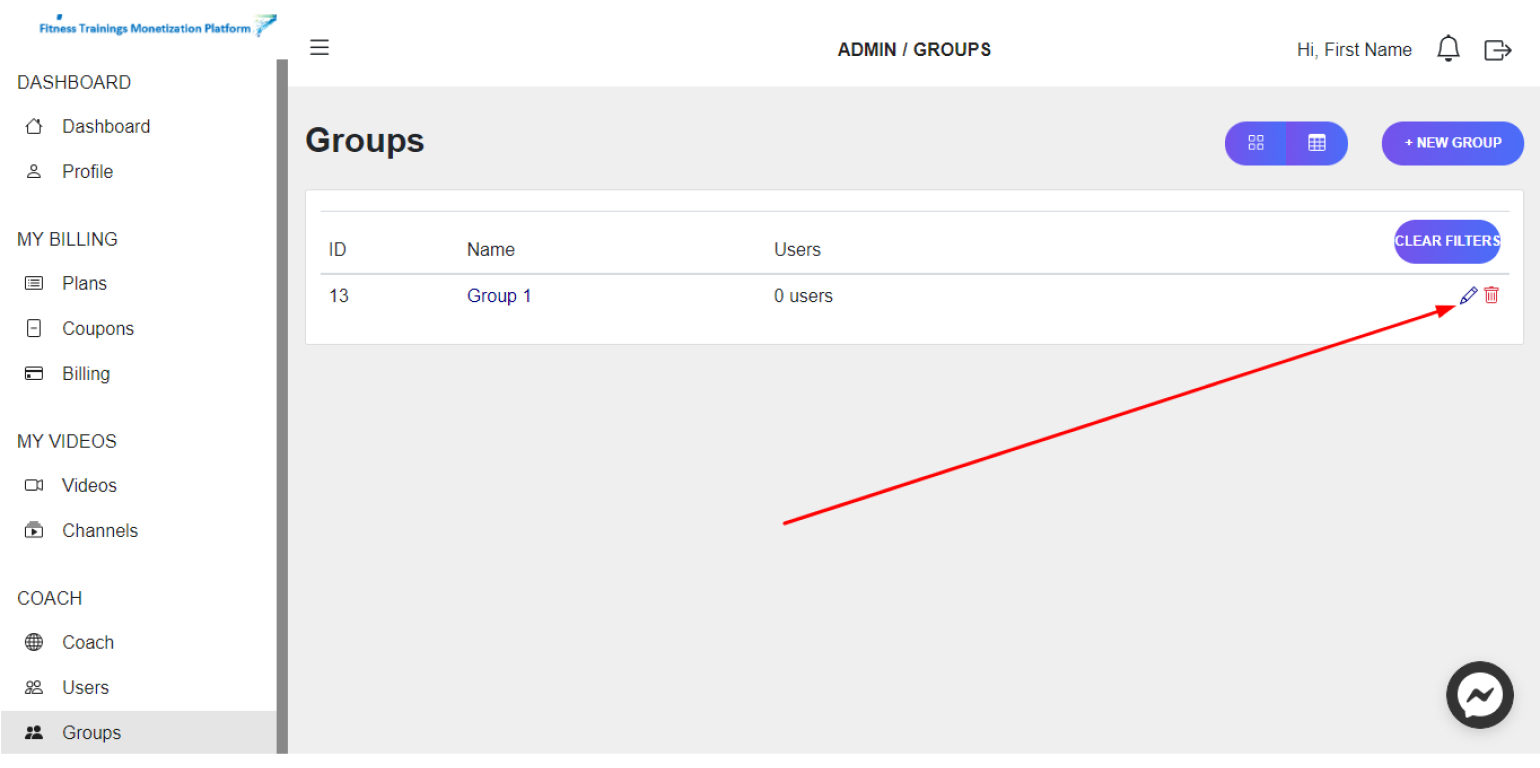
Add Users to your Group
Steps:
1. In your Dashboard in the left panel, click on Groups
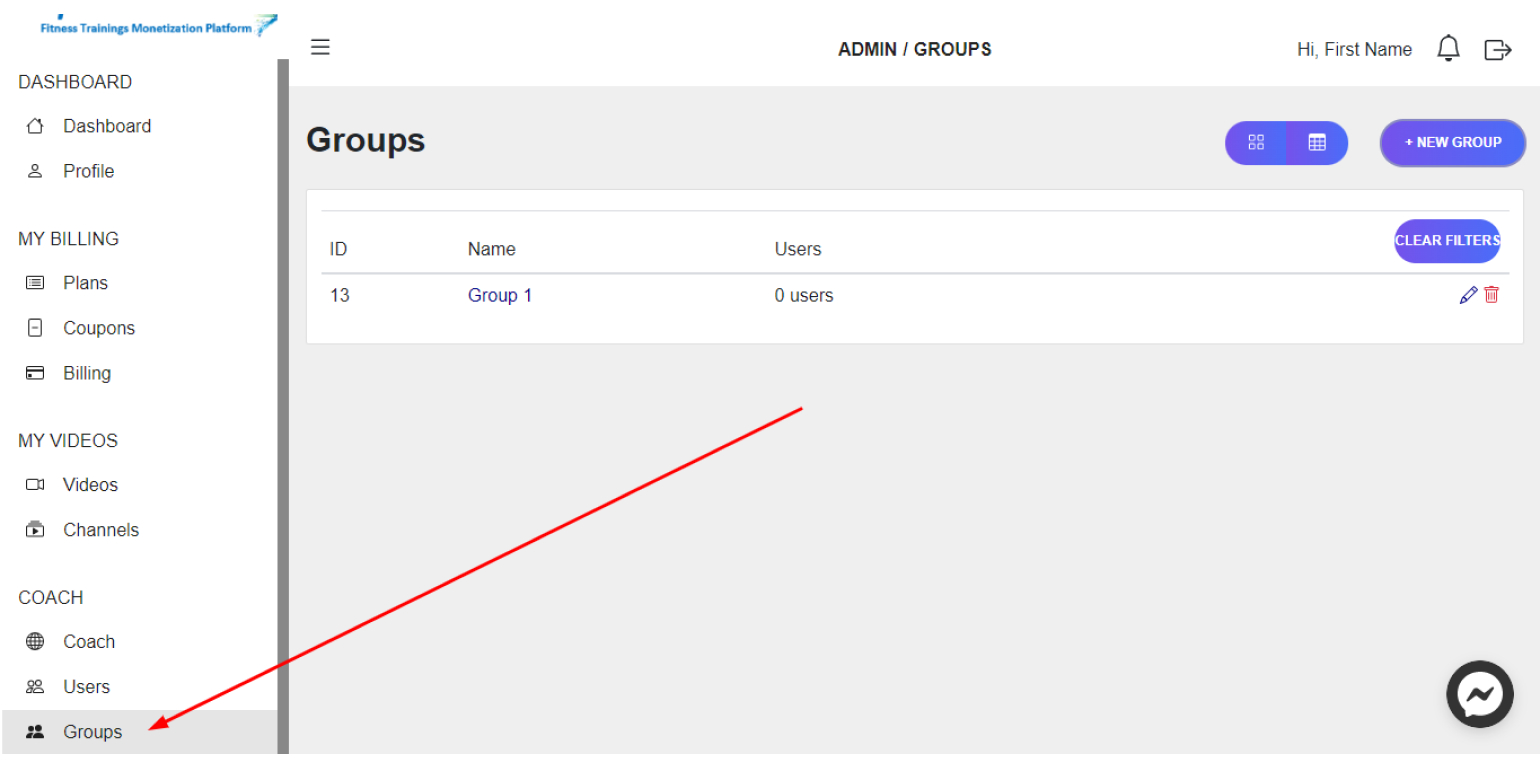
2. Click on the Group you want to add users to, or click on the Edit Icon

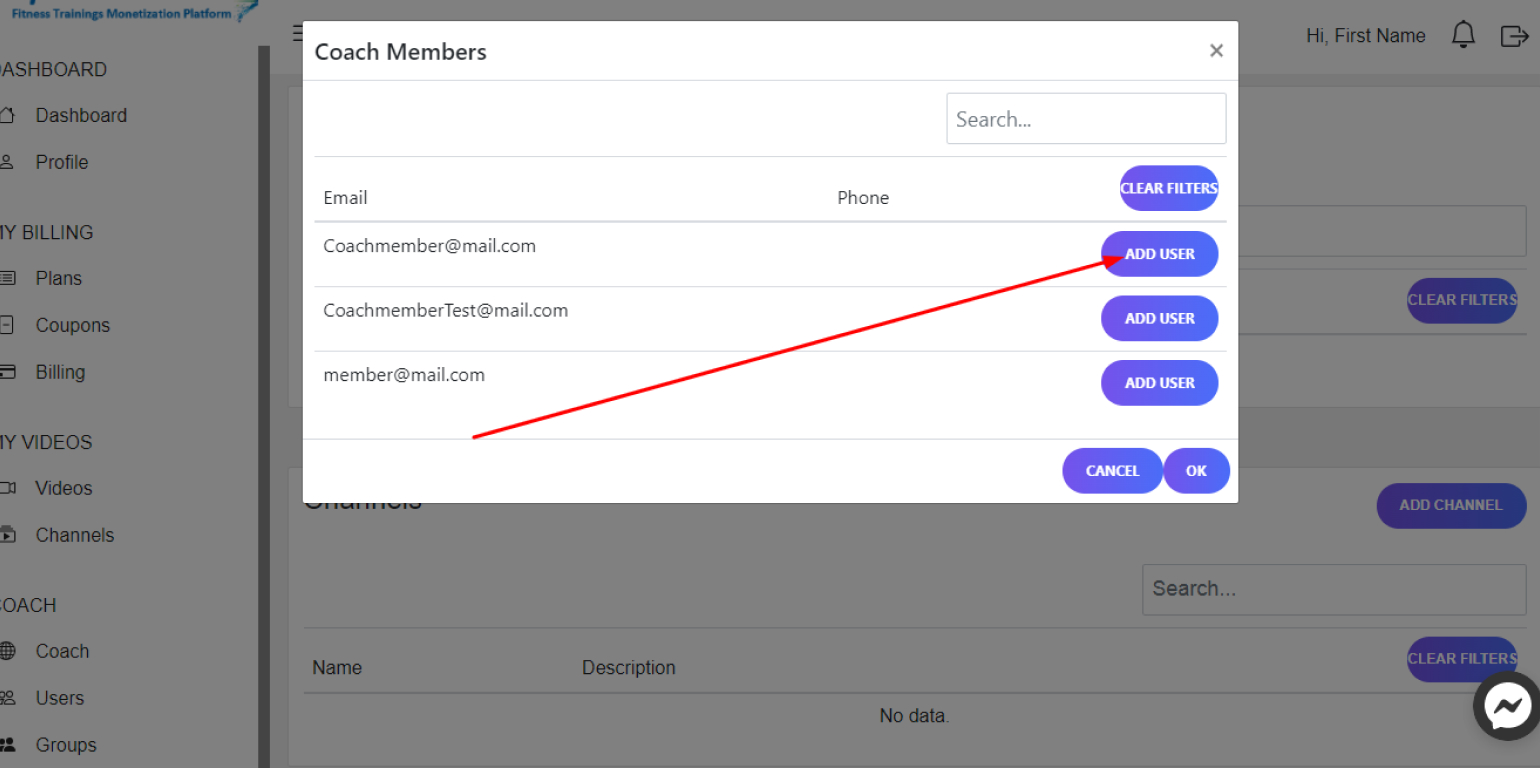
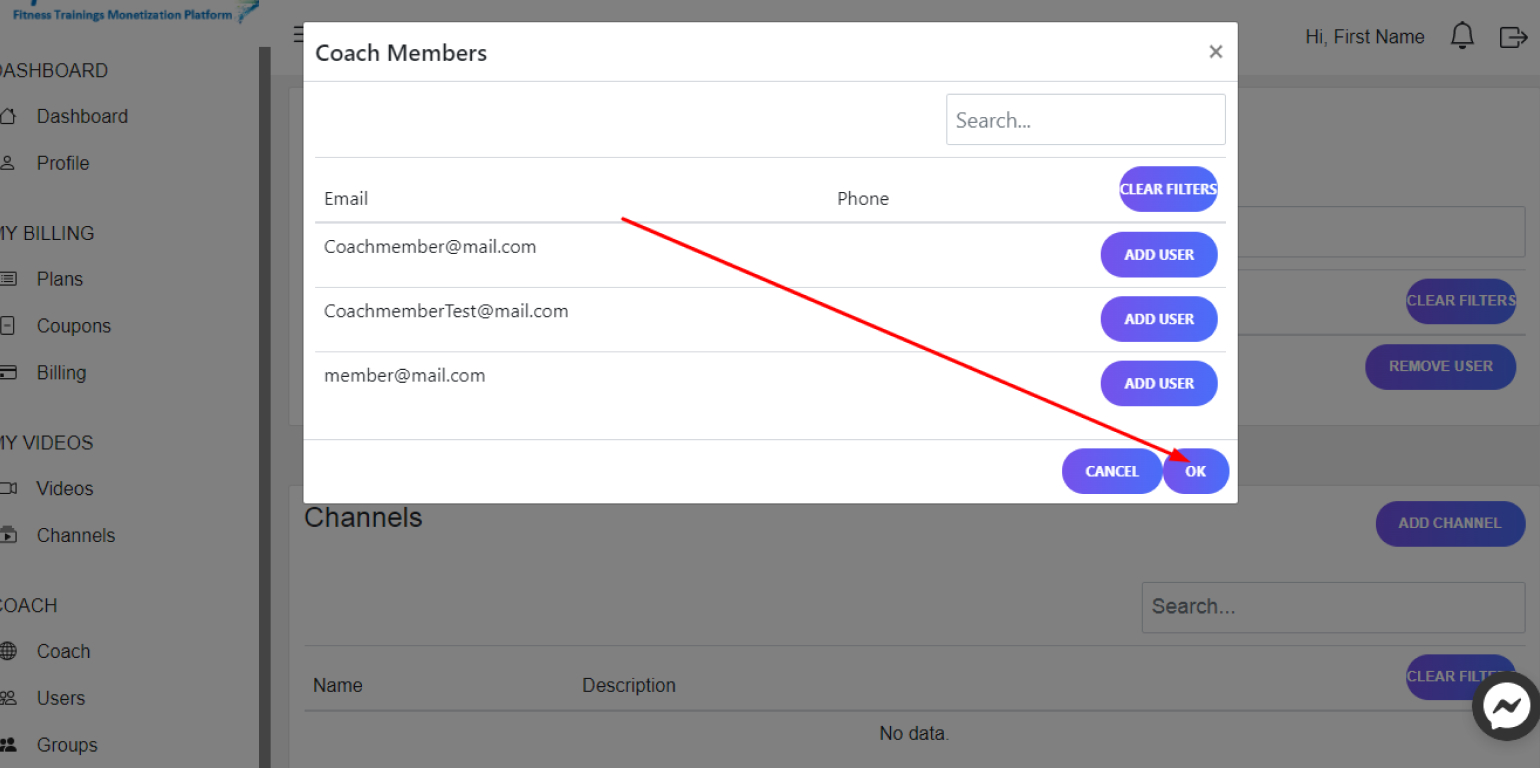
3. To add a user, click on the Add Member button, select the required user, click on Add User , and then click on OK
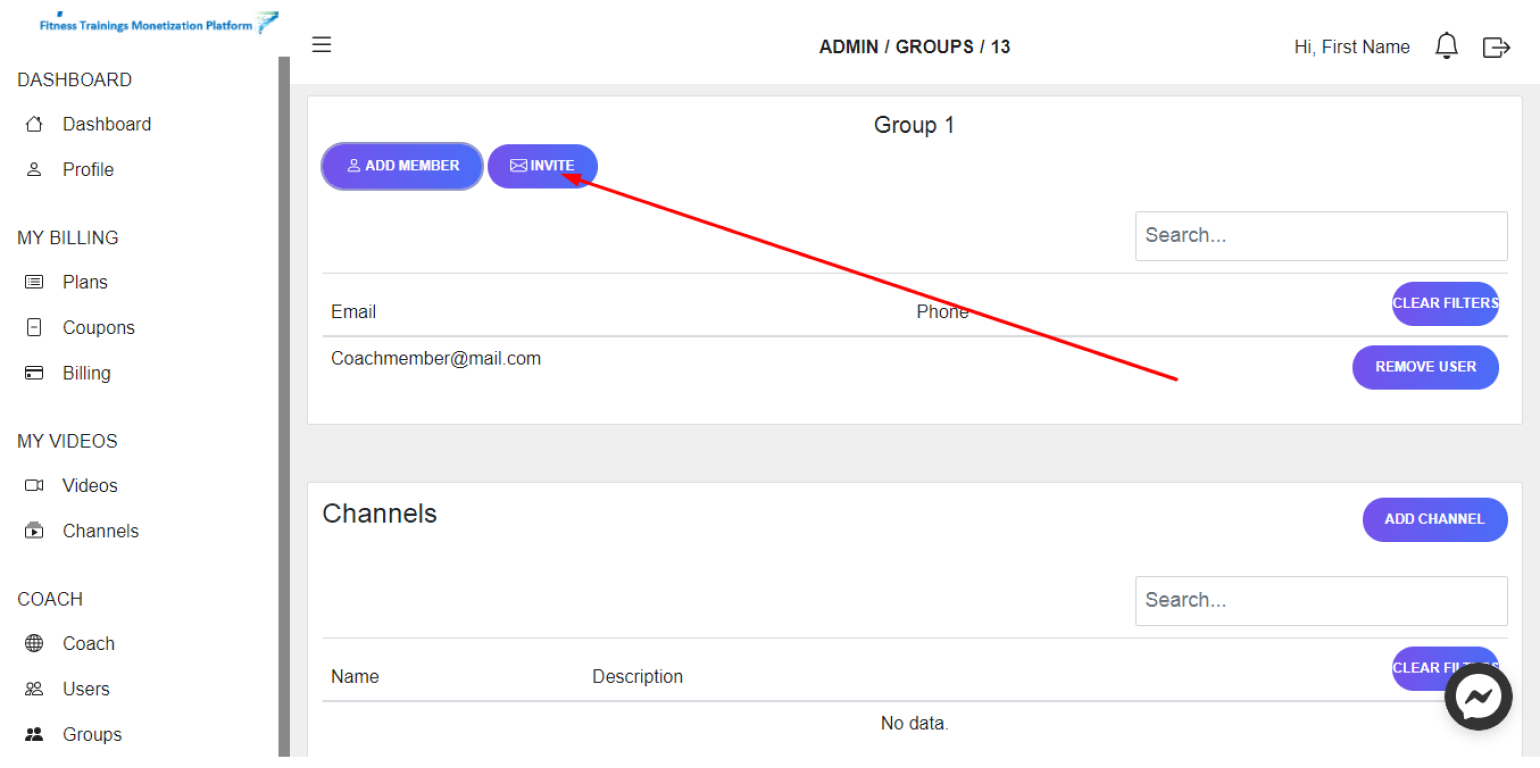
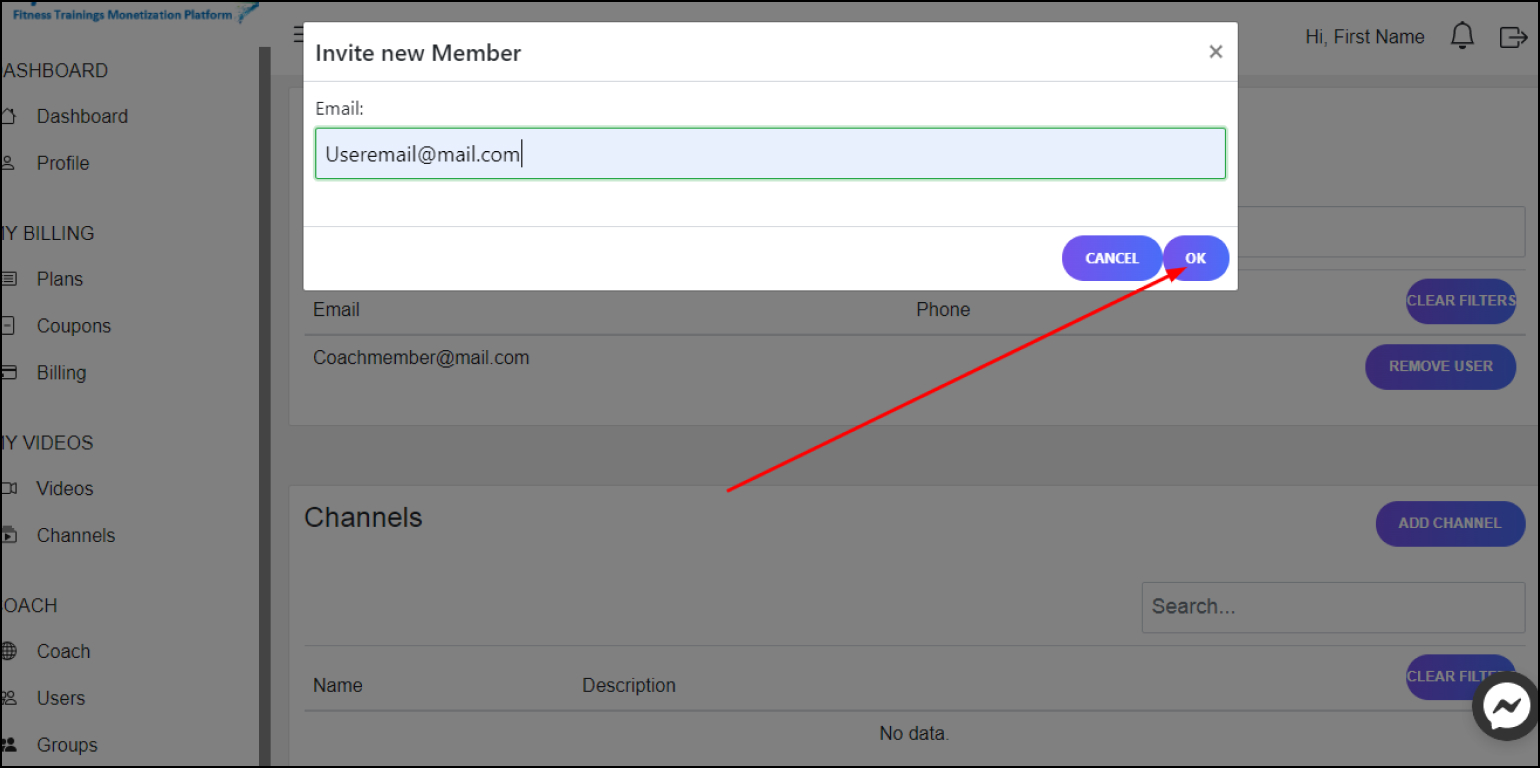
4. To invite an unregistered user to the group, click on Invite. In the window that appears, enter the user's Email and click on OK
Remove Users from your Group
Steps:
1. In your Dashboard in the left panel, click on Groups

2. Click on the Group from which you want to remove the user, or click on the Edit Icon

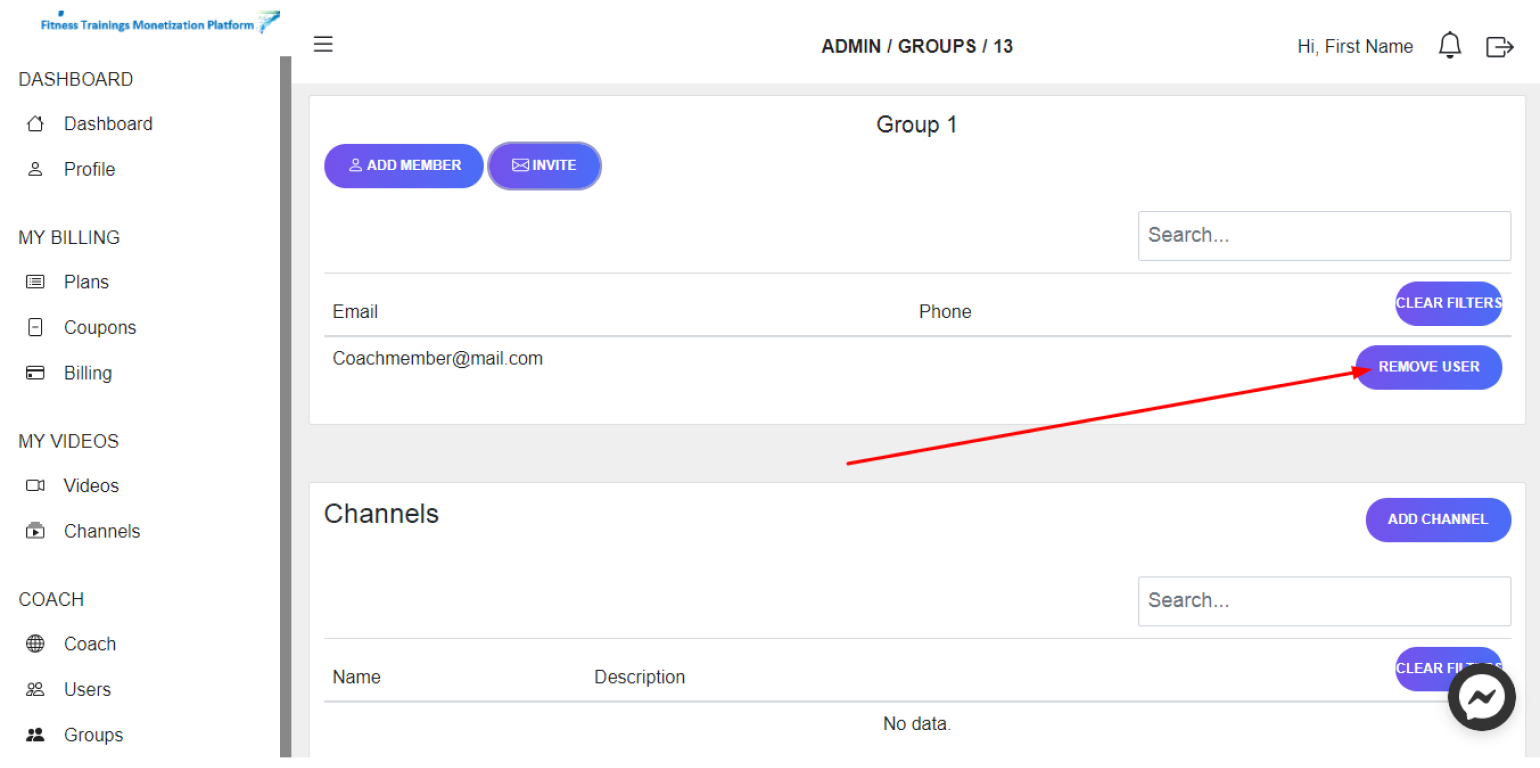
3. In the Group field next to the desired user, click on Remove User
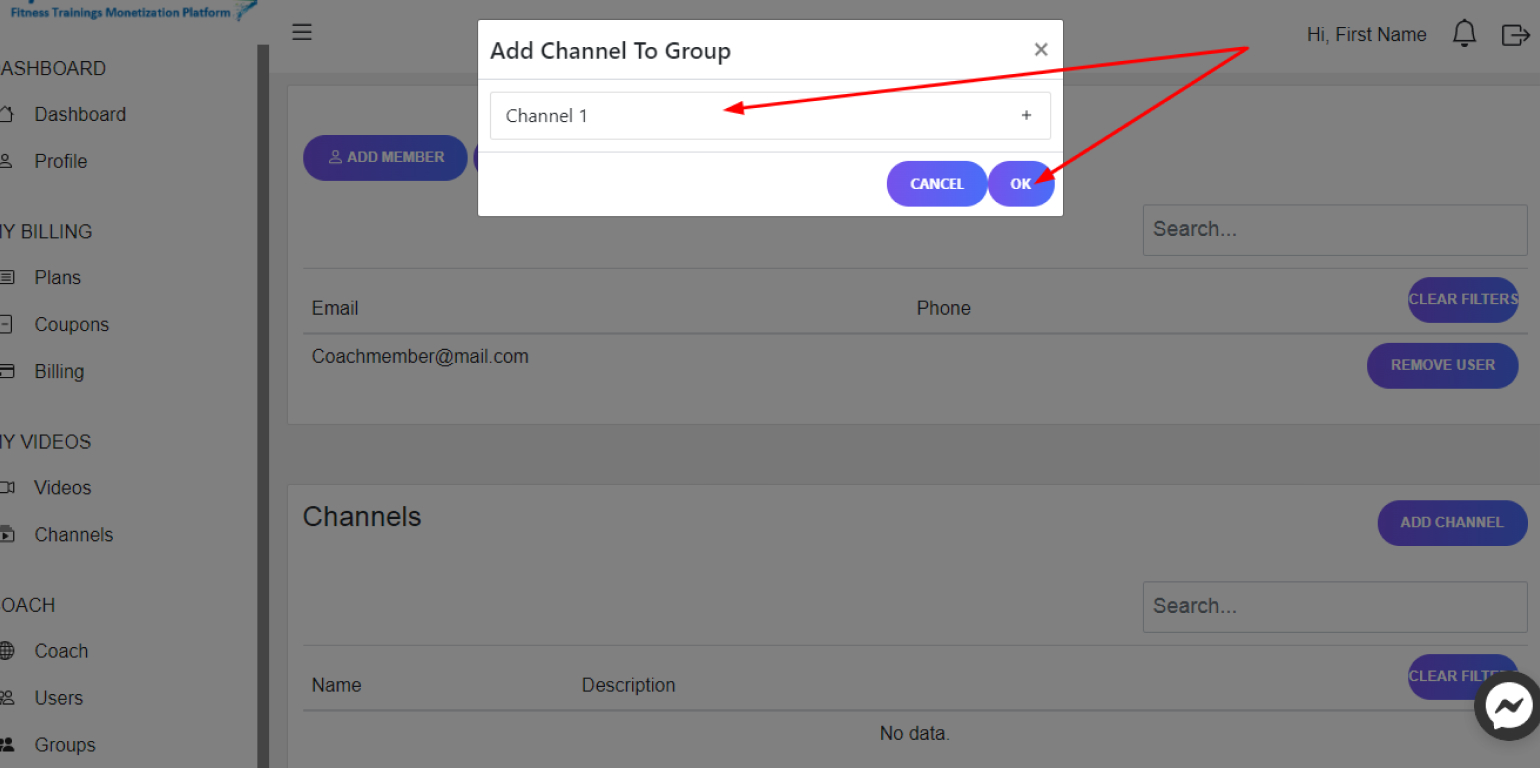
Add a Channel to your Group
Steps:
1. In your Dashboard in the left panel, click on Groups

2. Click on the Group you want to add channels to, or click on the Edit Icon

3. In the channels field in the upper-right corner, click on Add Channel
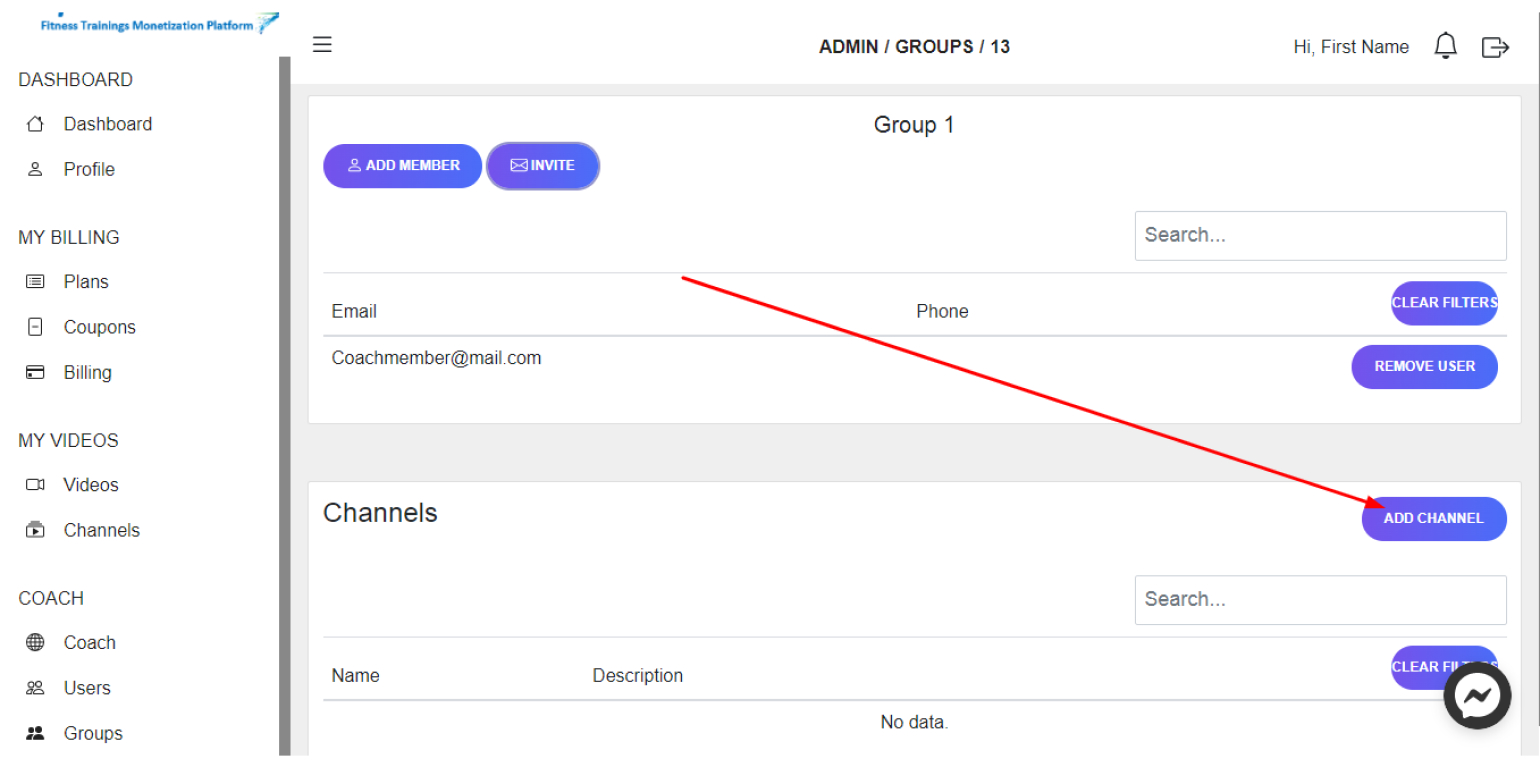
4. In the window that appears, select the desired Channels and click on OK
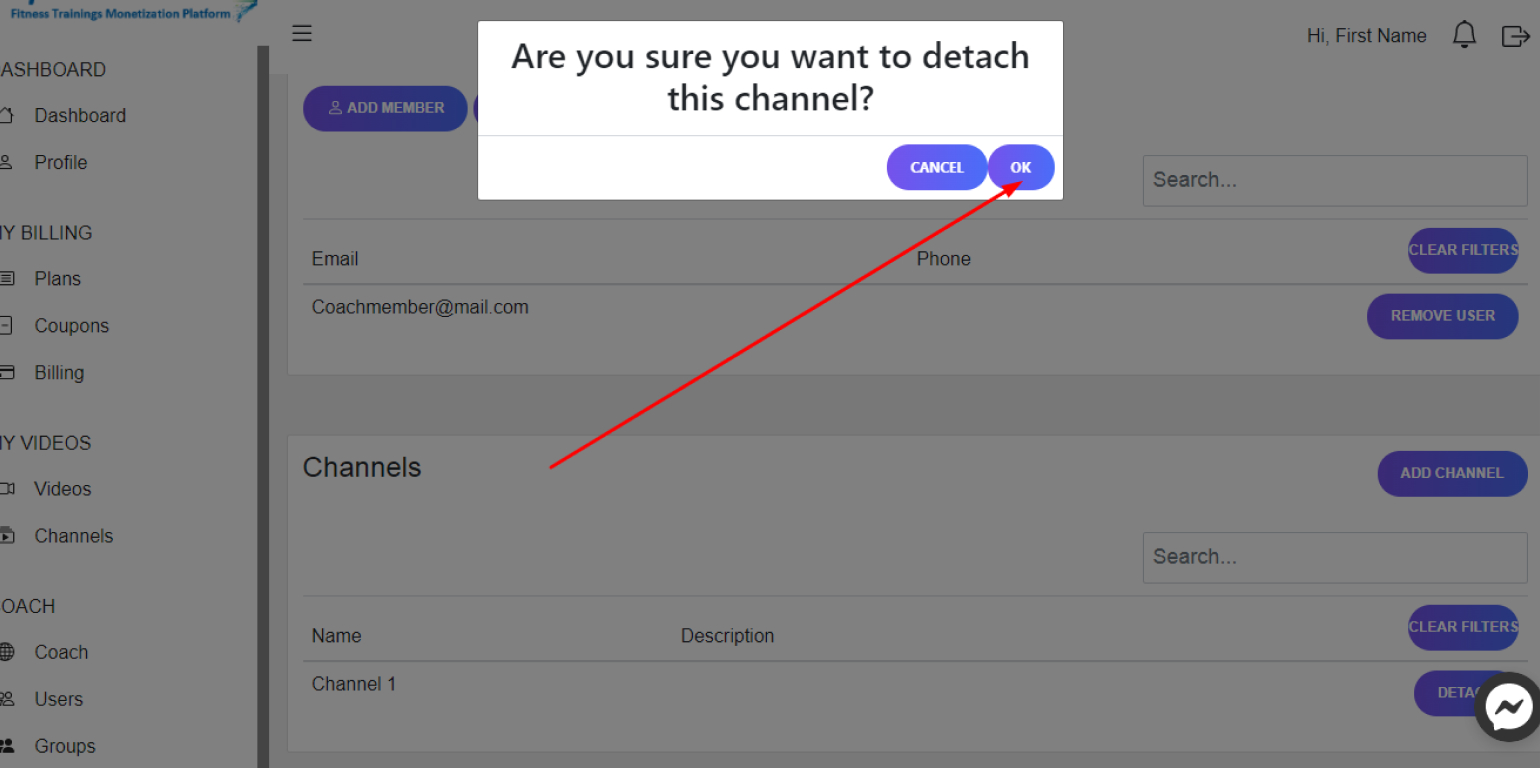
Delete a Channel from your Group
Steps:
1. In your Dashboard in the left panel, click on Groups

2. Click on the Group where you want to delete channel, or click on the Edit Icon
3. In the channels field next to the desired channel, click on Detach
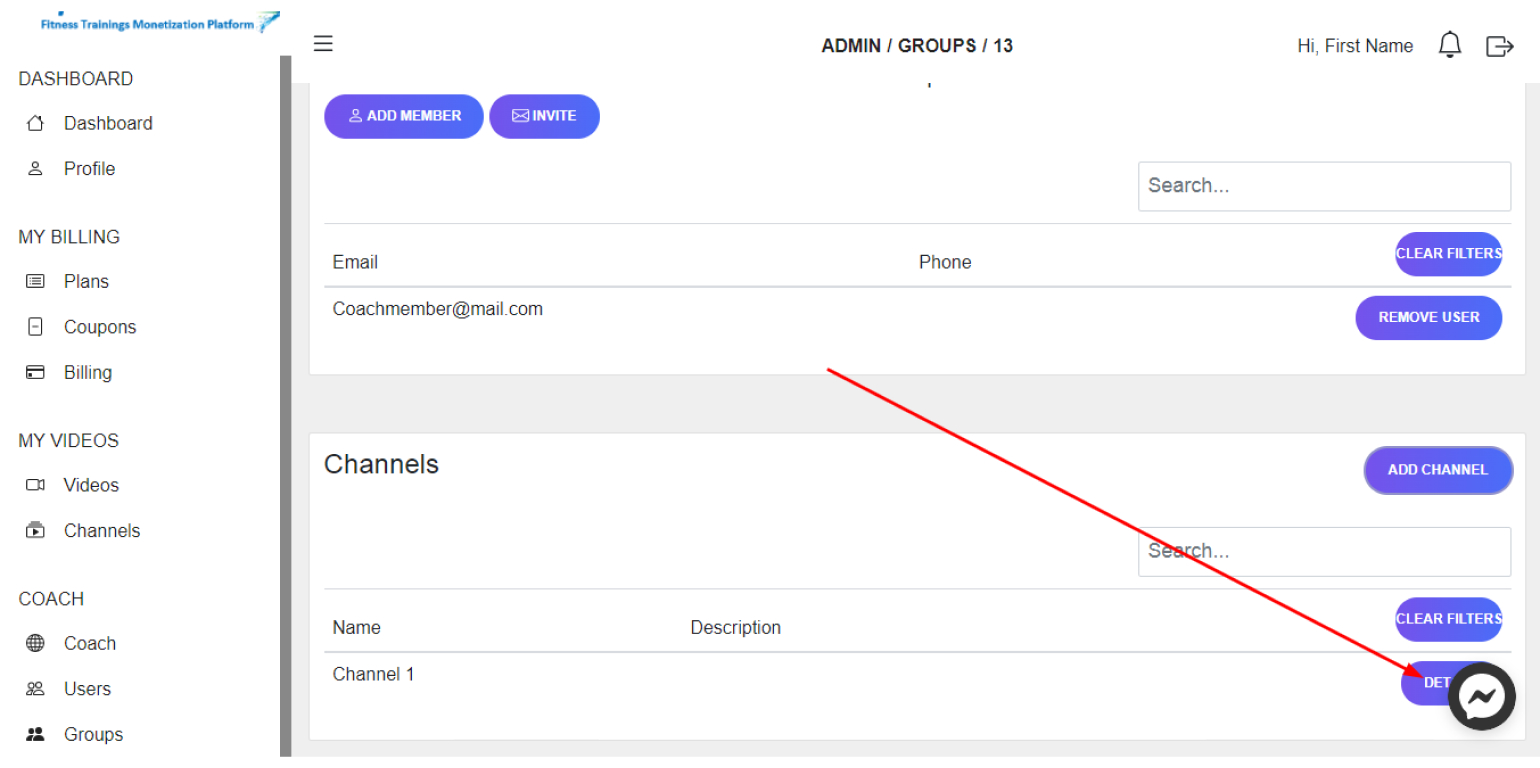
4. In the window that appears click on OK
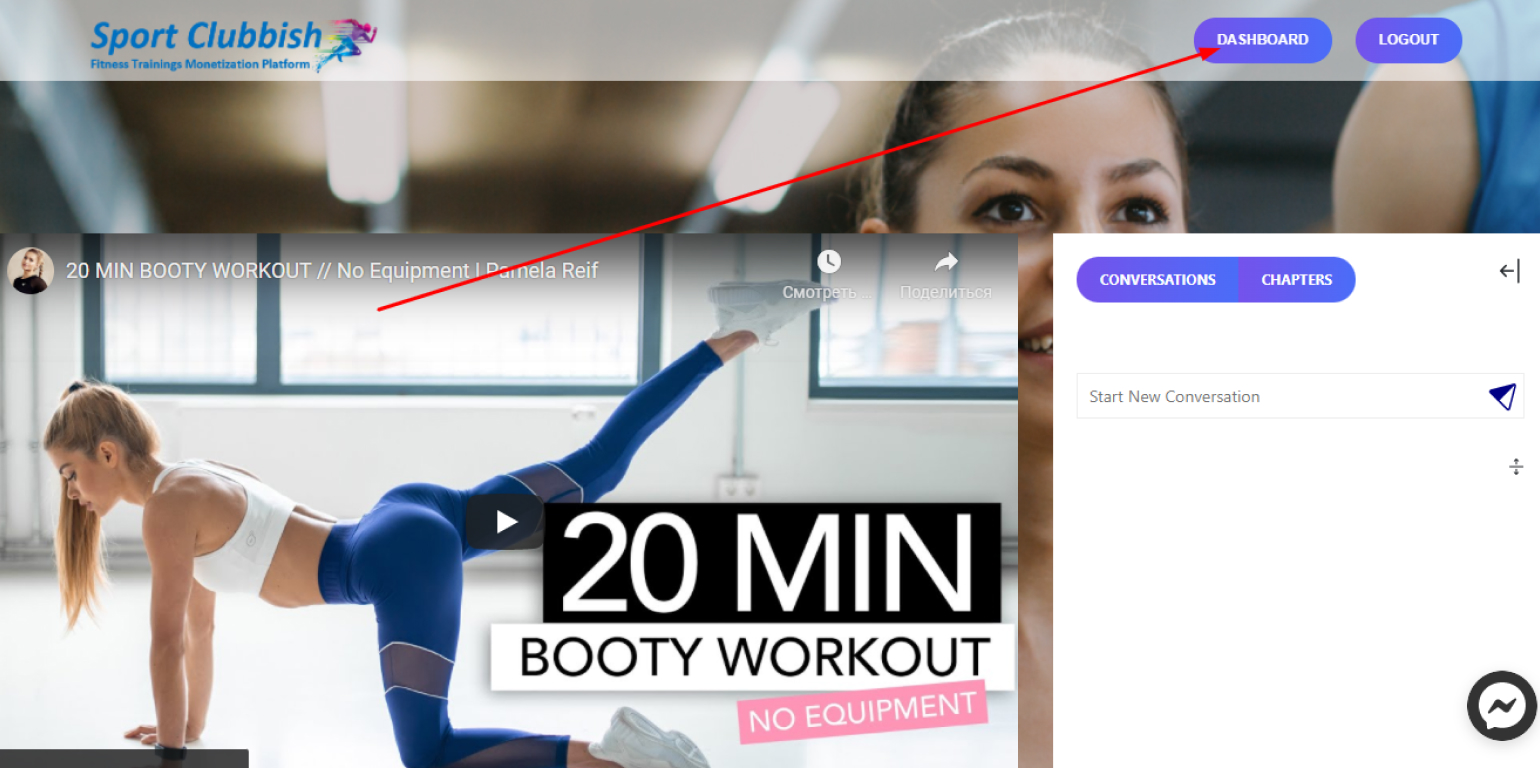
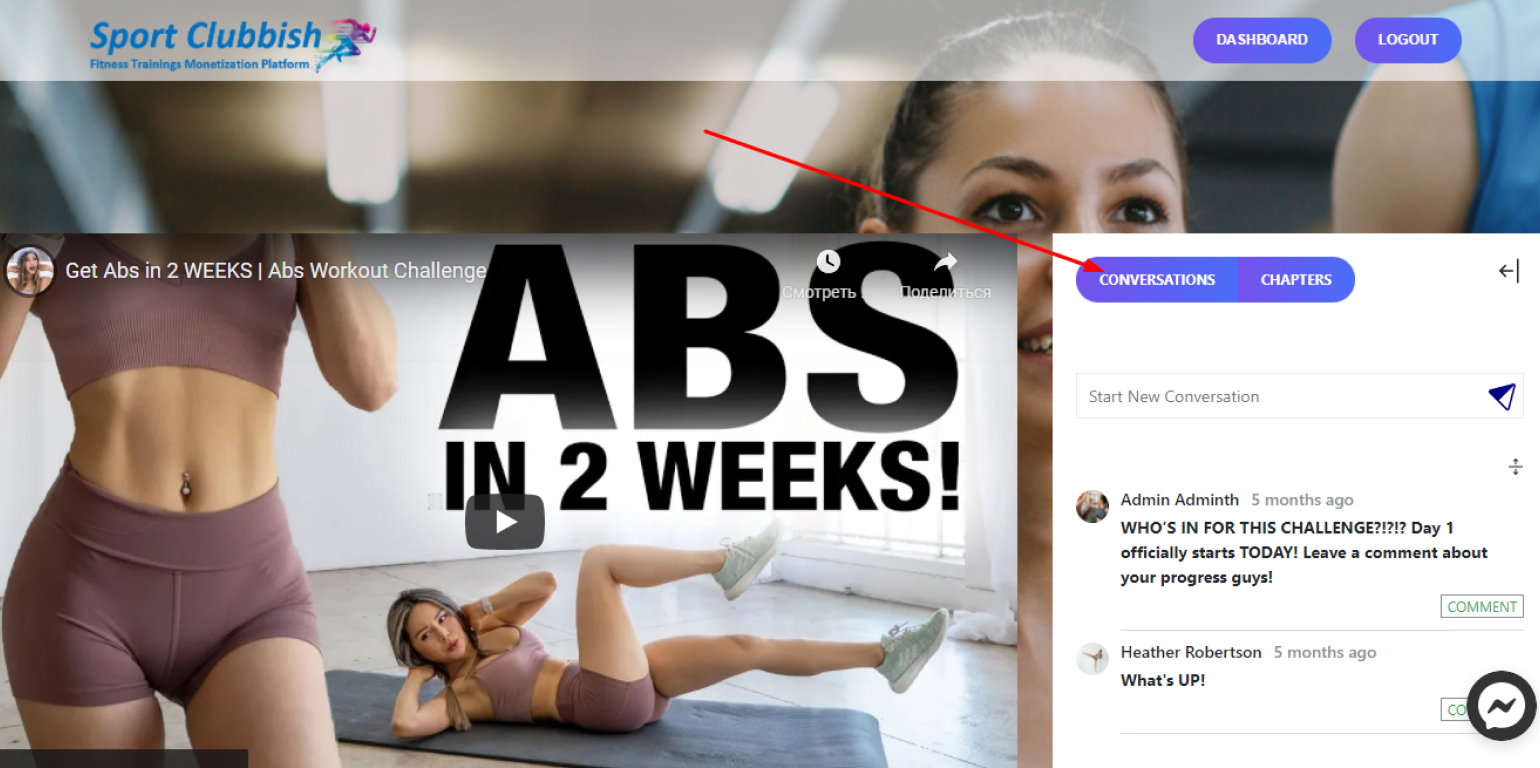
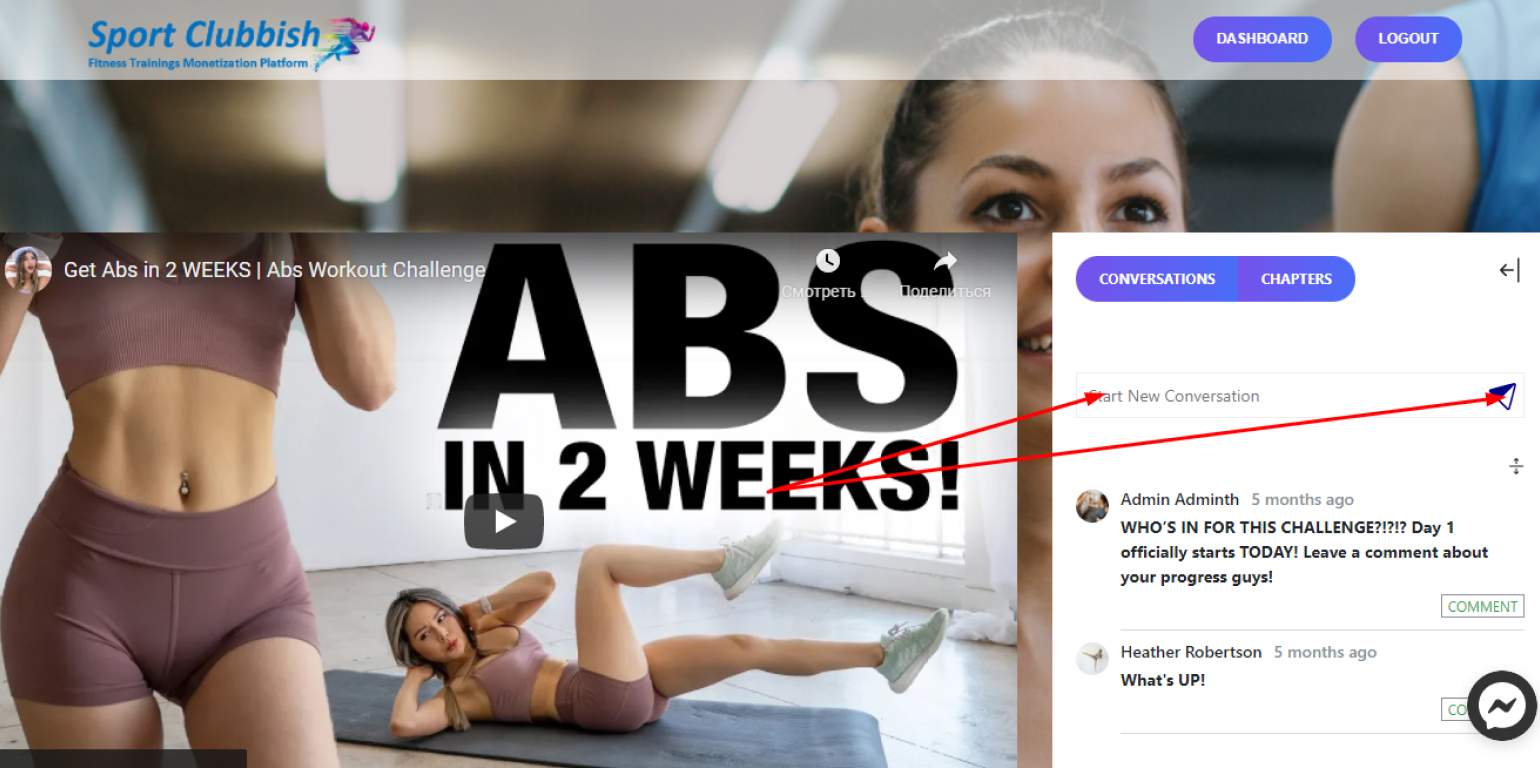
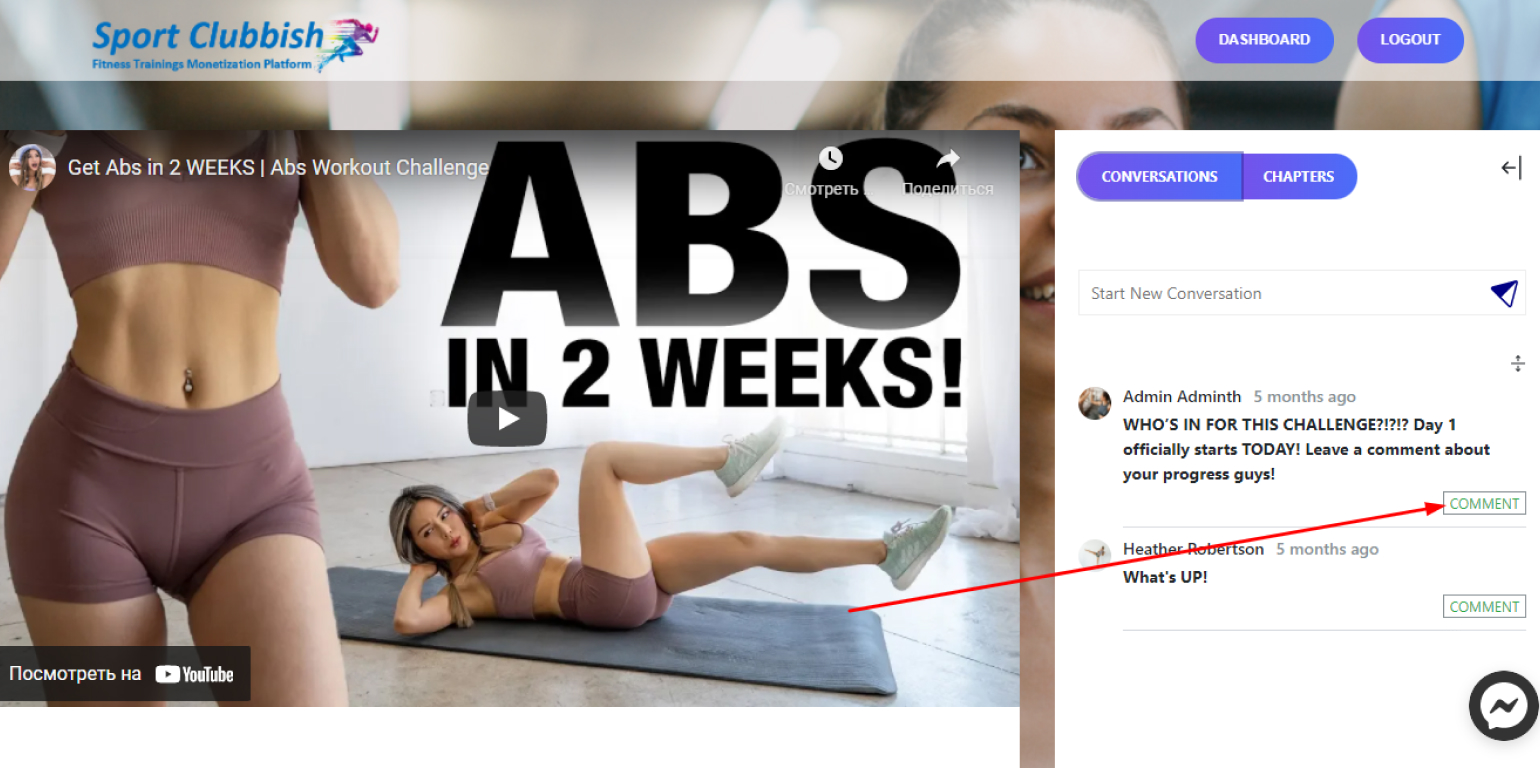
Add Comments/Communicate with Users
Steps:
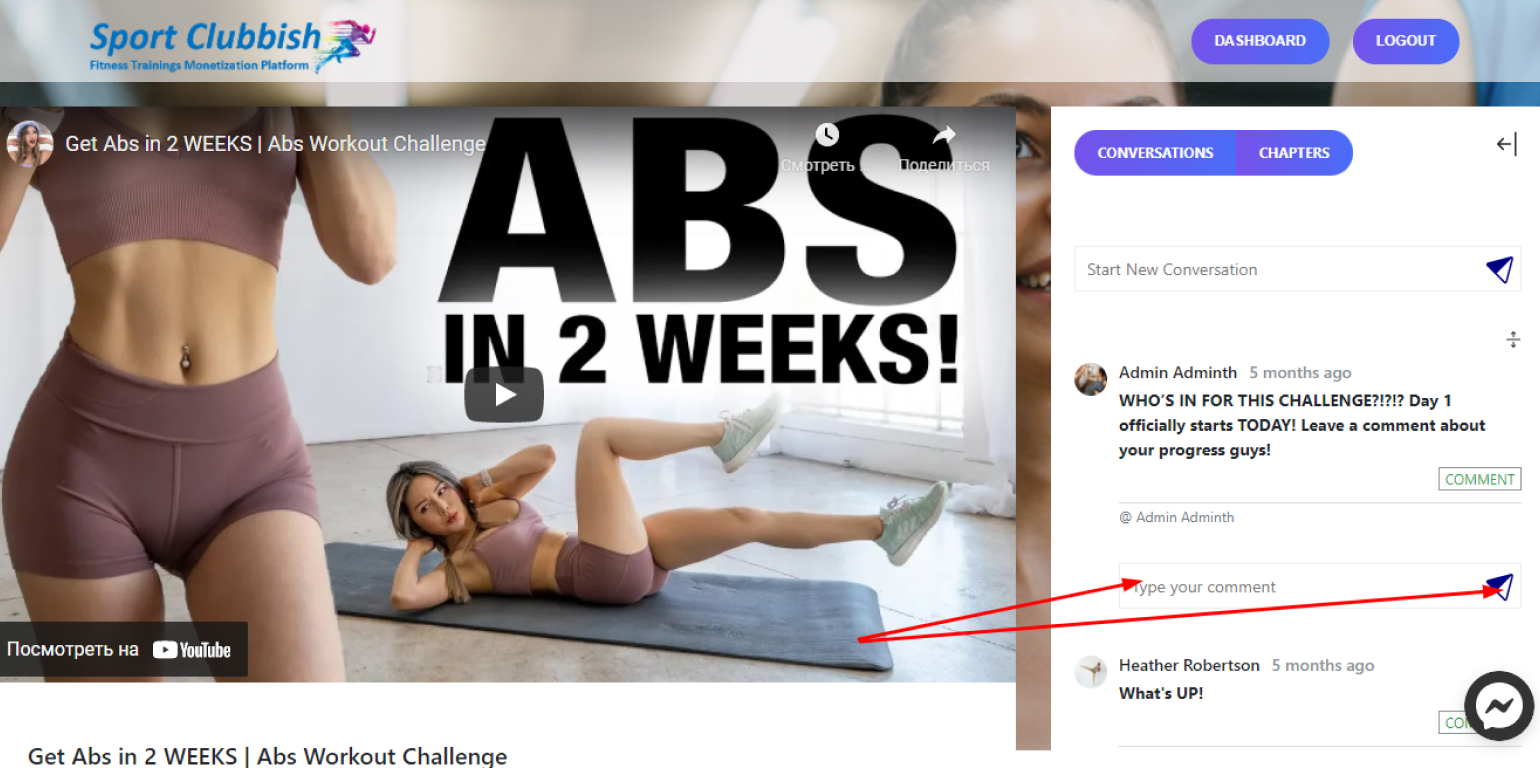
1. Select the video you want, and click on Conversations to the right of the video
2. Write your comment and click on Submit
3. To reply to the other person, click on Comment
4. Write your comment and click on Submit
Plans, Coupons, Billing
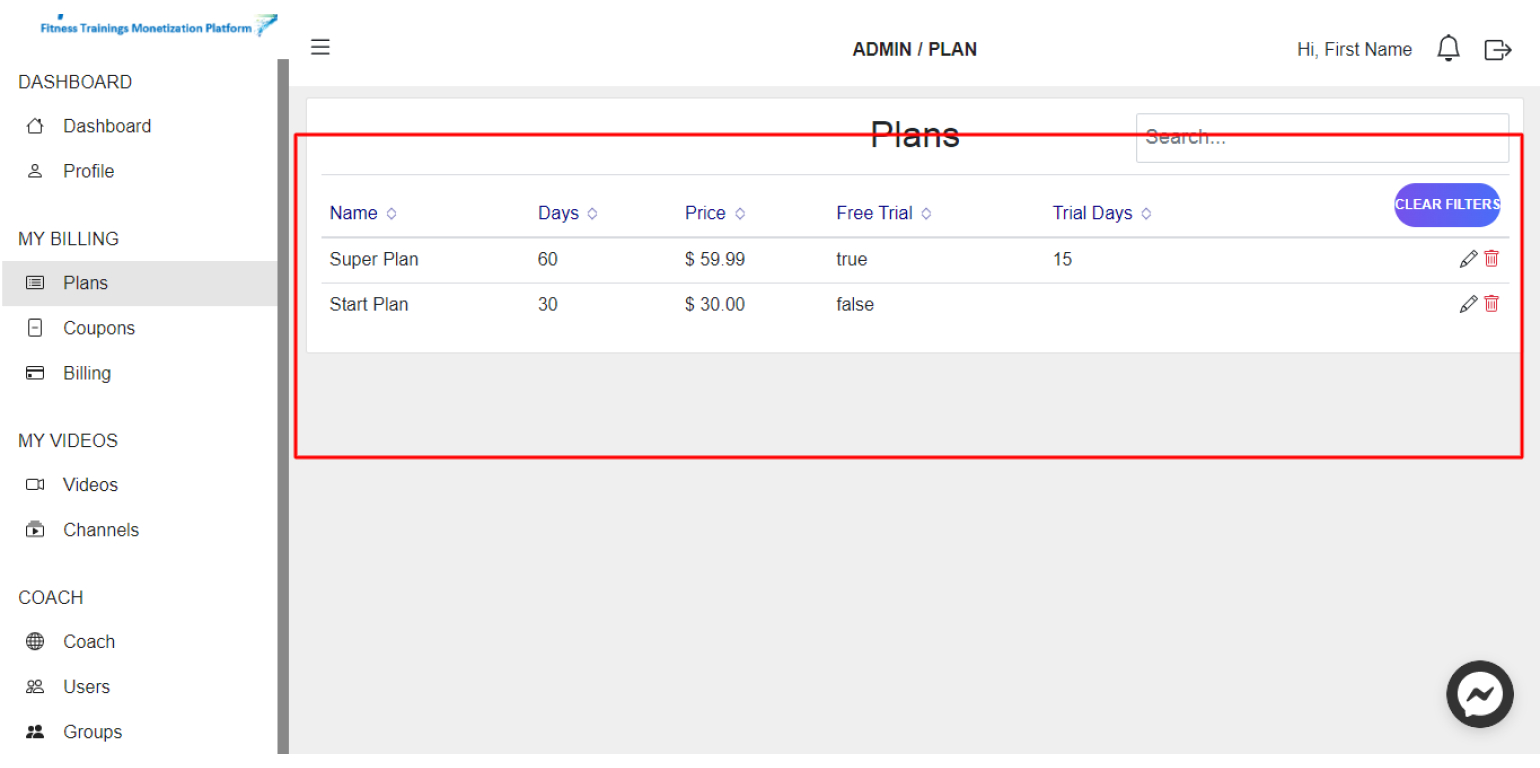
View Plans
Steps:
1. In your Dashboard in the left panel, click on
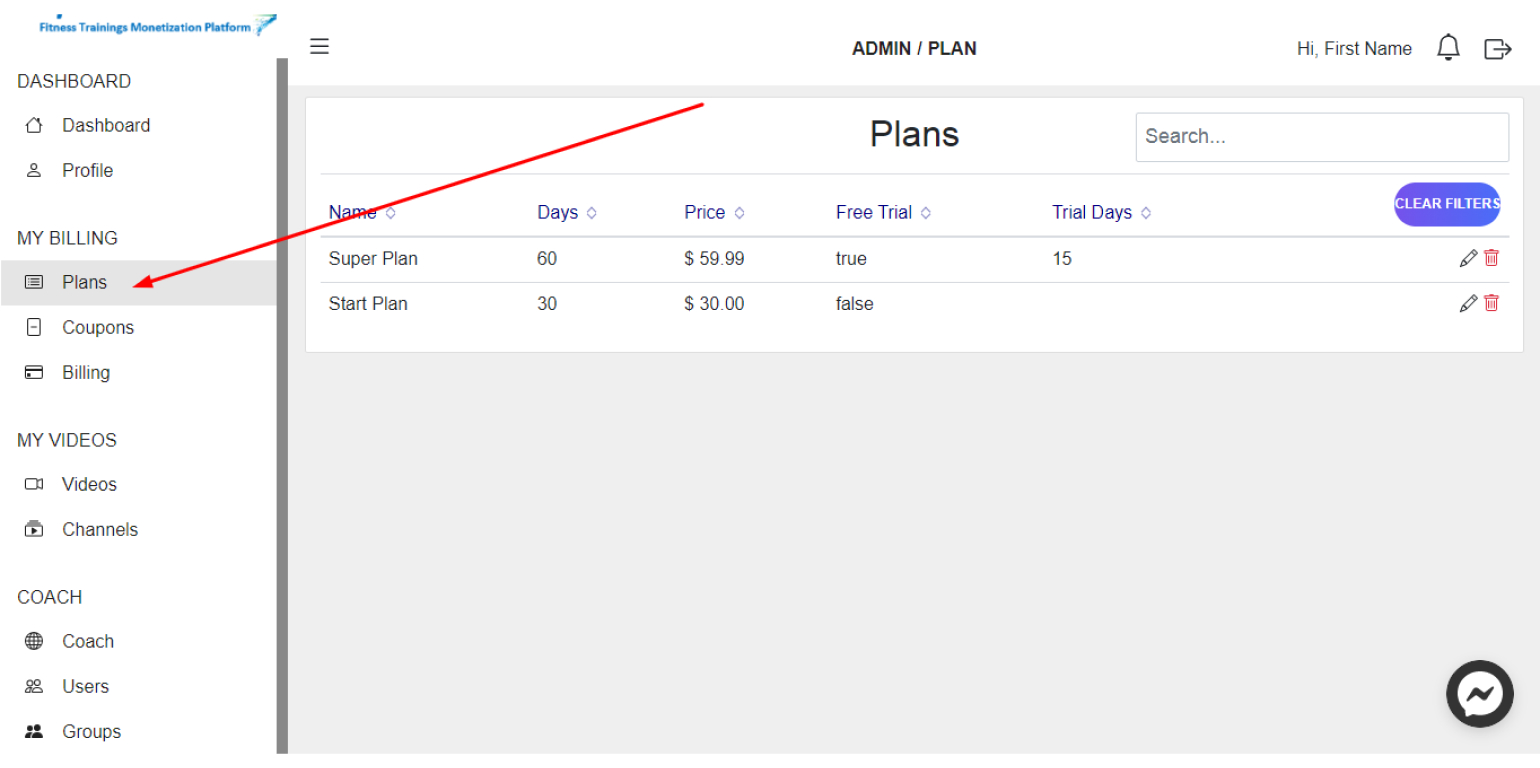
Here you can see the Plans proposed for your Course.
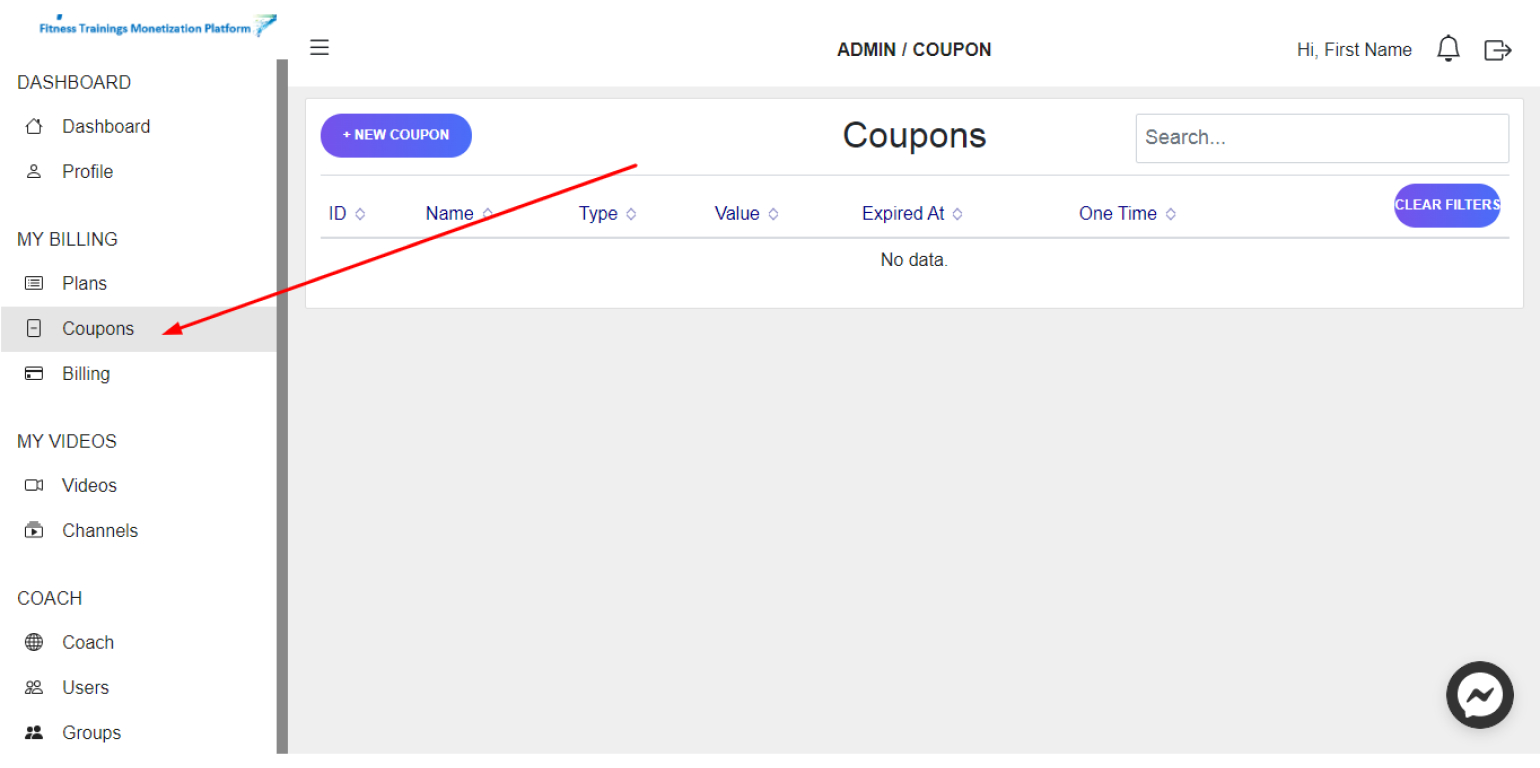
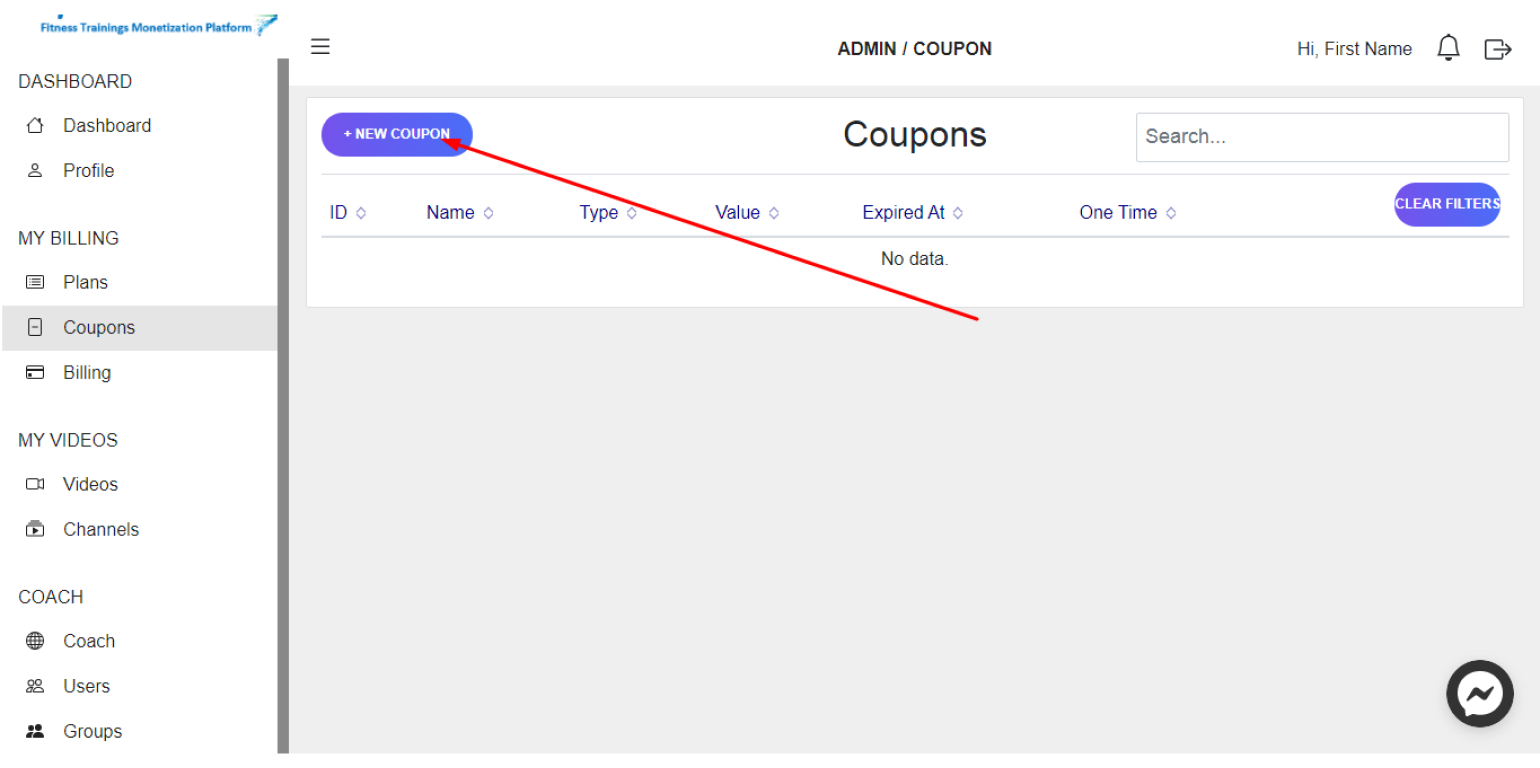
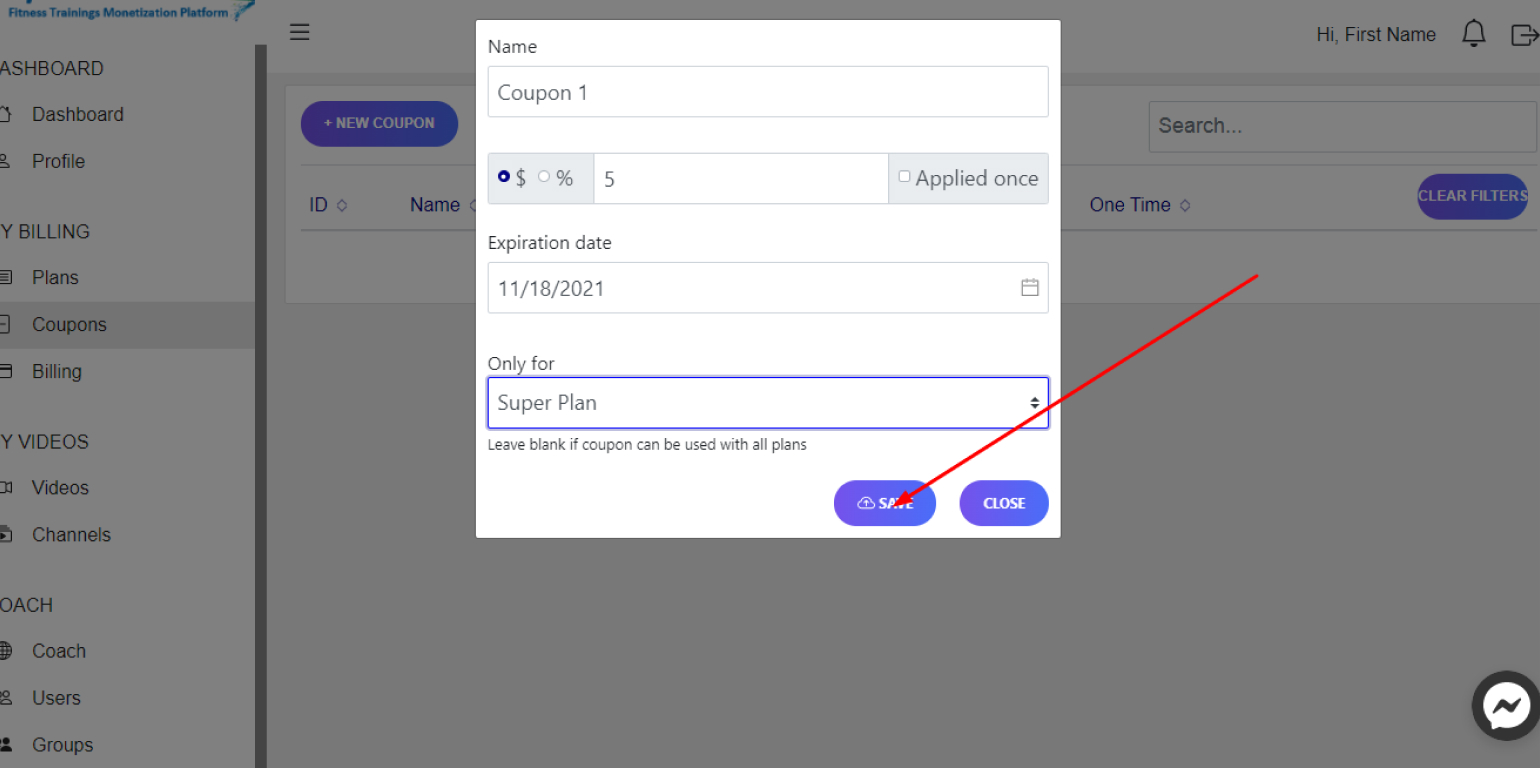
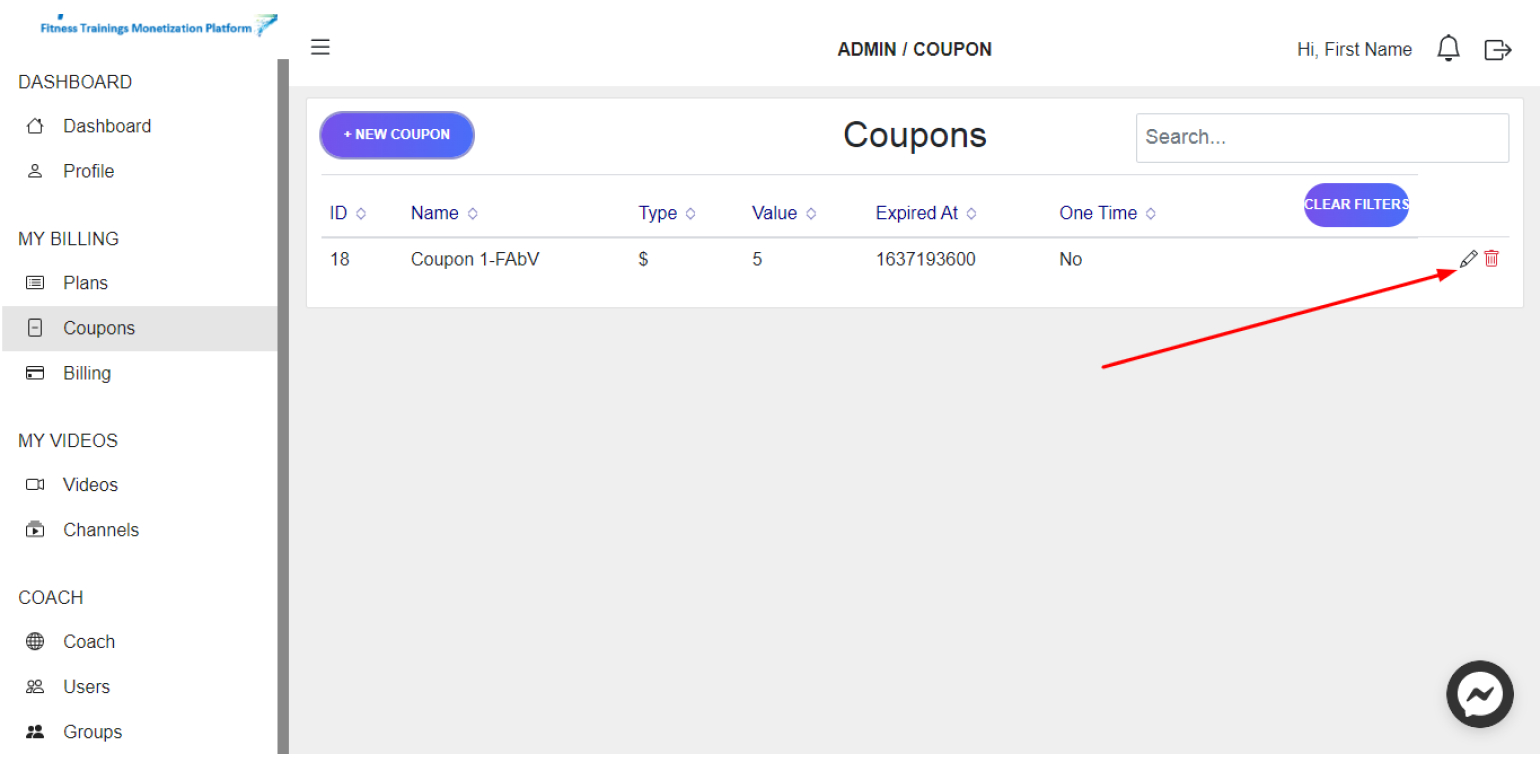
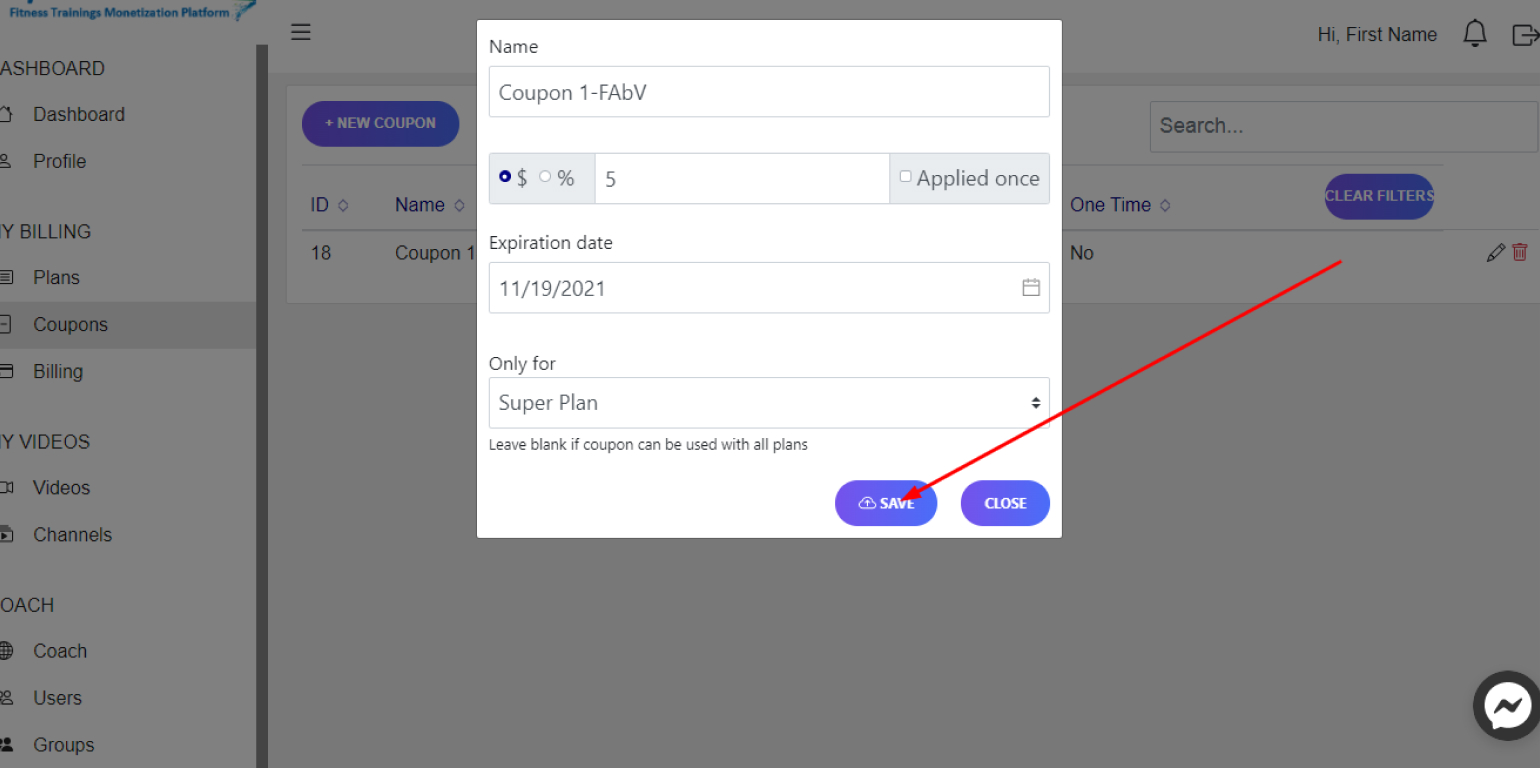
Add or edit Coupons
Steps:
1. In your Dashboard in the left panel, click on Coupons
2. To create aNew coupon, click on +New Coupon
3. In the window that appears, enter Name, Value, Expiration date, choose the Plan or leave the field blank if coupon can be used with All Plans and click on Save
4. To edit a coupon, click on the Edit Icon next to the desired coupon, change the necessary information and click on Save
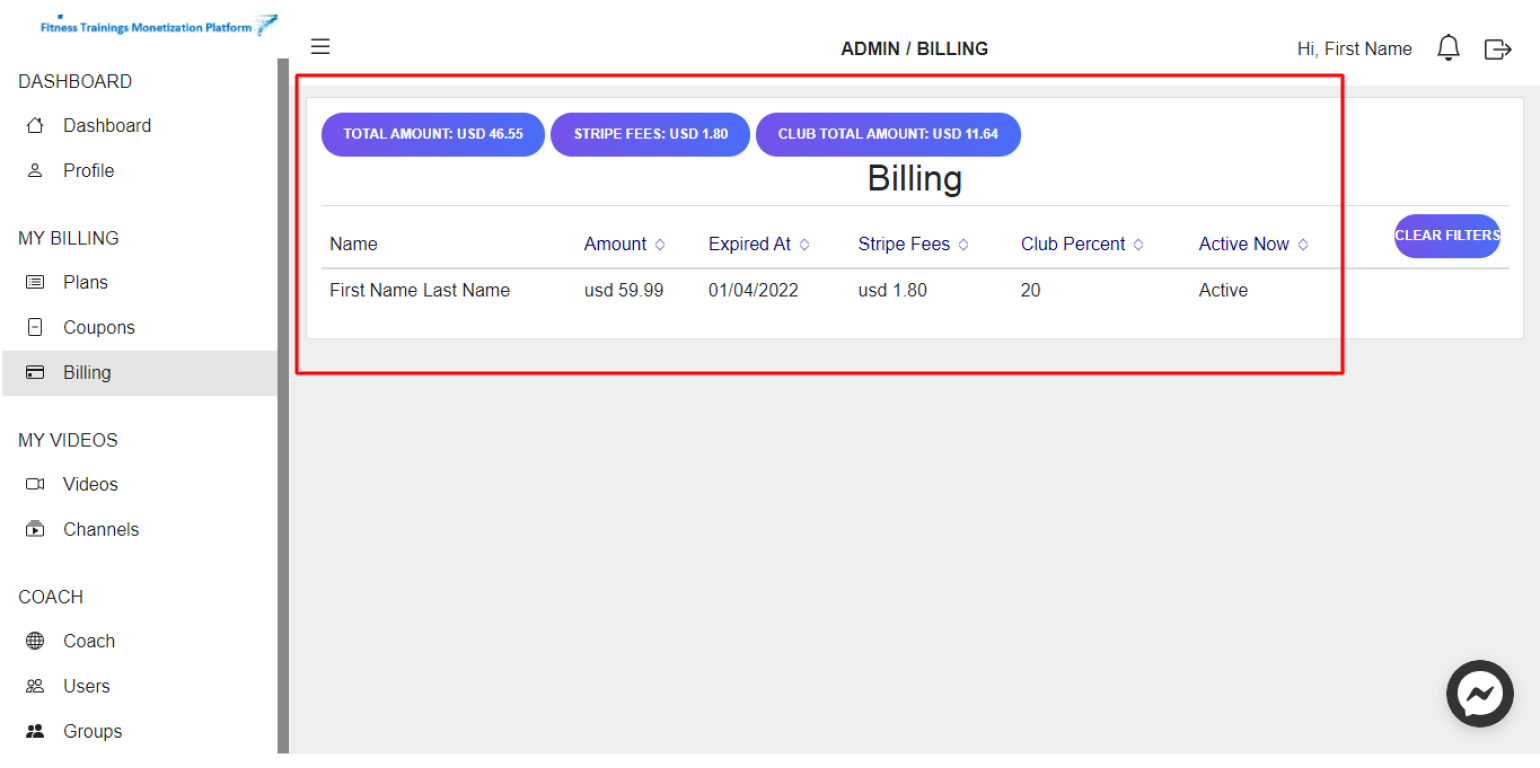
View Billing
Steps:
1. In your Dashboard in the left panel, click on Billing
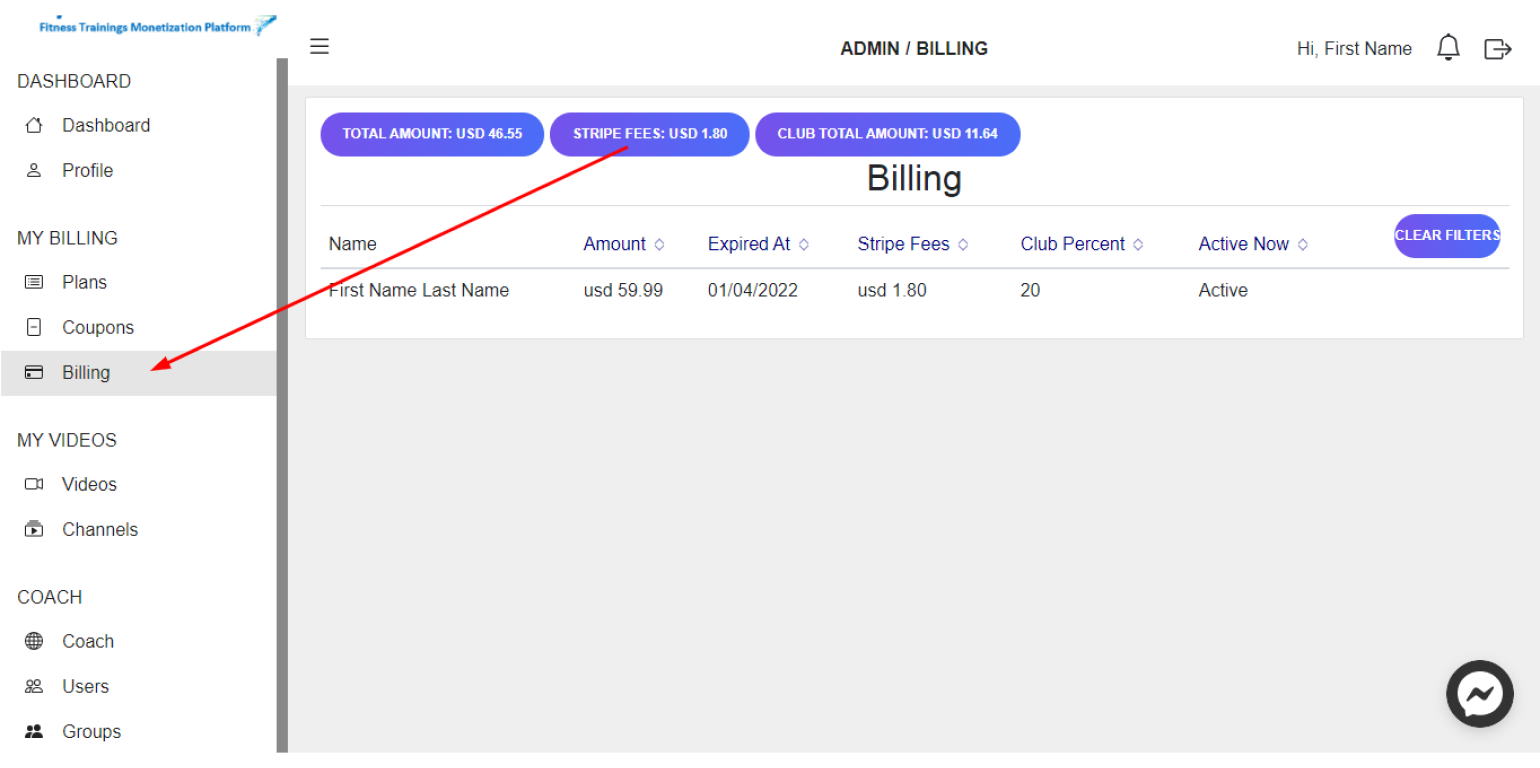
Here you can see your Income including Fees (Stripe transaction fees, Sport Clubbish fee).